


Zone focusing Posted On 27th July 2017 To Learning Zone & Expert Series

Zone focusing is arguably one of the quickest and most effective methods of focusing your camera. With a little forethought, practice and pre-visualisation of your shot, it's a method that can reduce problems like shutter lag. Ensure your images are sharp every time. And help you take photos more surreptitiously.
It doesn't rely on automation and, in most cases can be put into practice before you've brought the camera to your eye. I believe it's a core skill and a method that everyone who takes photography seriously should understand.
The exposure triangle
Before I get into the details, I just quickly want to touch on the fact that it's impossible to discuss zone focusing without also talking about reciprocity, or through how reciprocity is commonly explained "the exposure triangle". The exposure triangle is the diagrammatical way the reciprocal relationship of the three main settings of a camera: aperture, shutter and film speed work. This tutorial does assume prior knowledge of what these settings do, and why one might change them. That said, when I taught myself how to zone focus, it became the trigger for the all of the pieces of the exposure triangle puzzle falling into place. As such, even if you don't know what the exposure triangle is, I would still encourage you to read on!
The basics
For the benefit of this little guide, I have chosen a lovely old Pentax 28mm f/3.5. There are a few reasons why I've chosen this lens which I will get to later. For now, I want to draw your attention to the scales on the top highlighted in the photo above.
As we know, aperture controls depth of field. In very simple terms, zone focusing is the name given to the technique of harnessing depth of field to manually preset focus in anticipation of a "zone" of focus within which your potential subject is likely to be. The scales highlighted above show three things.
The first is distance which changes as the focus of the lens is adjusted:
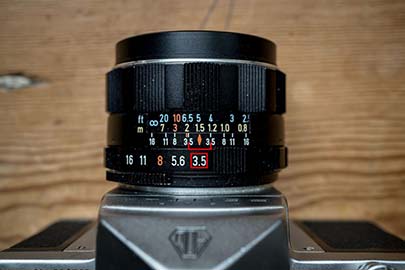
The second represents the set aperture:

Aperture and distance for Zone Focusing Blog by Hamish Gill
The third combines the set aperture with the distance scale by highlighting the near and far limits of what will be in focus:
Aperture and distance for Zone Focusing Blog by Hamish Gill
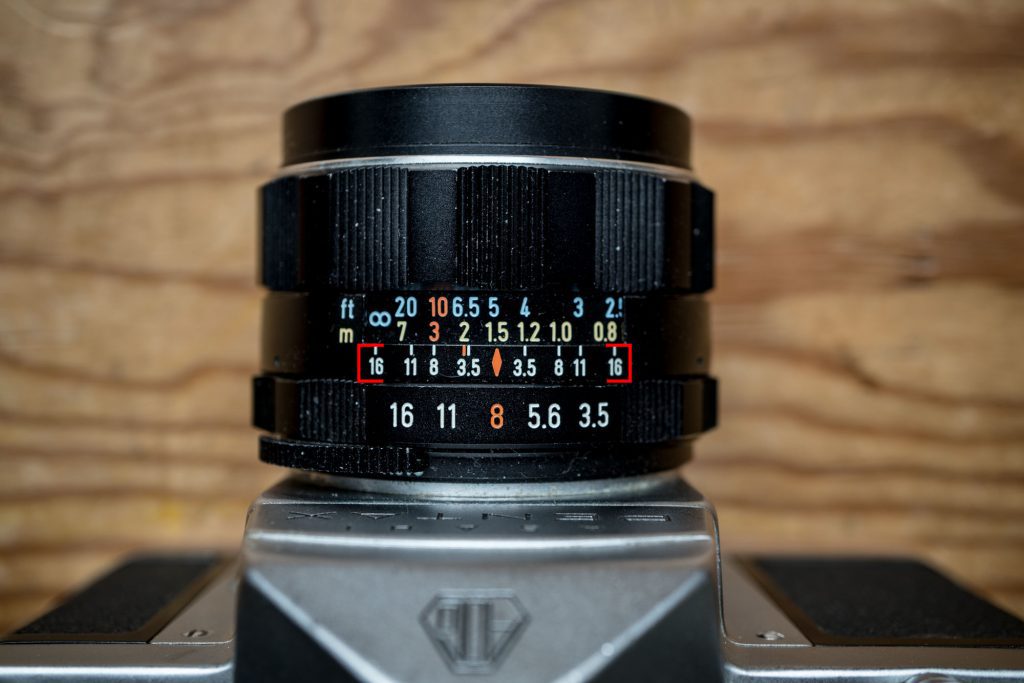
Setting your zone of focus
To set your "zone of focus", simply line the aperture you have set the lens to with the distance markings to determine what will be in focus. In this next photo the lens is set to f/3.5 and the the lens focused to 1.5m. Looking at the scales you can see that I will have between 1.2m and 2m in focus. As such, I have a depth of field of around 80cm:
Hyperfocal focusing
To expand on this further you can also employ a technique called hyperfocal focusing. In simple terms, this is setting the lens to a "hyperfocal" focus distance that will give a zone of focus all the way to infinity. With this lens, as you can now see in the below photo I can achieve everything from under 0.8m to infinity by setting the lens to f/16 and focusing to 1.5m.
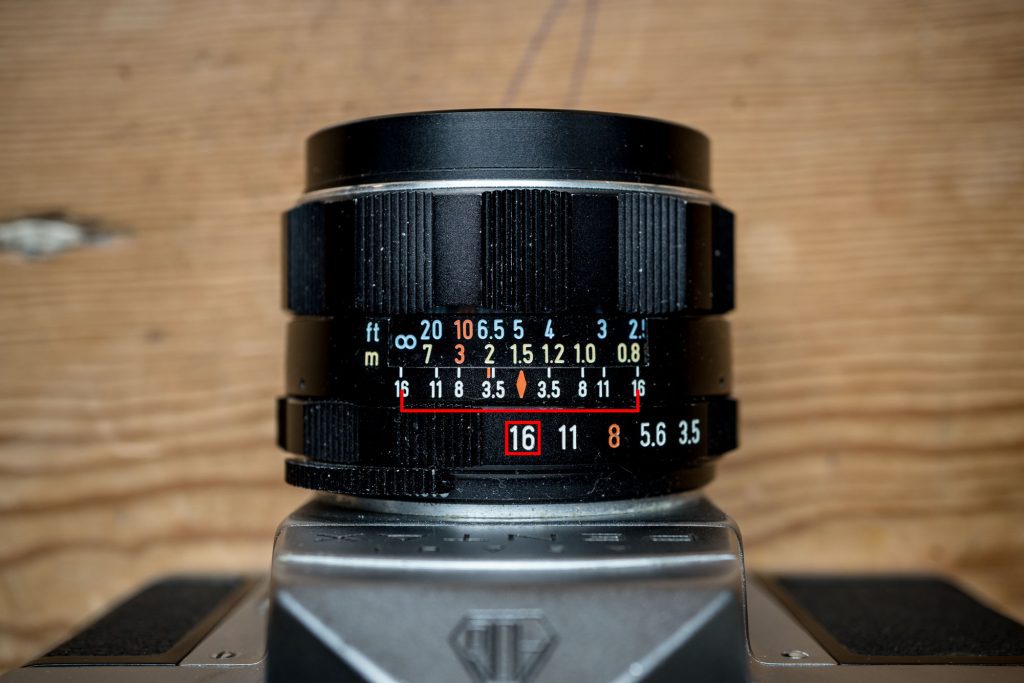
This isn't always practical, you need good light or a higher ISO or longer shutter speed to shoot at f/16. Also shooting at the smallest apertures can slightly impact on image sharpness. Lenses are almost always sharpest at their middle apertures.
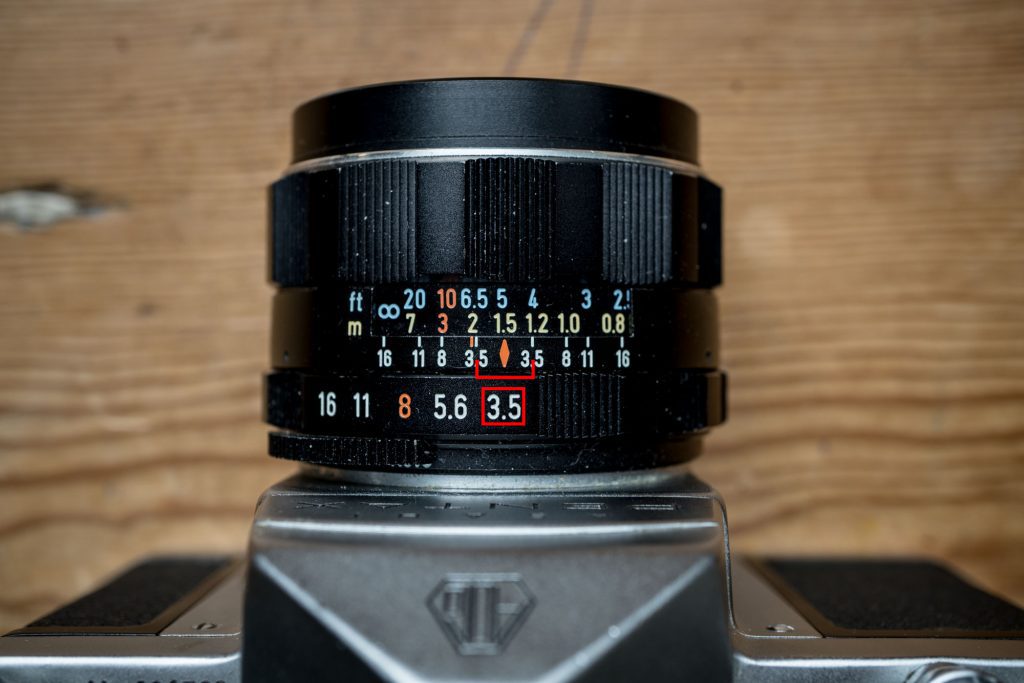
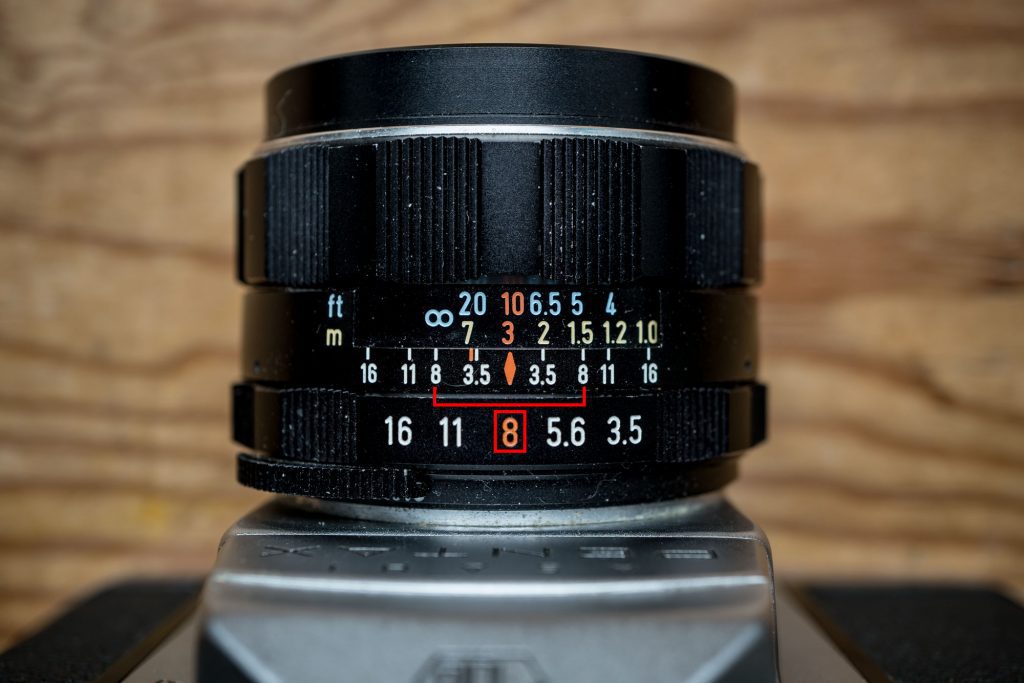
f/8 and be there
Earlier, I mentioned there are a few reasons I chose this lens to help illustrate what I am talking about. The main one is how clear the scales are. Secondary to this you will notice a few of the markings are highlighted in orange
Looking at the picture below you'll notice that if you line up all those markings you'll find the lens is set to 3m and f/8. This combination of settings is pretty much the base line for zone-focusing. Everything from 1.5m to infinity, good middle ground aperture for the balance between sharpness and light gathering. This is the "f/8 and be there" setting. Set your camera to this with a 400 ISO film, and in many daytime circumstances, you can snap away without any thought to setting focus.
Longer and wider lenses
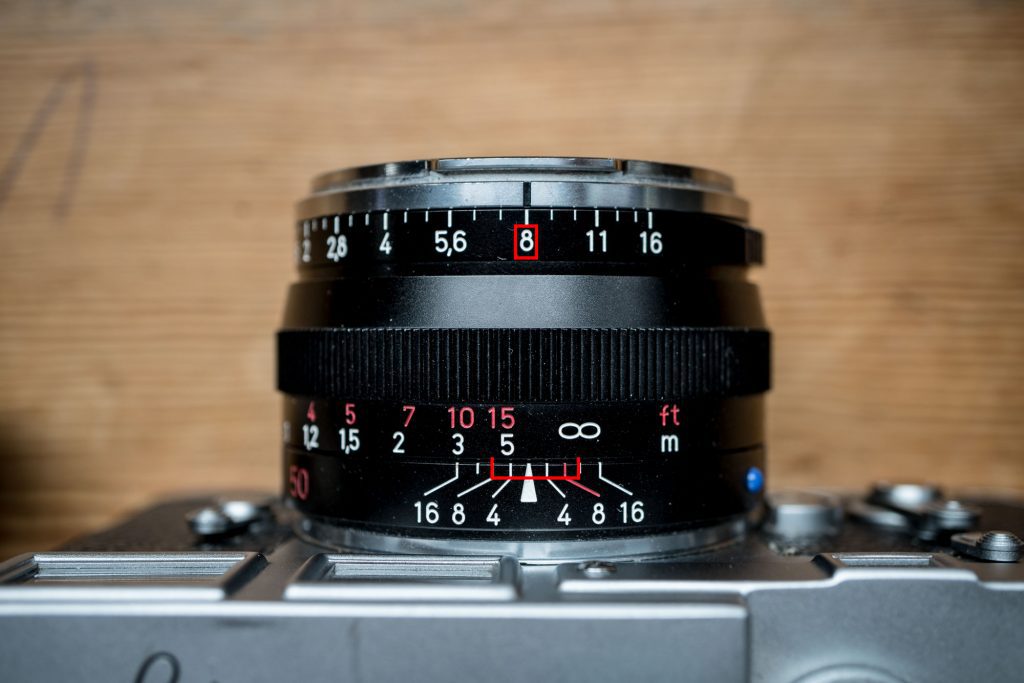
It's worth noting of course that the above settings are only based on the use of a 28mm lens. The longer the lens, the narrower the depth of field to play with at any given aperture and set distance. Take a look at my favourite 50mm lens, - the Zeiss 50mm ZM Sonnar. At f/8 my hyperfocal distance is much further away meaning I only have between around 4m and infinity in focus.
But then, take a look at my 17mm Tamron lens and you can see at f/8 I can focus to just over 1m and have between around 0.65m and infinity in focus.

Pitfalls - the circle of confusion
No post about zone focusing would be complete without mentioning the dreaded "circle of confusion". Let me tell you a joke I read on a forum the other day. I wish I could find it now because it did reference the person credited for the joke.
Q: What do you call a group of photographers sat around a table talking about depth of field
A: A circle of confusion
I don't think I've met anybody who can eloquently describe what circle of confusion means in less than 2000 words. Not least its importance in determining what's going to be in or out of focus when zone focusing. And that's including myself.
The mistake that's often made is to talk about what it is, not what it means to your zone of focus. (Depth of field). If you're really interested in trying to understand it from that perspective, this is my layman's attempt at an explanation:
The circle of confusion is the diameter of the largest spot of blur on a 35mm negative that can still be perceived as sharp by the human eye when a 35mm negative in optimum circumstances is blown up to and viewed at normal viewing distance [deep breath]. For the sake of this explanation, it's easiest just to take a view that a "normal viewing distance" is defined as a small enlargement viewed close up or a larger enlargement viewed from further away.
the largest spot of blur
With 35mm film, the approximate standard diameter of "the largest spot of blur" on a negative is around 0.03mm. So, a spot of blur that's 0.03mm on a 35mm negative when blown up and "viewed at a normal viewing distance" will look sharp. Anything bigger than that will start to look soft/blurred.
This is of course where things get really complicated, and why those photographers sat around the table in the joke are confused. The diameter of the circle of confusion could be considered entirely subjective as it is reliant on a level of acuity of eyesight, print or display quality and of course the viewing distance. The diameter of the circle of confusion also changes with film format, and since we now live in a world of pixel peeping at 300%, it is also often regarded as needing to be a much smaller diameter when the discussion is around digital.
Get it? No? It doesn't matter!
For the sake of this article, you don’t really need to fully understand it. The important thing is to understand that the near and far distances marked on a lens designed for 35mm cameras are calculated from that standard circle of confusion diameter of approximately 0.03mm. The only reason to know this is that it's the science bit behind the idea that an image is only perfectly sharp at the point of focus. I.e. If you focus at 1m, that's the point at which the image is theoretically "sharp". From that point, both in front and behind the point of focus, focus is falling away to softness. At wider apertures focus falls off quickly, and at smaller apertures, focus falls off more slowly.
In short, and in practical terms, this means that when you are zone focusing, you are not shooting with a zone of perfect focus, you are shooting with a zone of what's commonly defined as acceptable focus. Those markings on the lens simply show the limits of what the science says on average is right.
Final thoughts
Ultimately, using methods like zone focusing, practise and experimentation are always going to be needed to determine what exact method will result in an outcome you are happy with. That being said, once you've mastered the basics - which really are very basic once you have grasped them - zone focusing can make for a very enjoyable and successful way to shoot!
Images © Hanish Gill
About The Author
Hamish Gill
Hamish Gill is a professional photographer who shoots both film and digital. He’s been taking photos since he was a child and working as a photographer in one form or another for coming on a decade. He is also a dedicated blogger with a penchant for 35mm compact film cameras and rangefinders.
You can find out about all of Hamish’s varied projects on his website http://hamishgill.com
And if you share his interest cameras, you might like to check out http://www.35mmc.com
You can also follow him on twitter @HamishGill, Instagram @hamishgill & @35mmcblog