


Trichromes - Colour Photos with ILFORD HP5 Posted On 15th July 2021 To Learning Zone & Stories

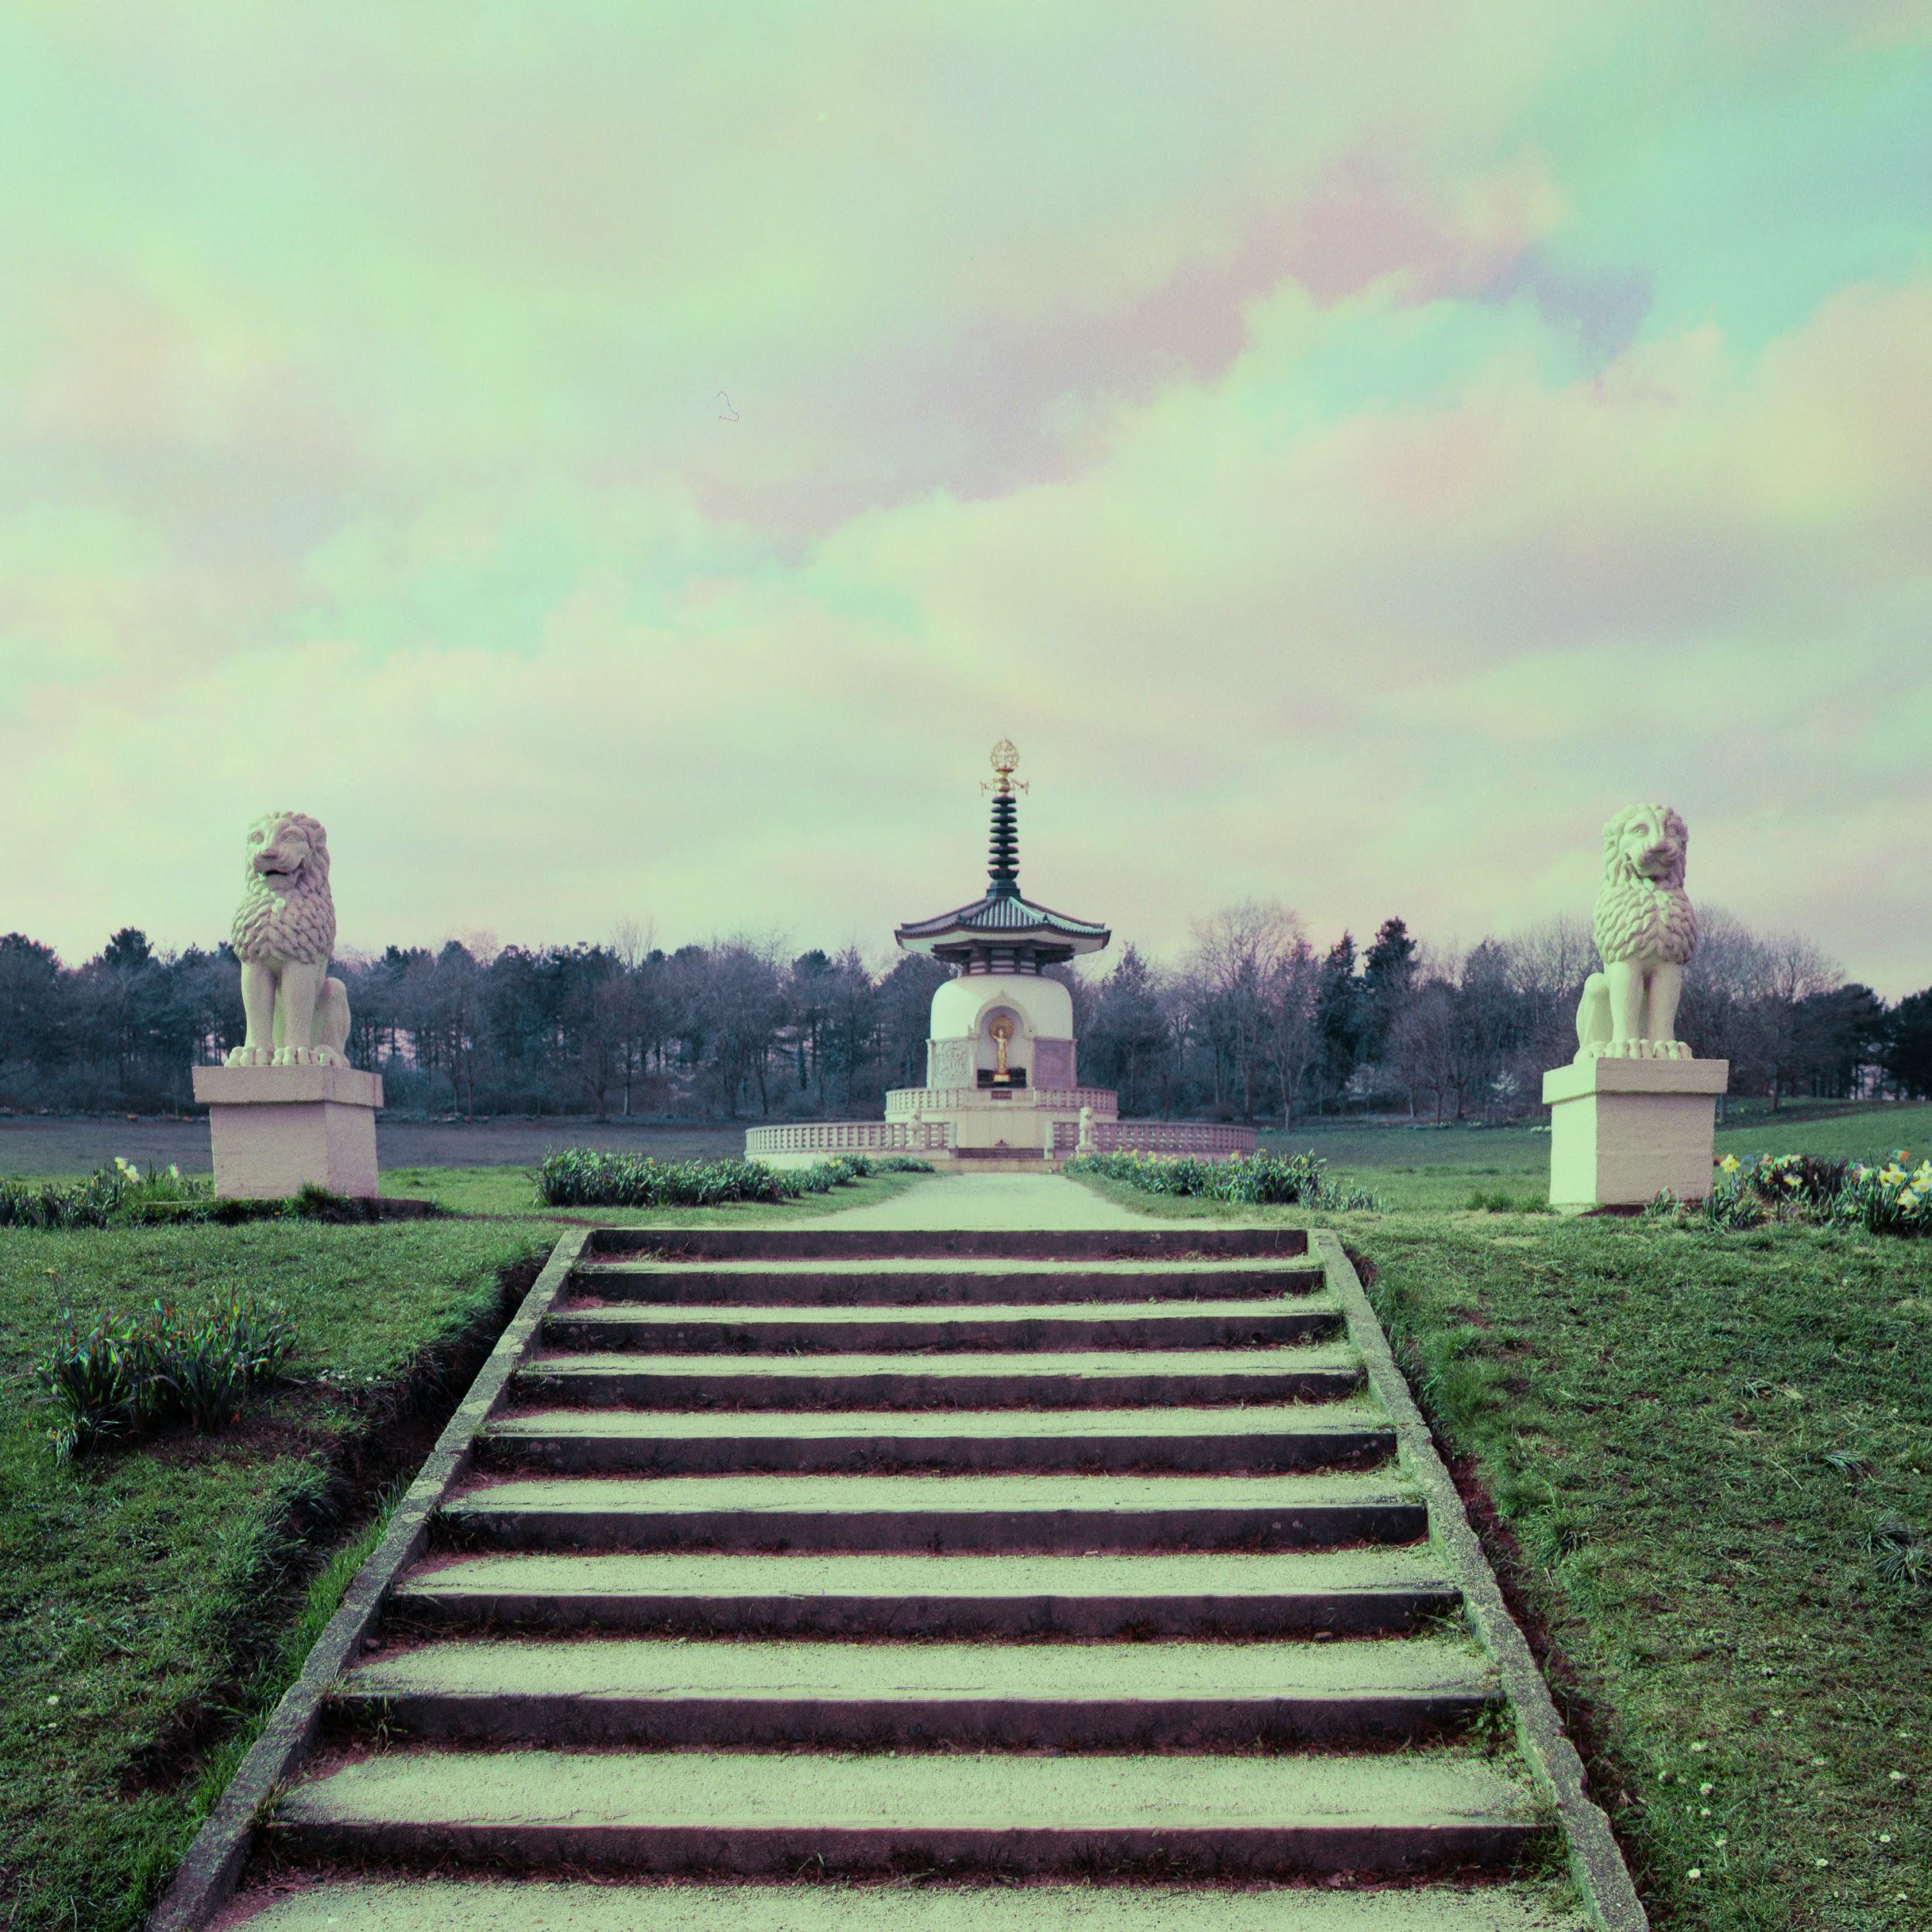
A scene that screams colour
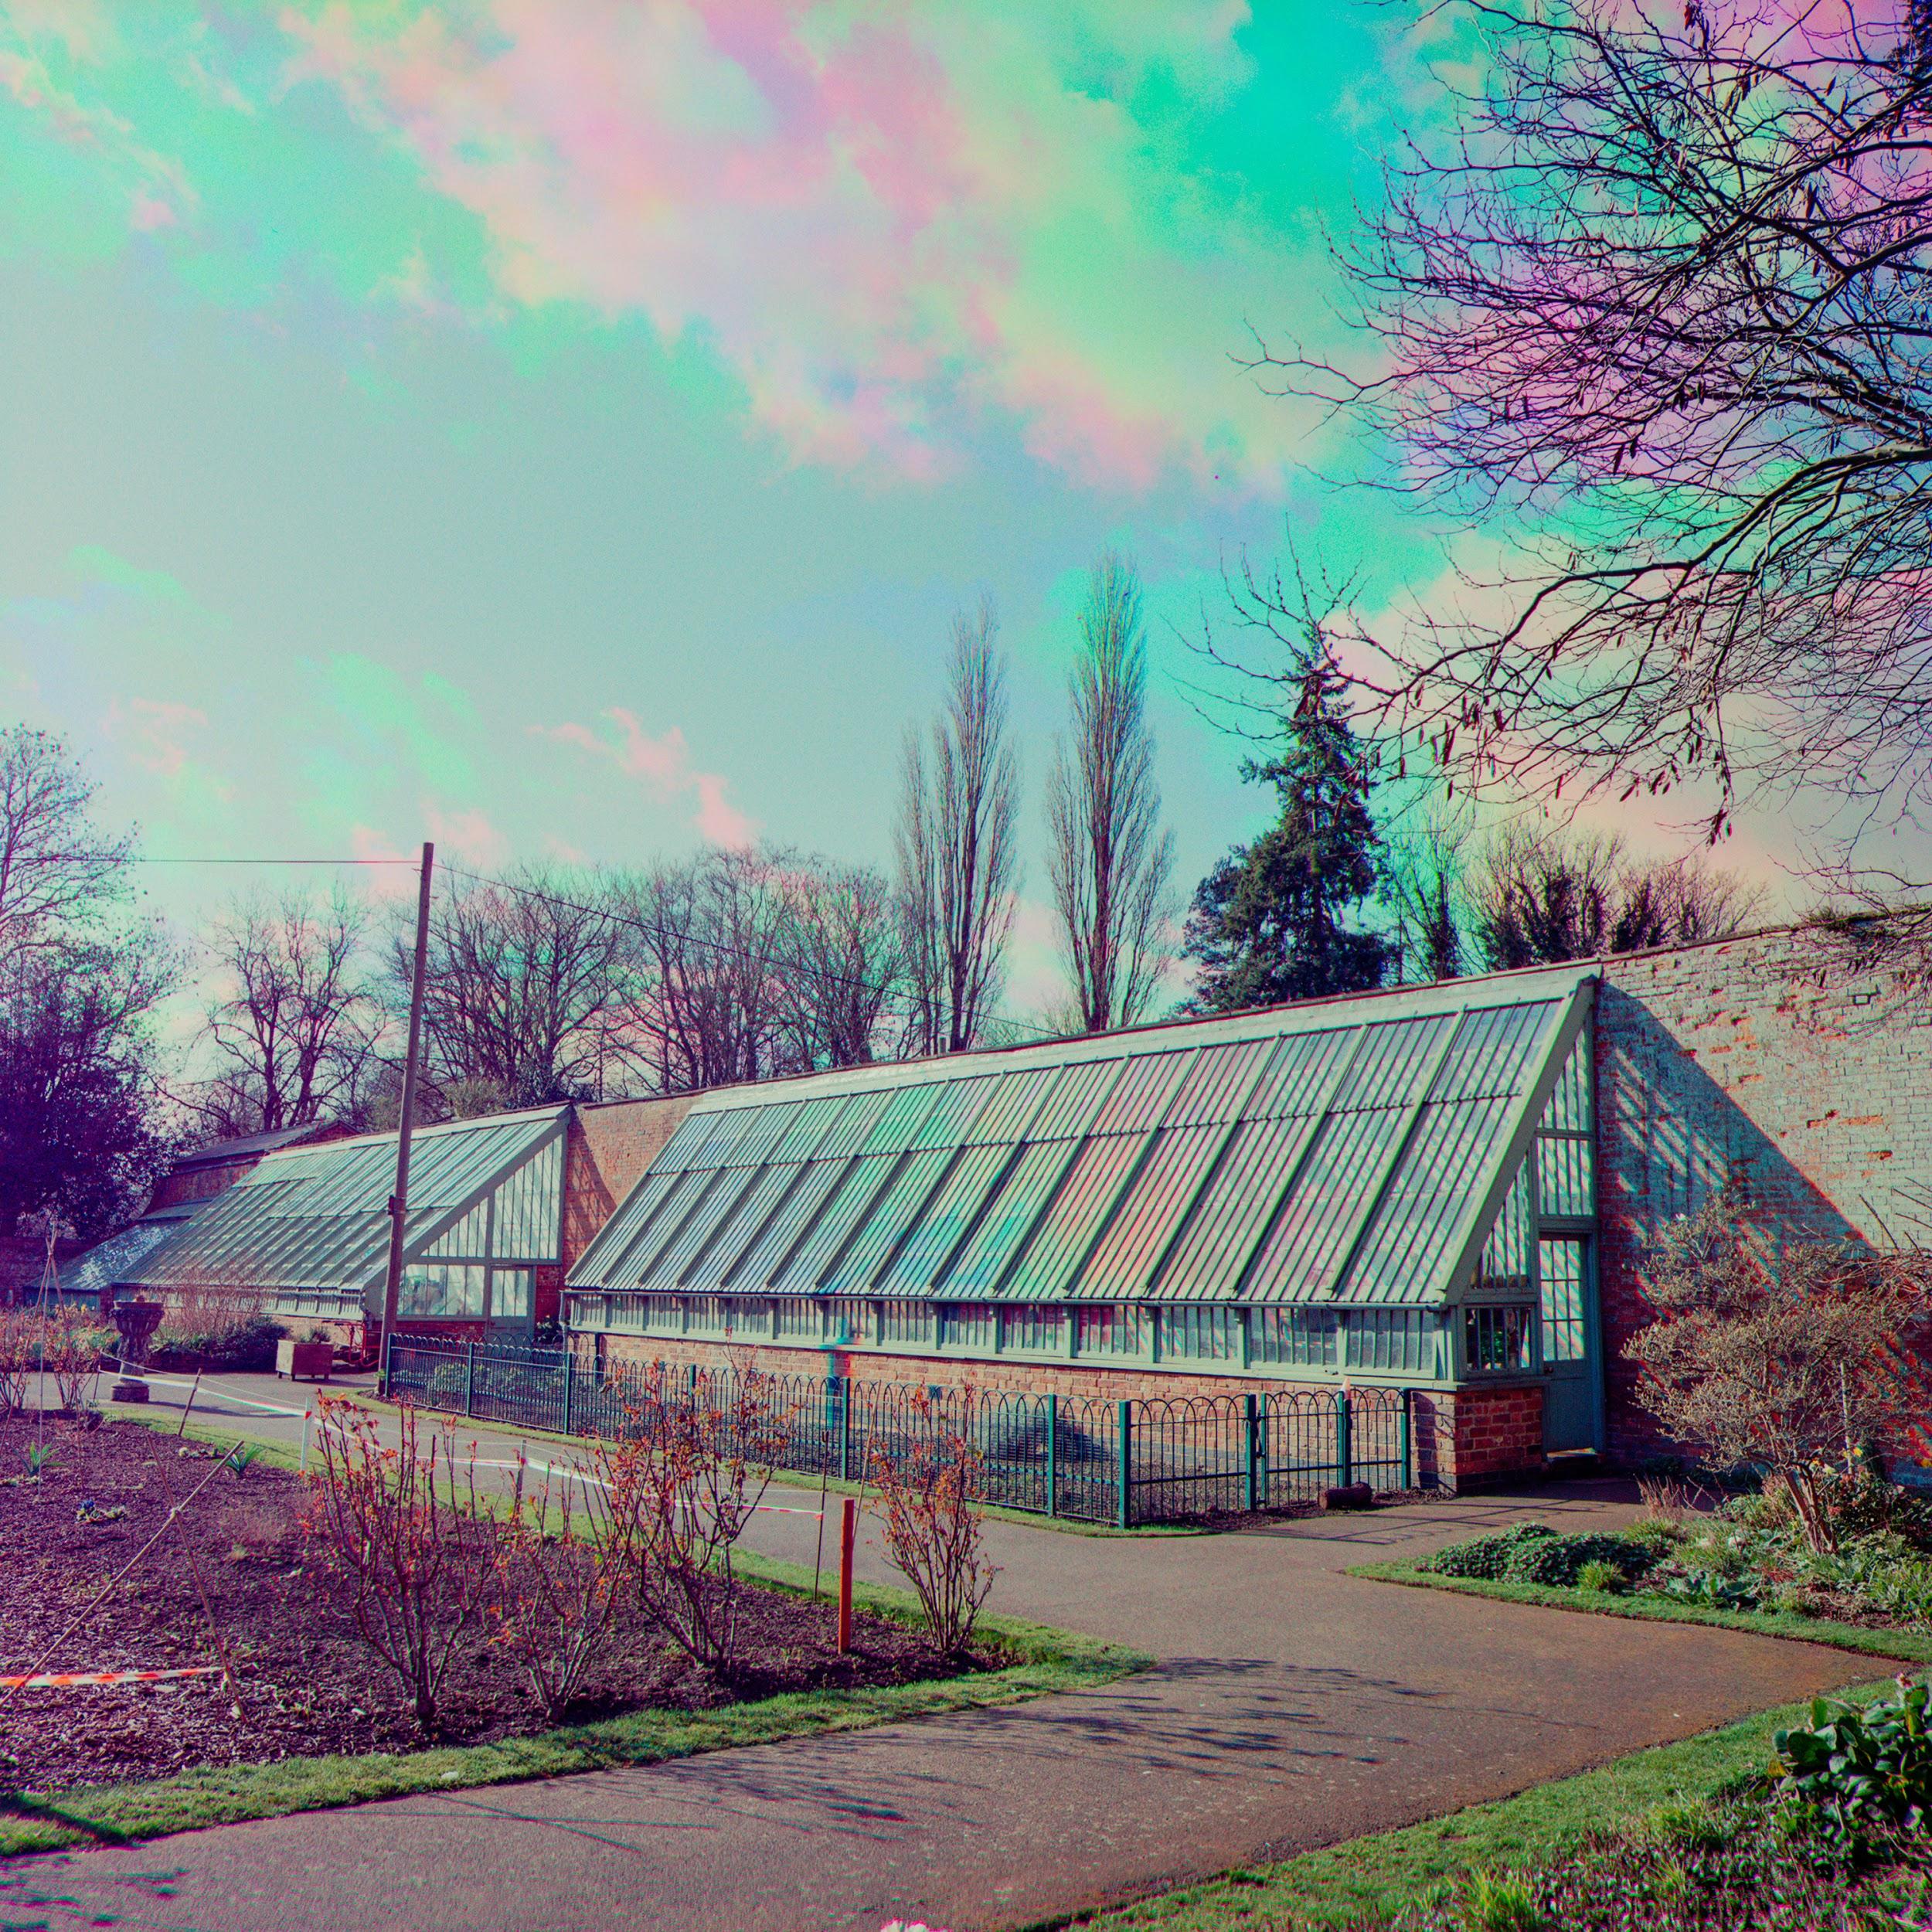
Have you ever been out with your camera, loaded with your favourite black and white film stock and found a scene that screams to be shot it colour? Of course you have, we have all been there!
Today I am going to introduce you to a new 150 year old process called Trichromy also known as the three colour process or more recently Trichromes (by Jasper Fforde). As with all early photographic techniques it's difficult to say who coined the process first as there were many people working on similar techniques in the same space of time.
History
The big three that are most commonly referenced are Louis Arther Ducos du Hauron, Charles Cros and James Clerk Maxwell. Both Ducos du Hauron and Cros presented their methods to the French Society of Photography on the 7th of May 1869 despite not working with one another or knowing of each other's research. J.C Maxwell presented the first colour photograph at a Royal institution lecture on colour theory in 1861. The photograph was taken by Thomas Sutton the inventor of the SLR, of a tartan ribbon using red, green, blue and yellow filters. Unfortunately for Maxwell the wet collodion plates Sutton used were insensitive to red and barely sensitive to green light. A published remark on the lecture read “if the red and green images had been as fully photographed as the blue" it would have been a fully coloured image.
The Process
I have used a red, green and blue filter and some digital manipulation to create this effect.
The list of items you will need to create this effect, include:
- A roll of film (any speed, orthochromatic film will not work as it is not sensitive to red light.)
- A camera
- A tripod
- A light meter (or digital camera for meter reading)
- Red, green and blue colour filters (sweet wrappers can and have been used)
- Editing software
The key to this procedure is to take three identical images using all three of the filters.
Composing the Image
My workflow follows these steps.
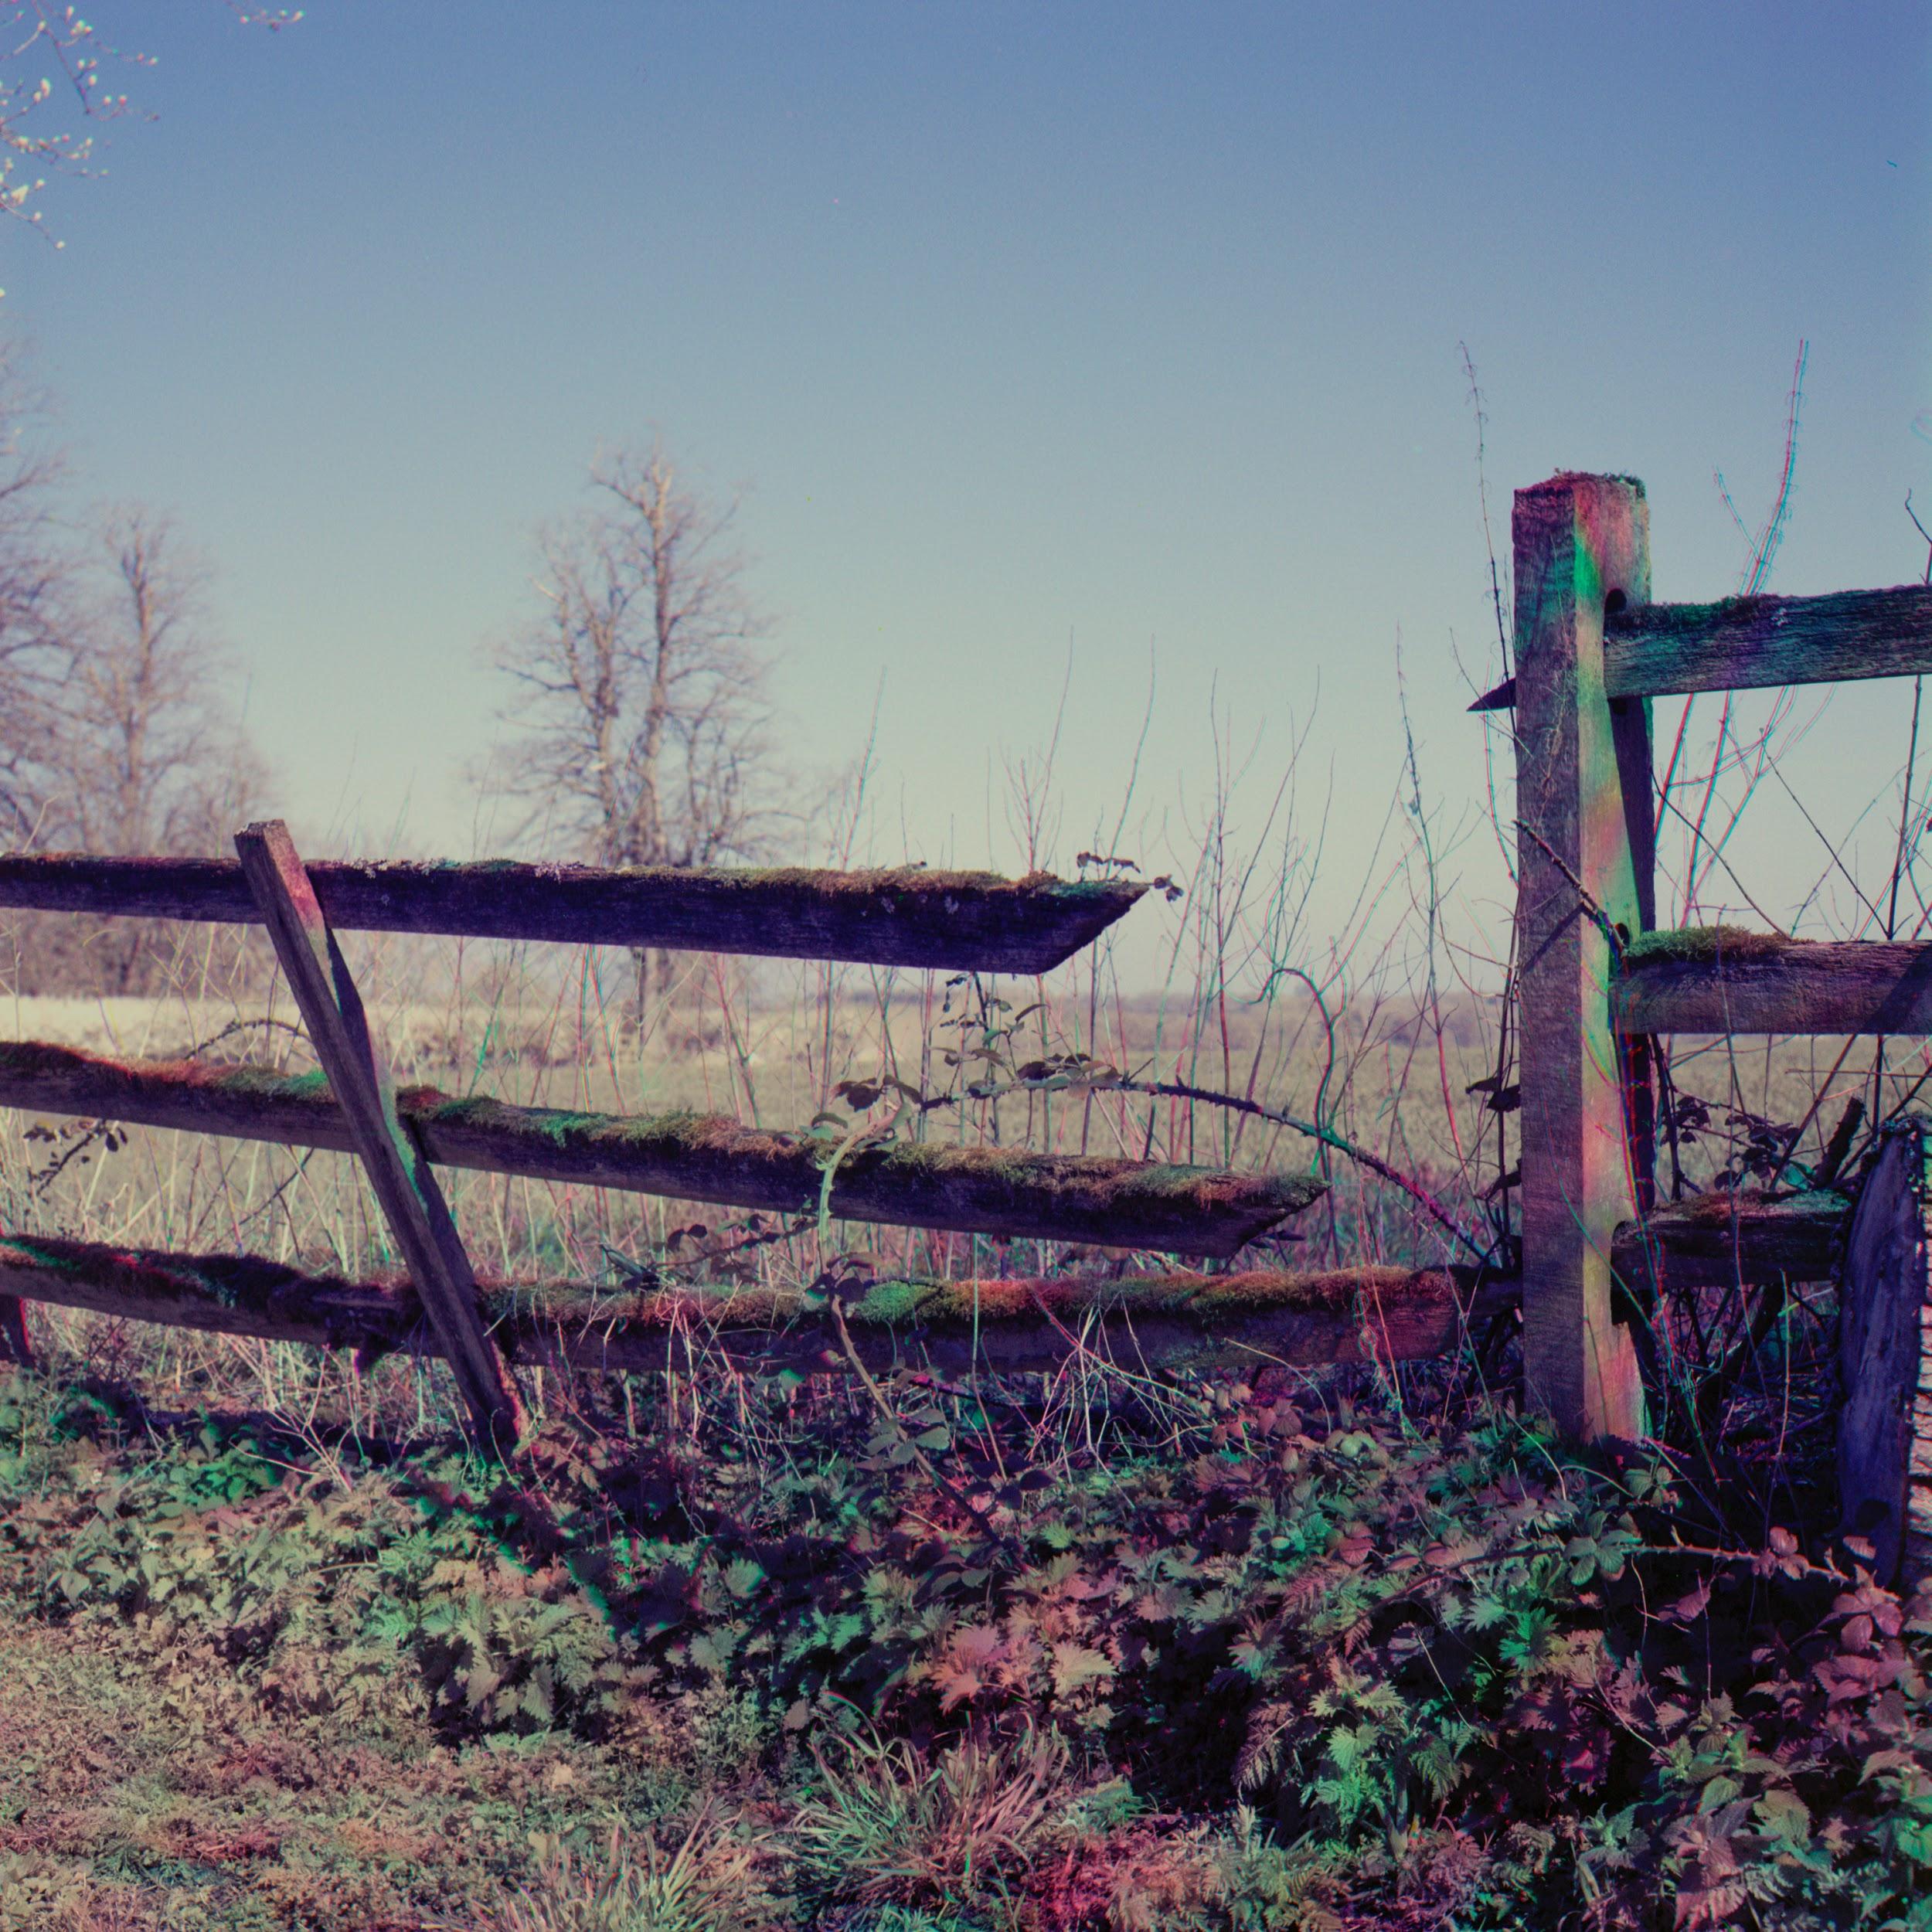
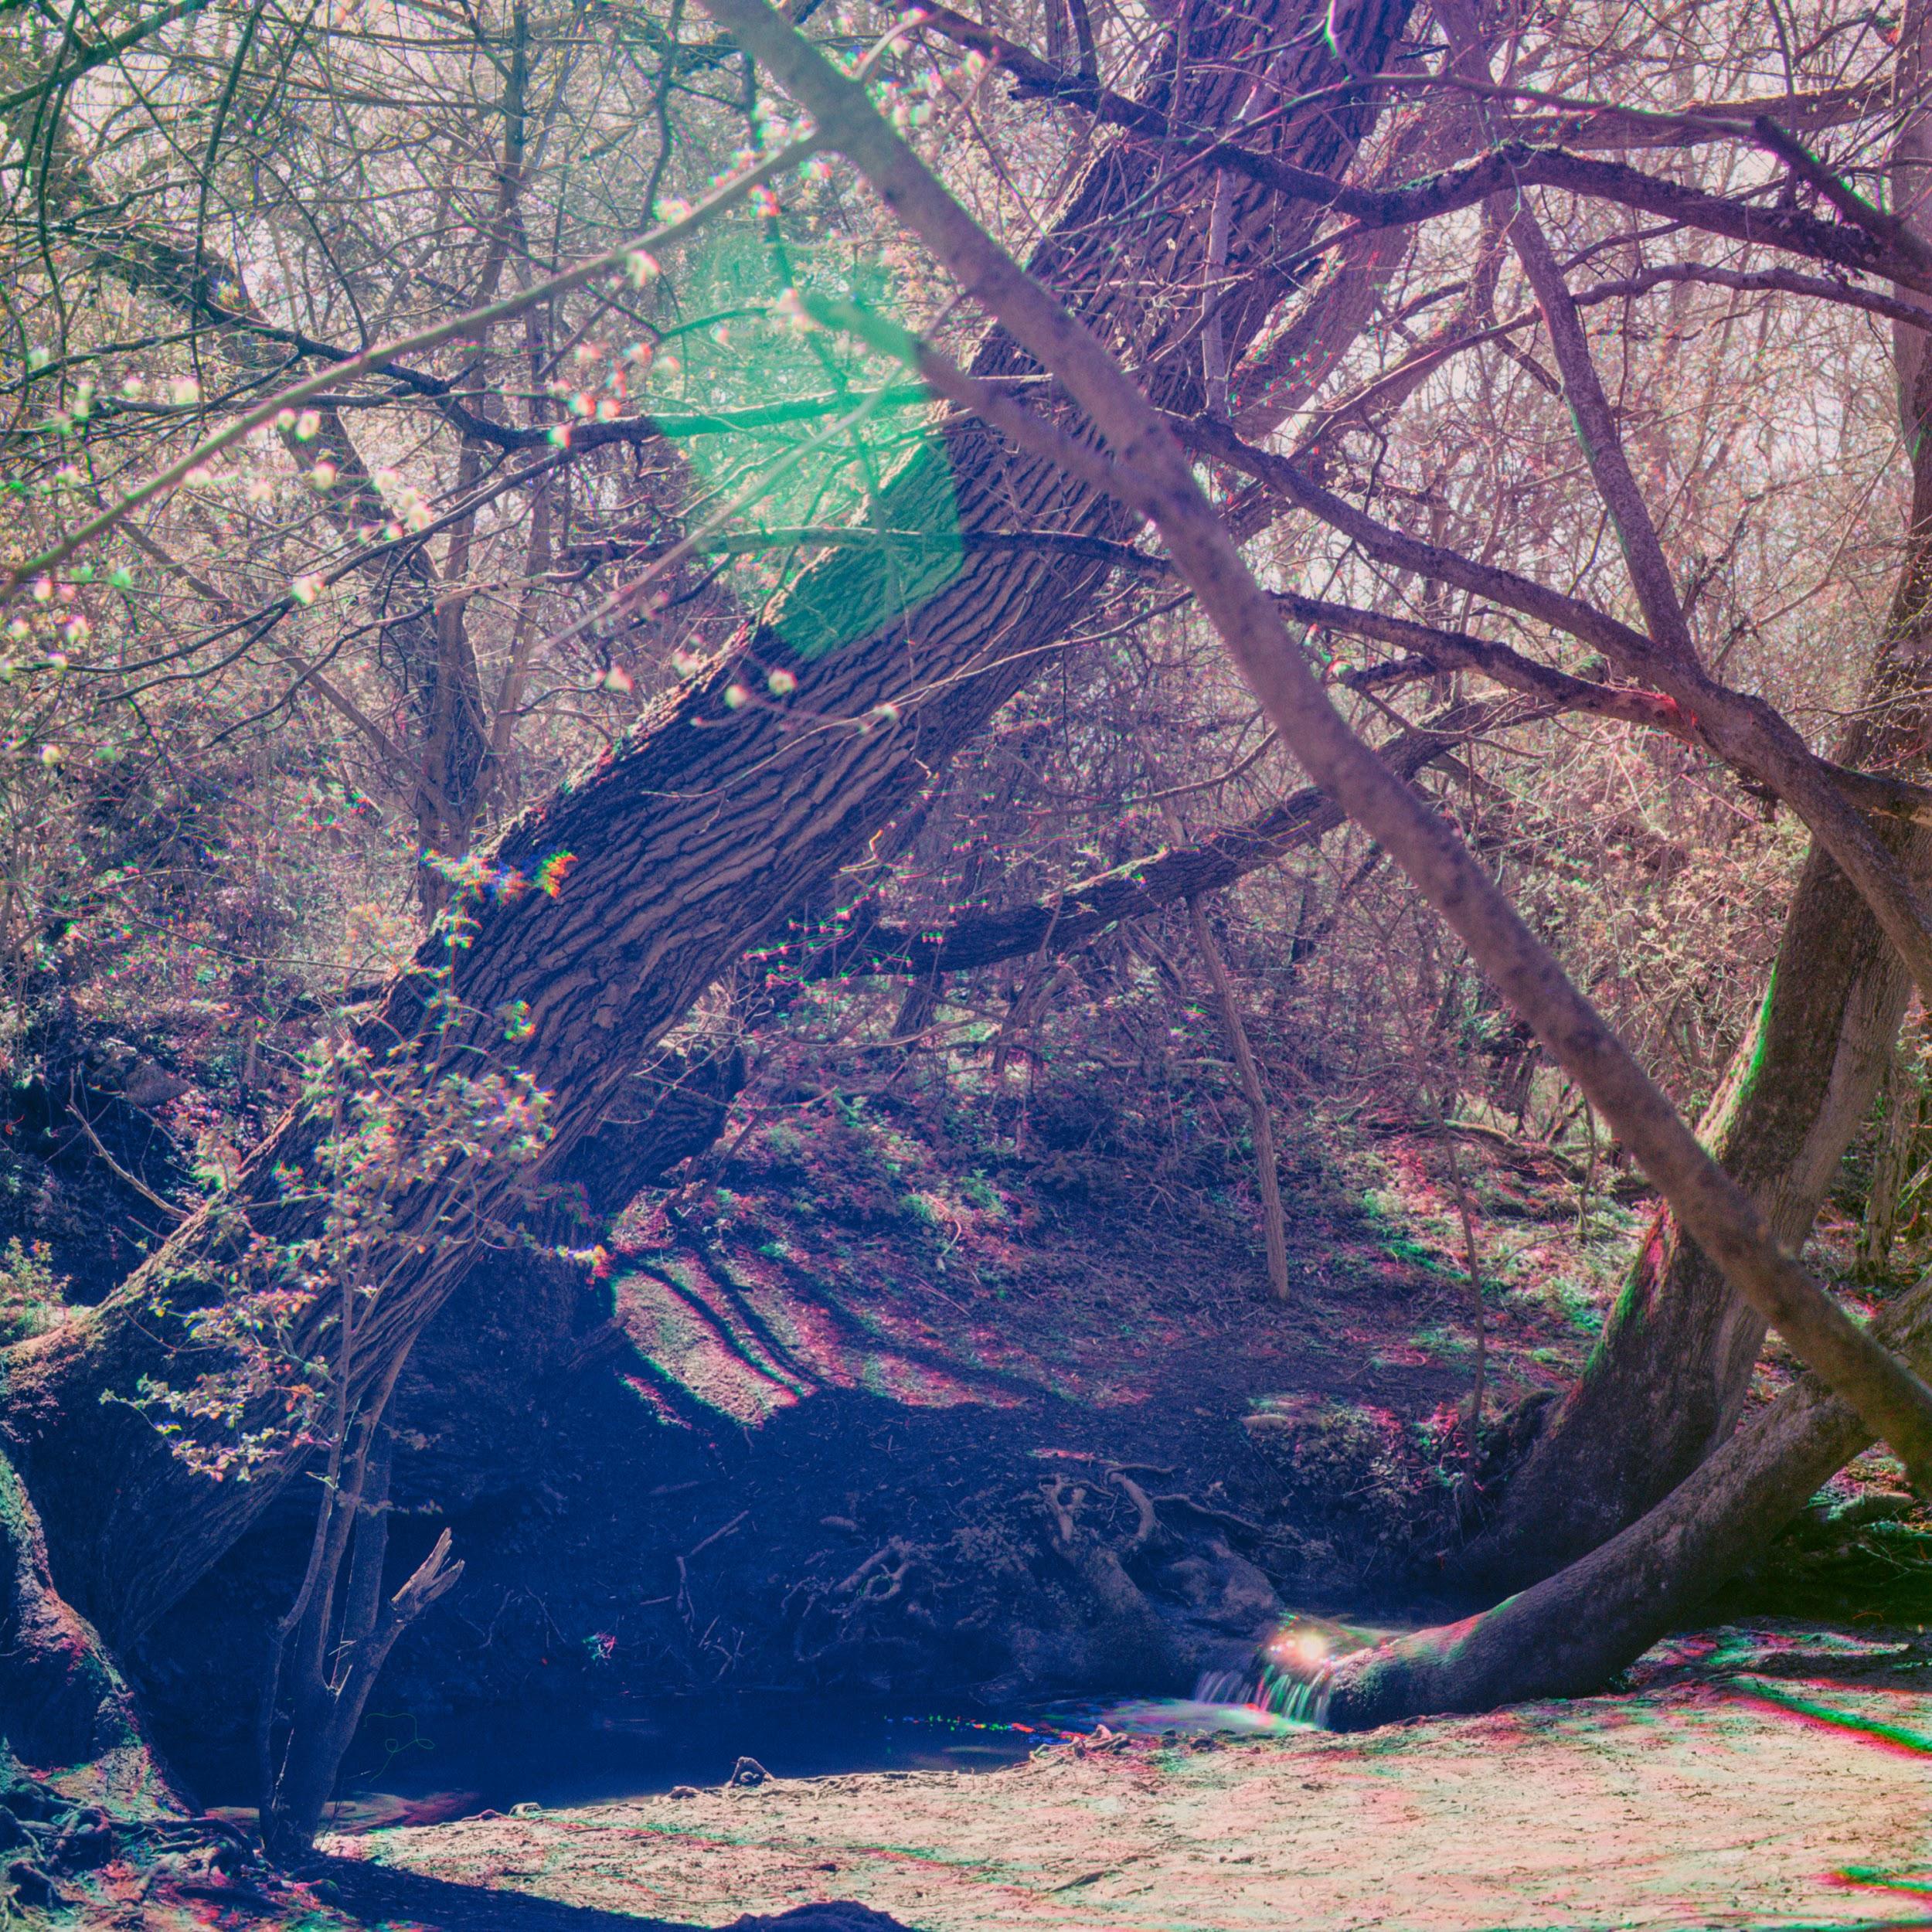
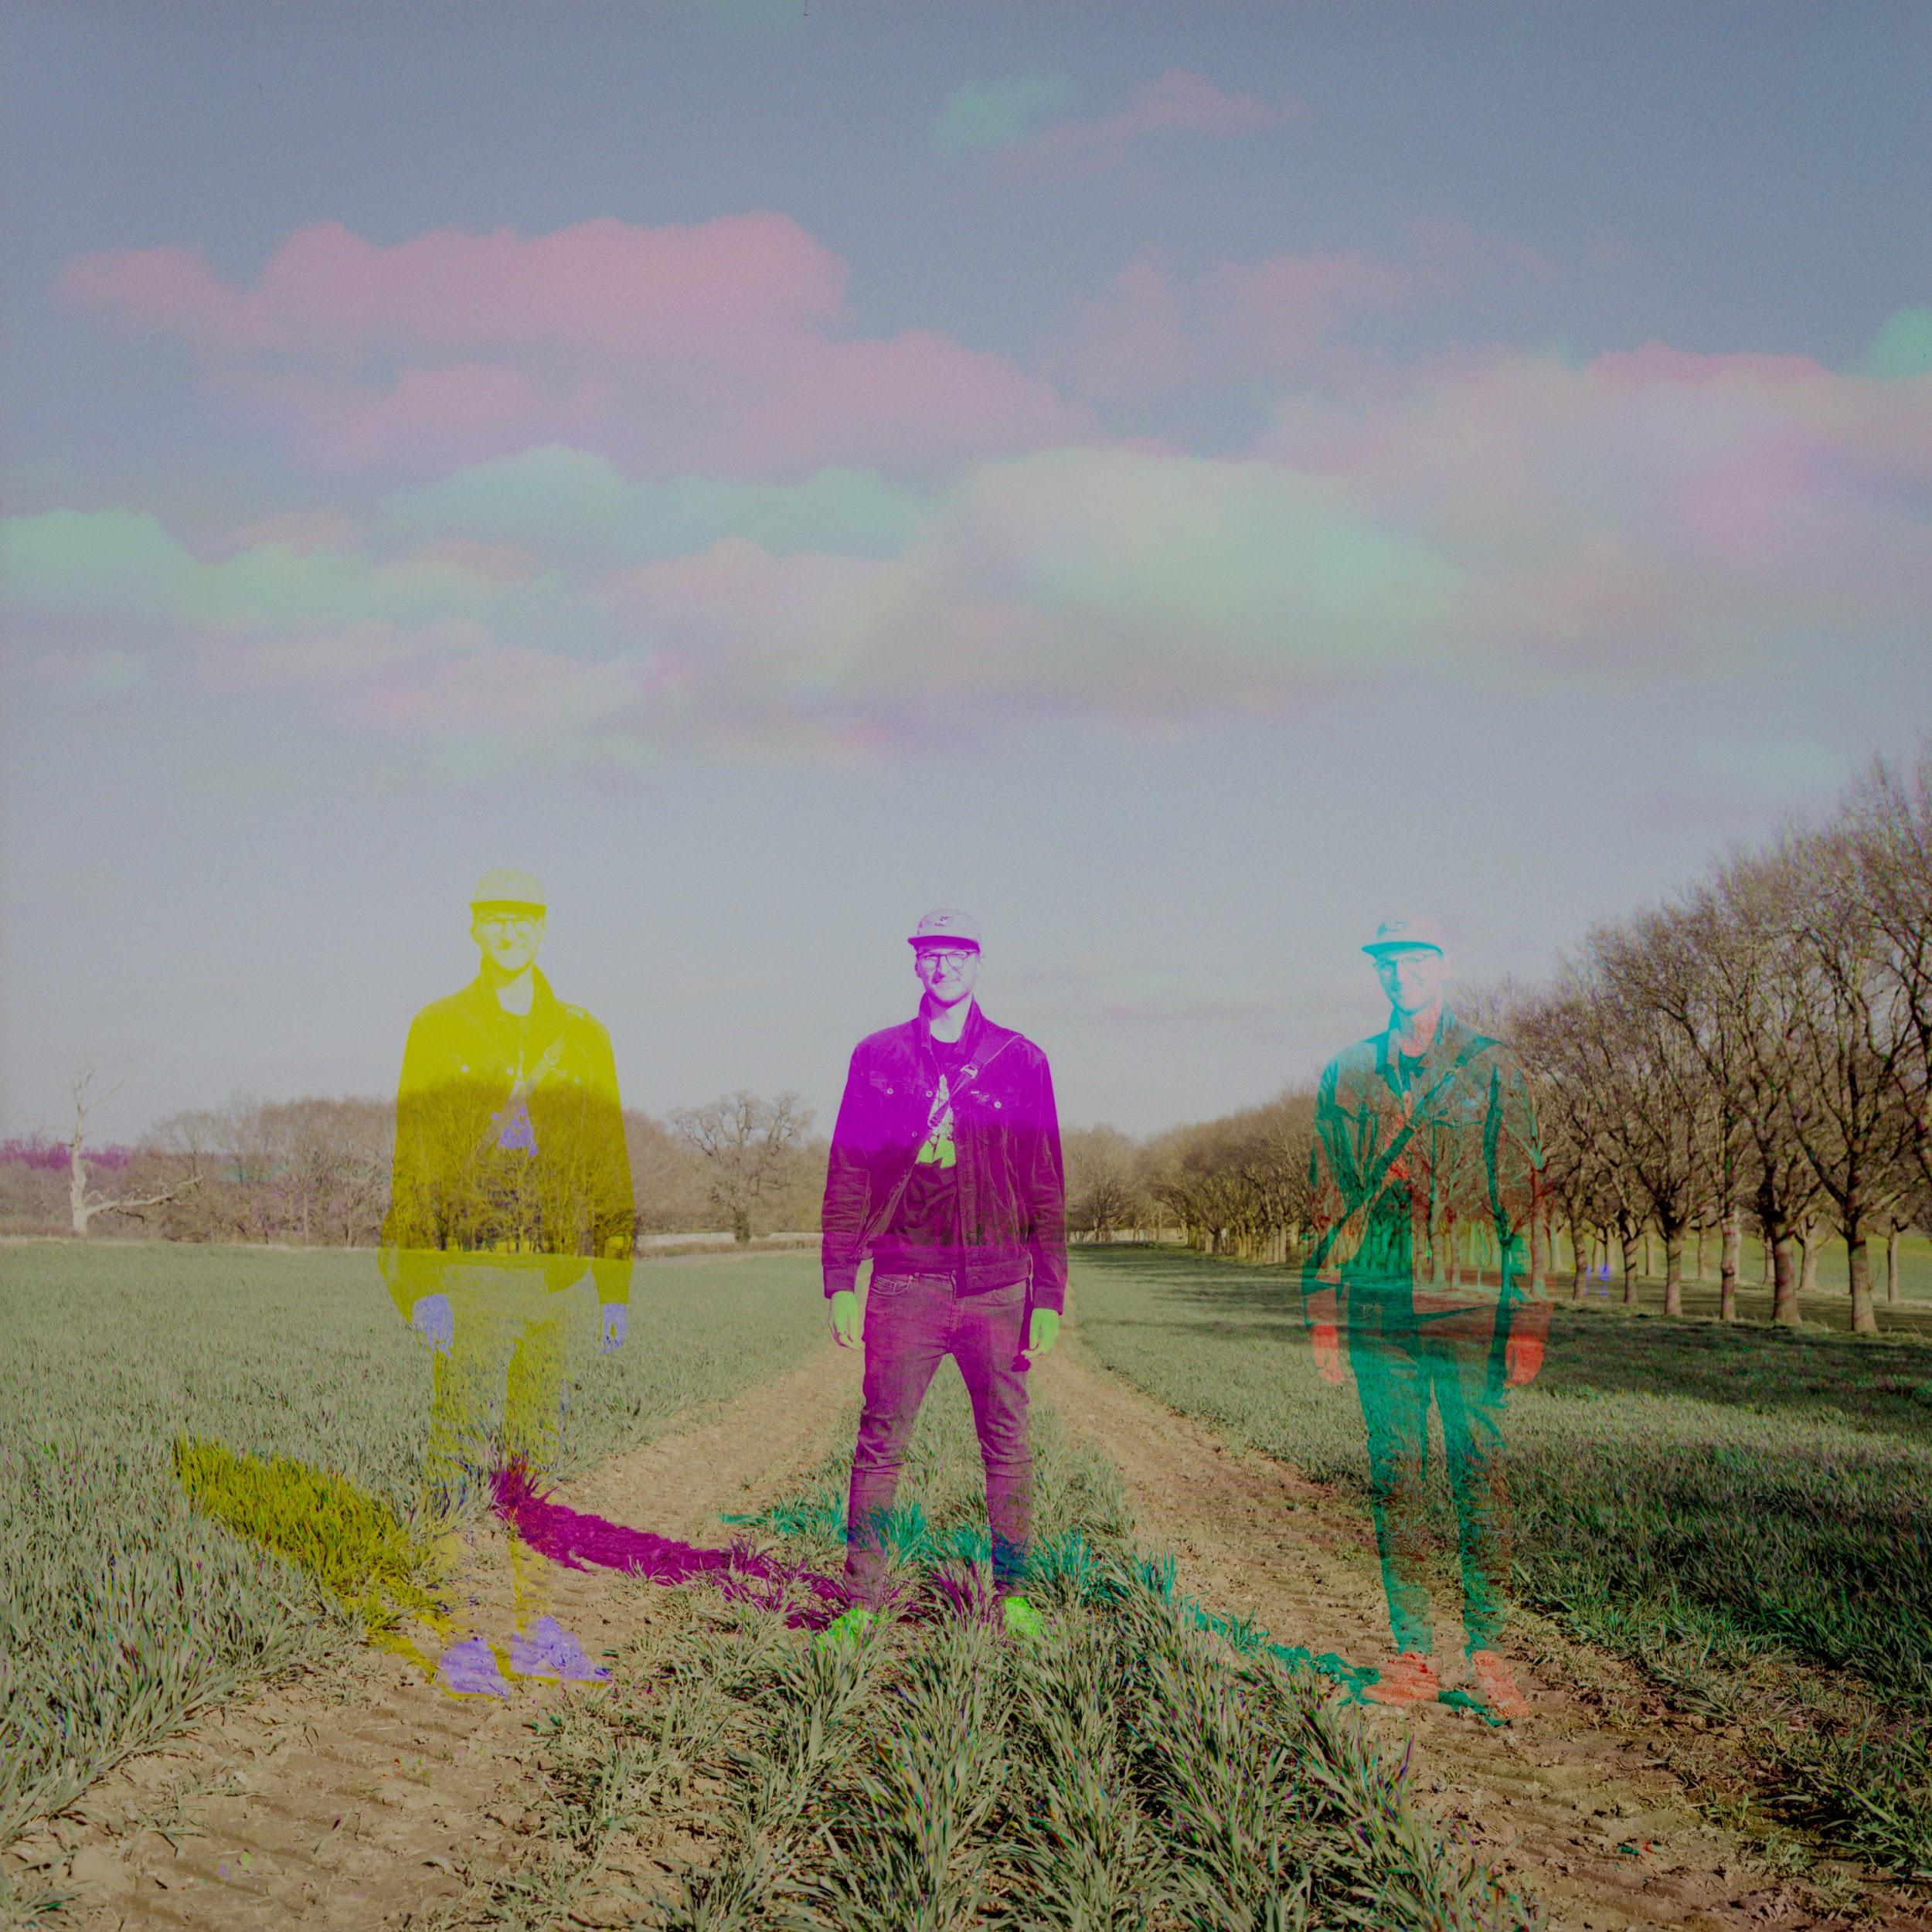
In my personal opinion I think that outdoor photographs are more interesting than indoor studio shots. I like to look for partially cloudy skies and foliage blowing in the wind, anything with movement. Slight movements of subjects create a Harris shutter type effect to the image.
Metering
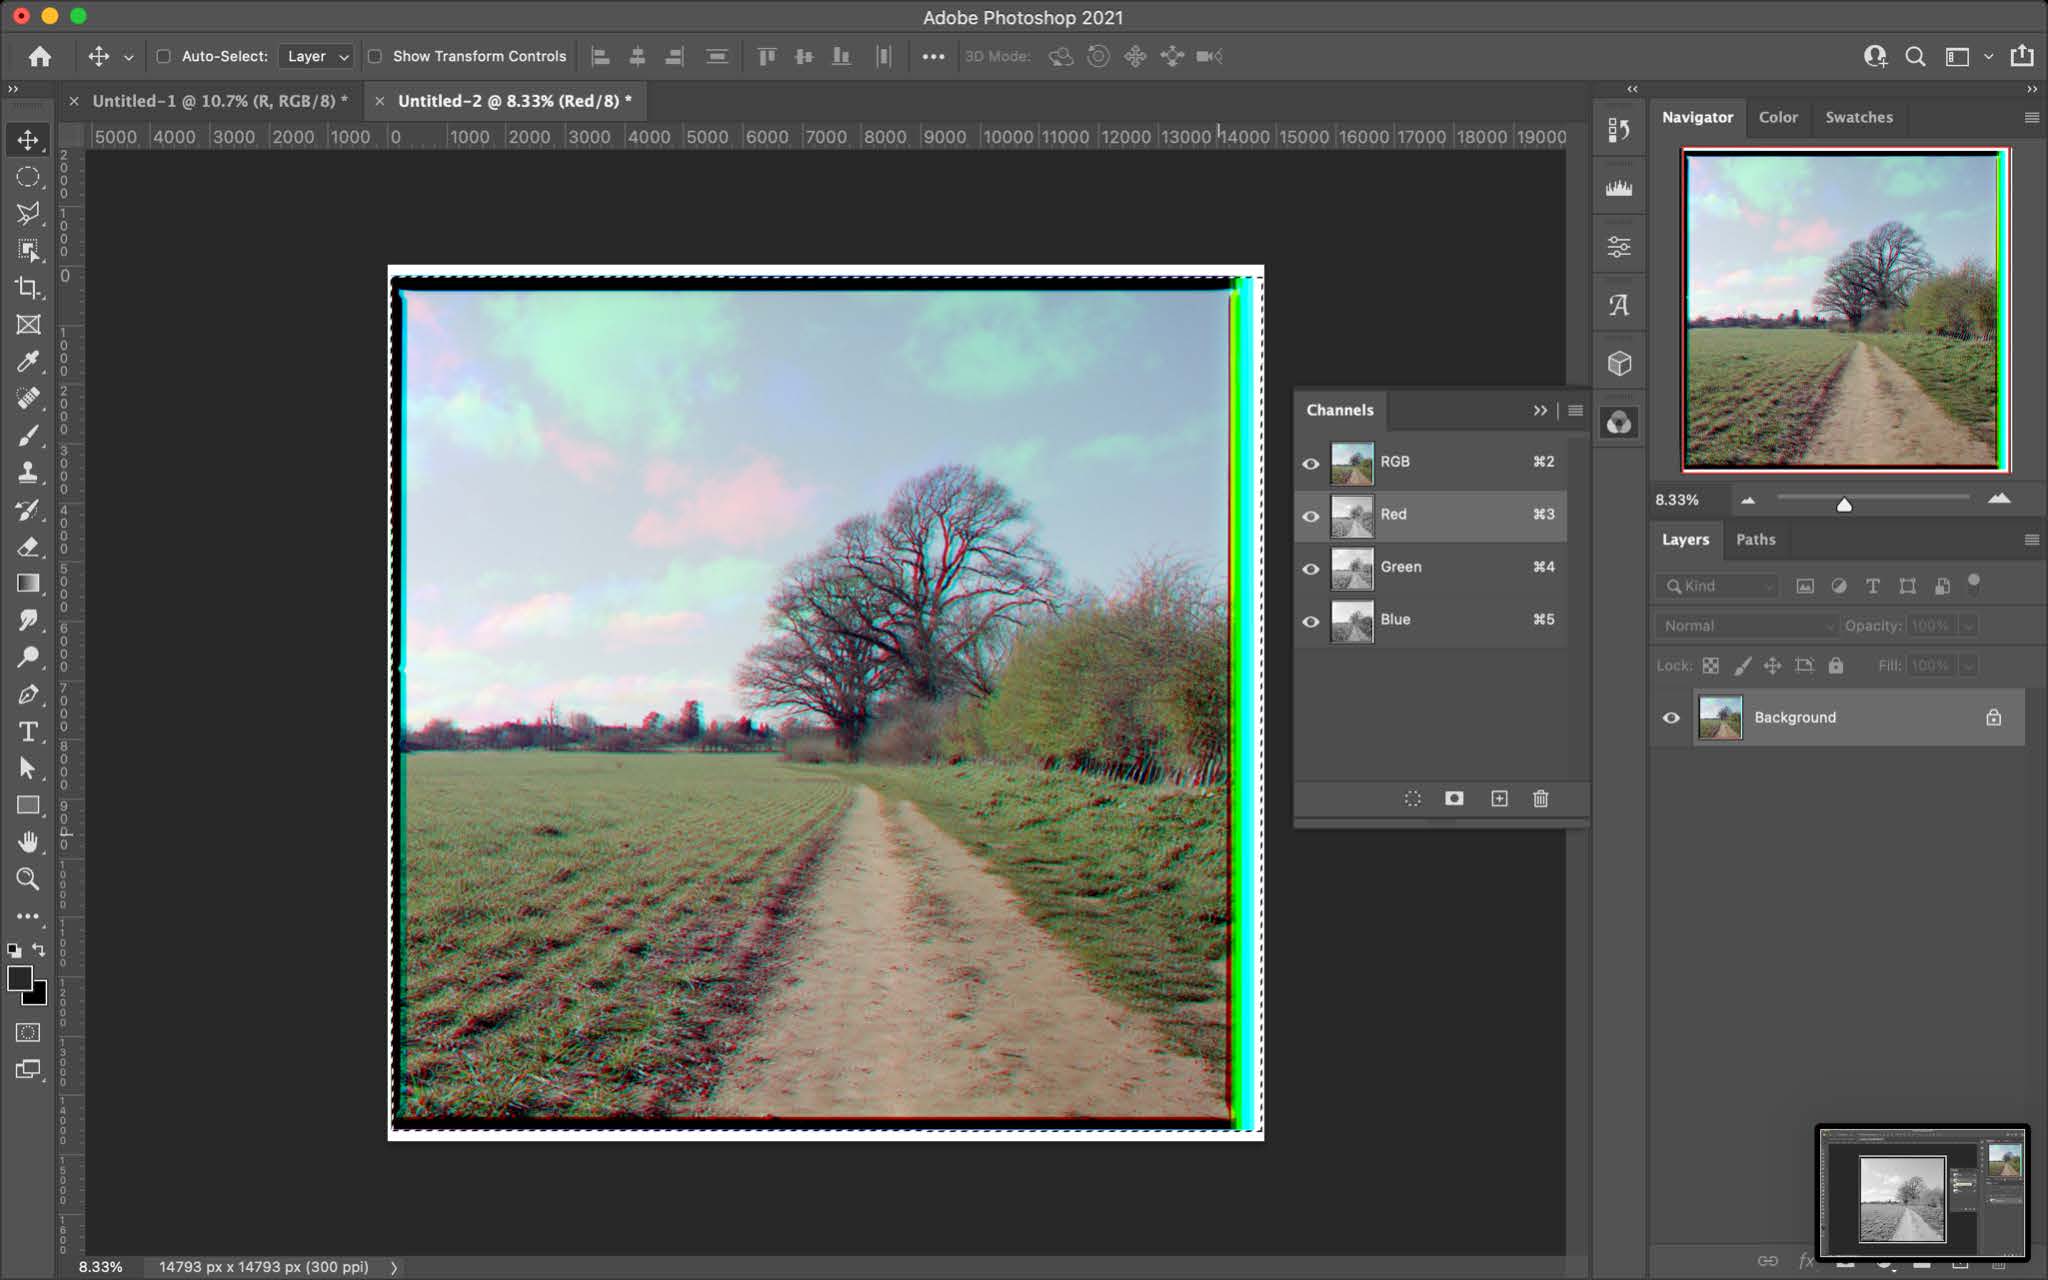
Meter the scene, I recommend only taking a reading of a neutral colour object in the scene such as concrete, my reasoning for this is because it will not be affected by the colour filter. Subjects to avoid metering would be anything red, green or blue in colour. I can then apply my colour filter compensation in my case 3 stops for the red filter 2 for the green and 3 stops for the blue filter. Before taking my images I would double check my reading with all filters to make sure that all my readings are accurate. If any of the exposures are off you may end up with weird colour shifts much like the one below. These can be corrected in the editing process but take time.
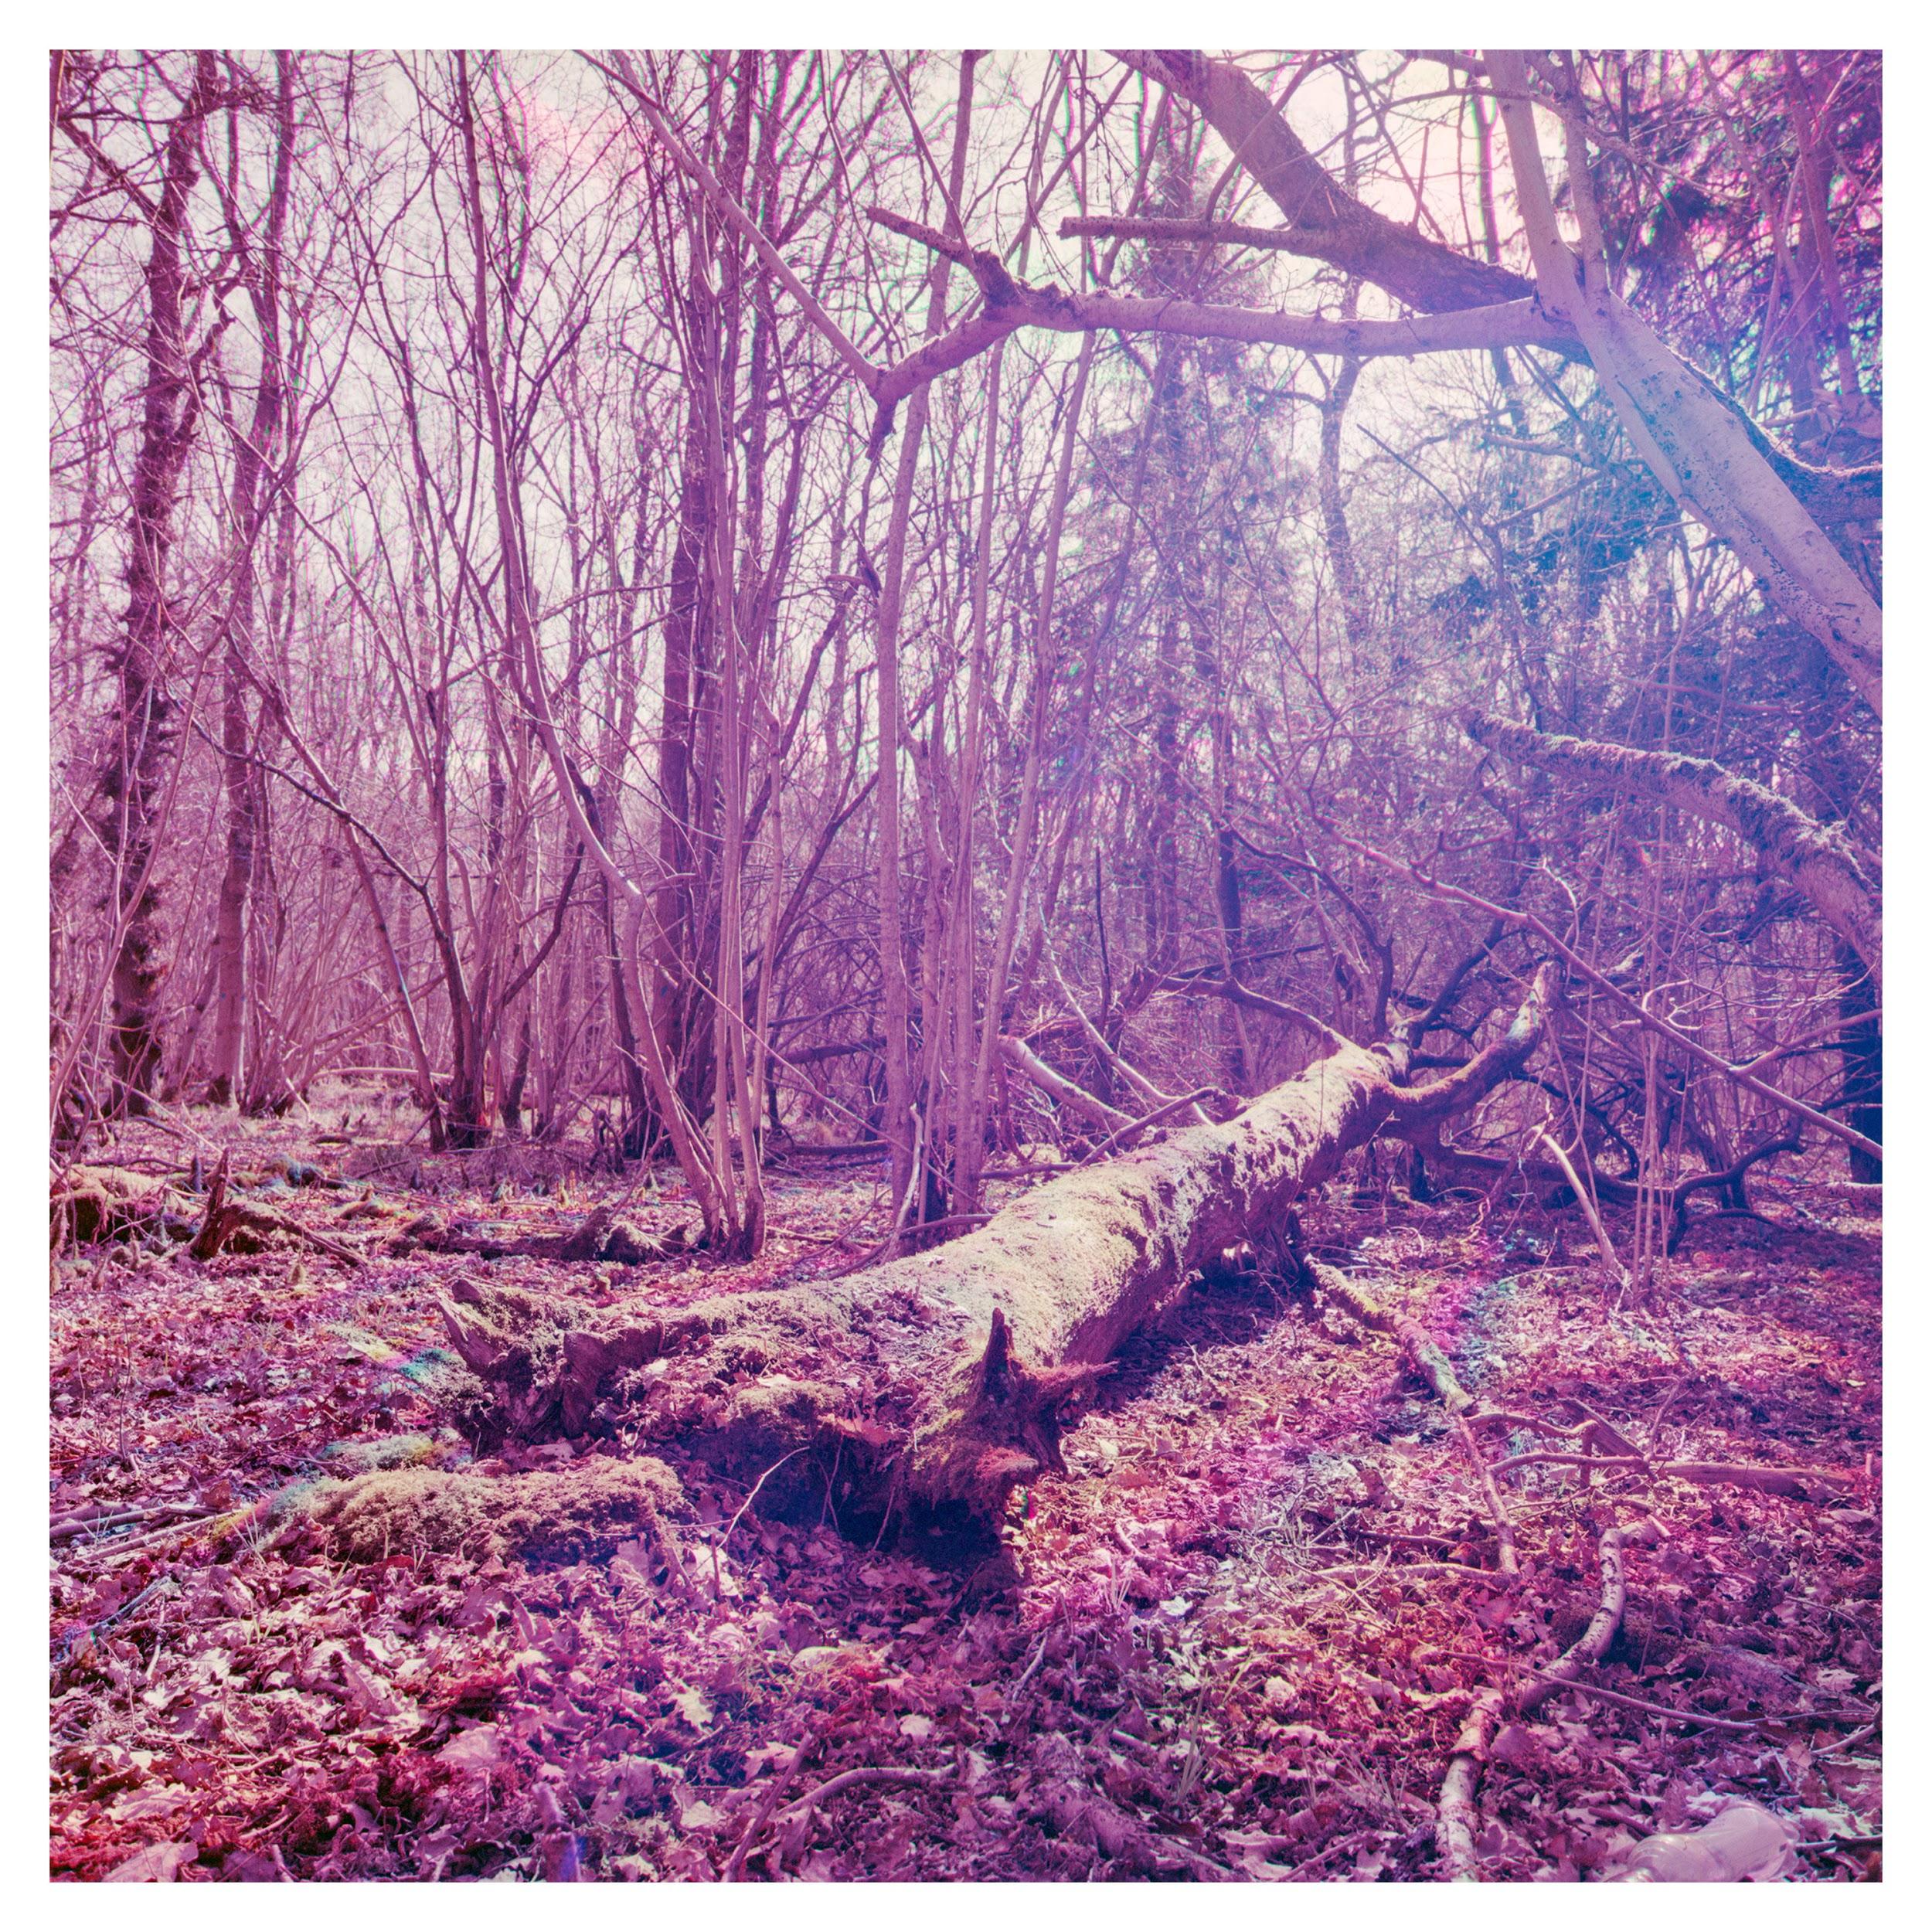
Incorrect exposure on all filters Very Lomography Purple
It is important to remember which filter you used on each frame number. The order in which I take my images are RGB only because of the abbreviation of RGB in camera sensors televisions and online image publishing.
Scanning and manipulating the images.
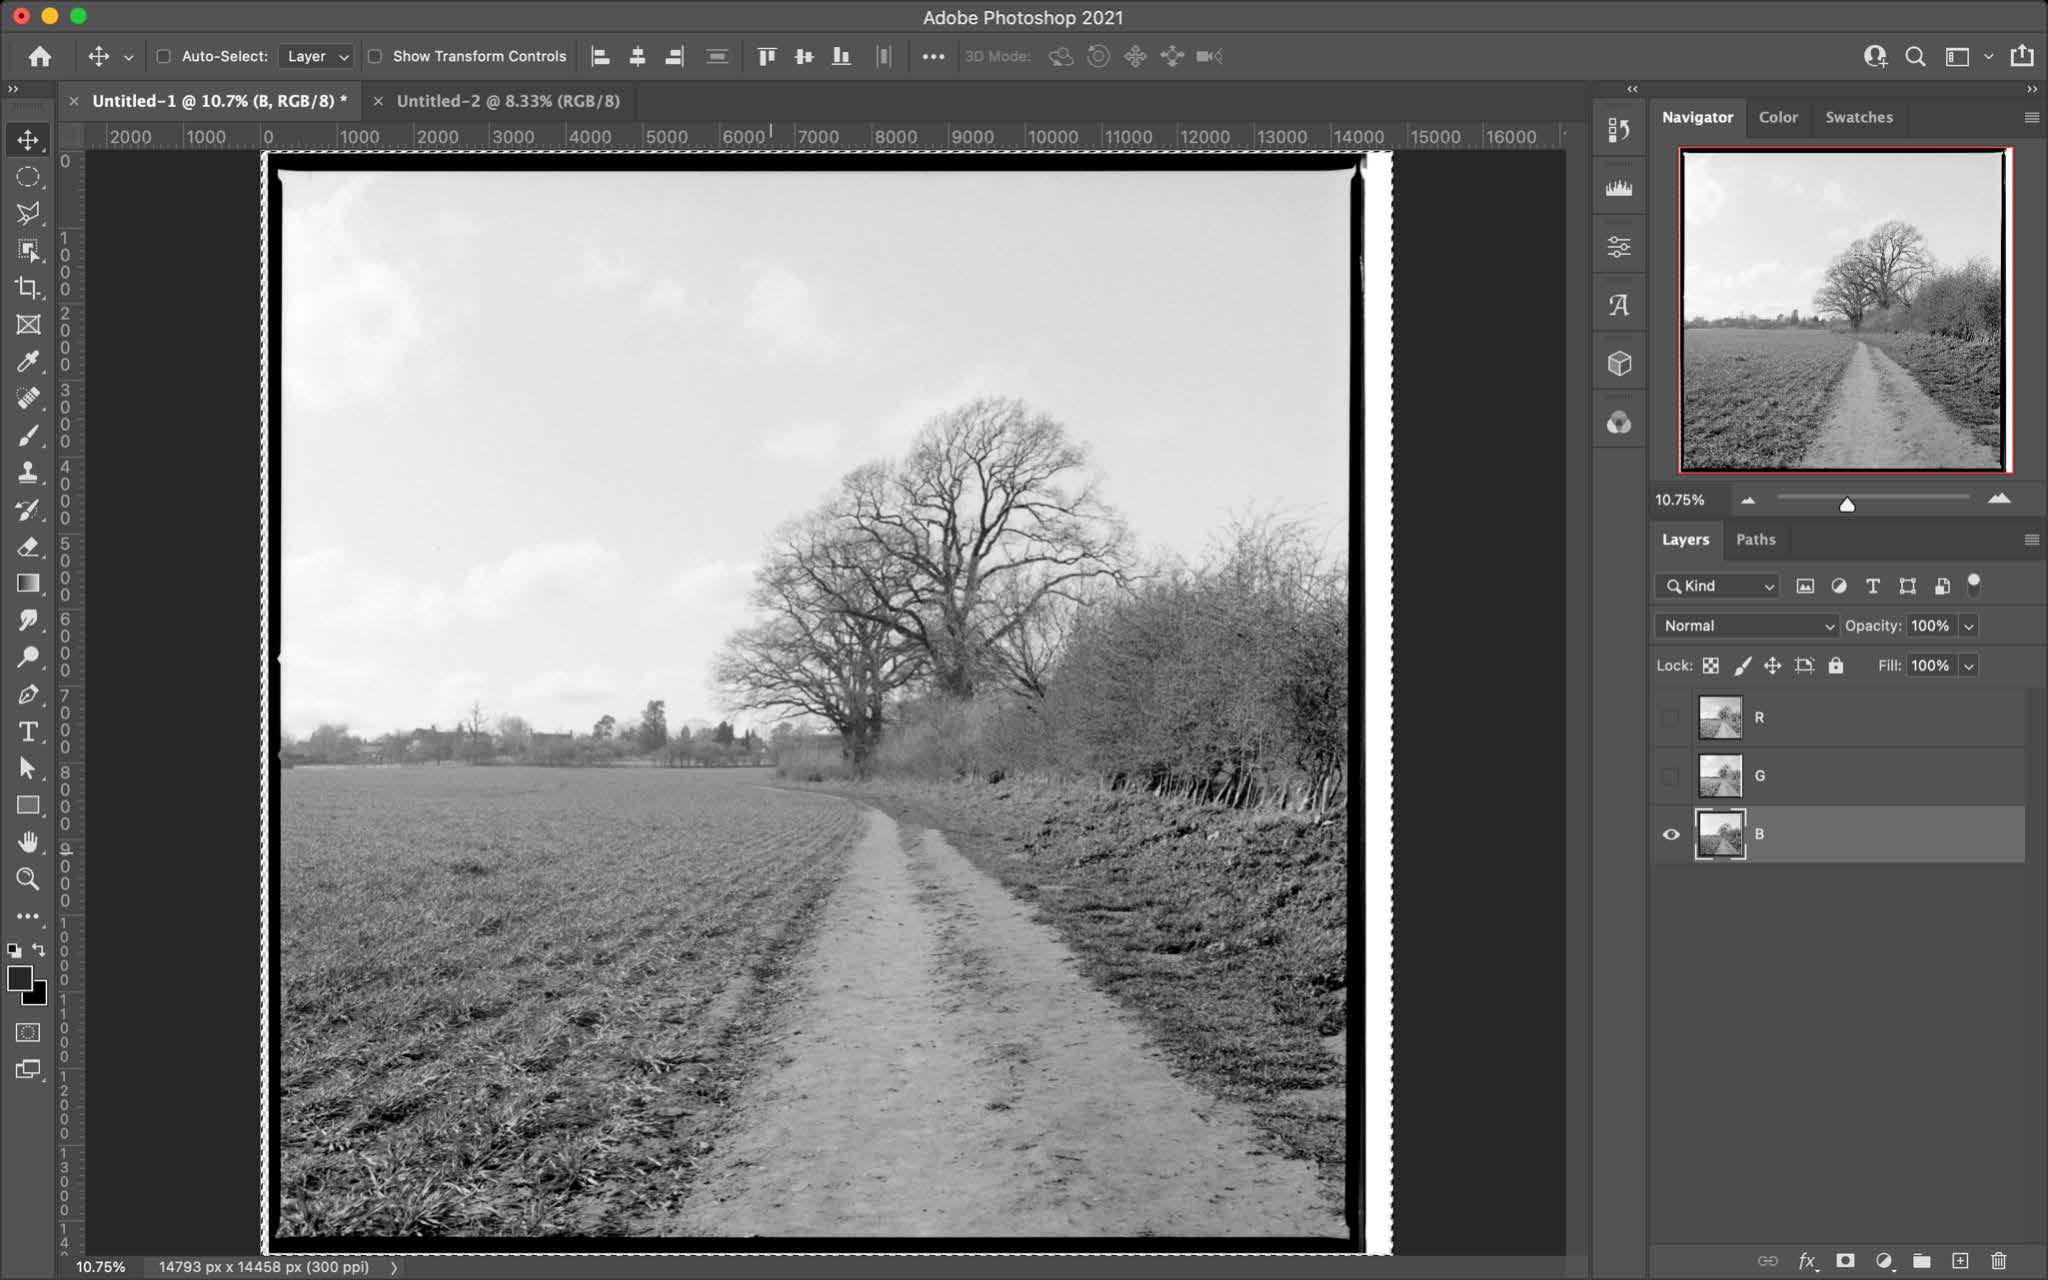
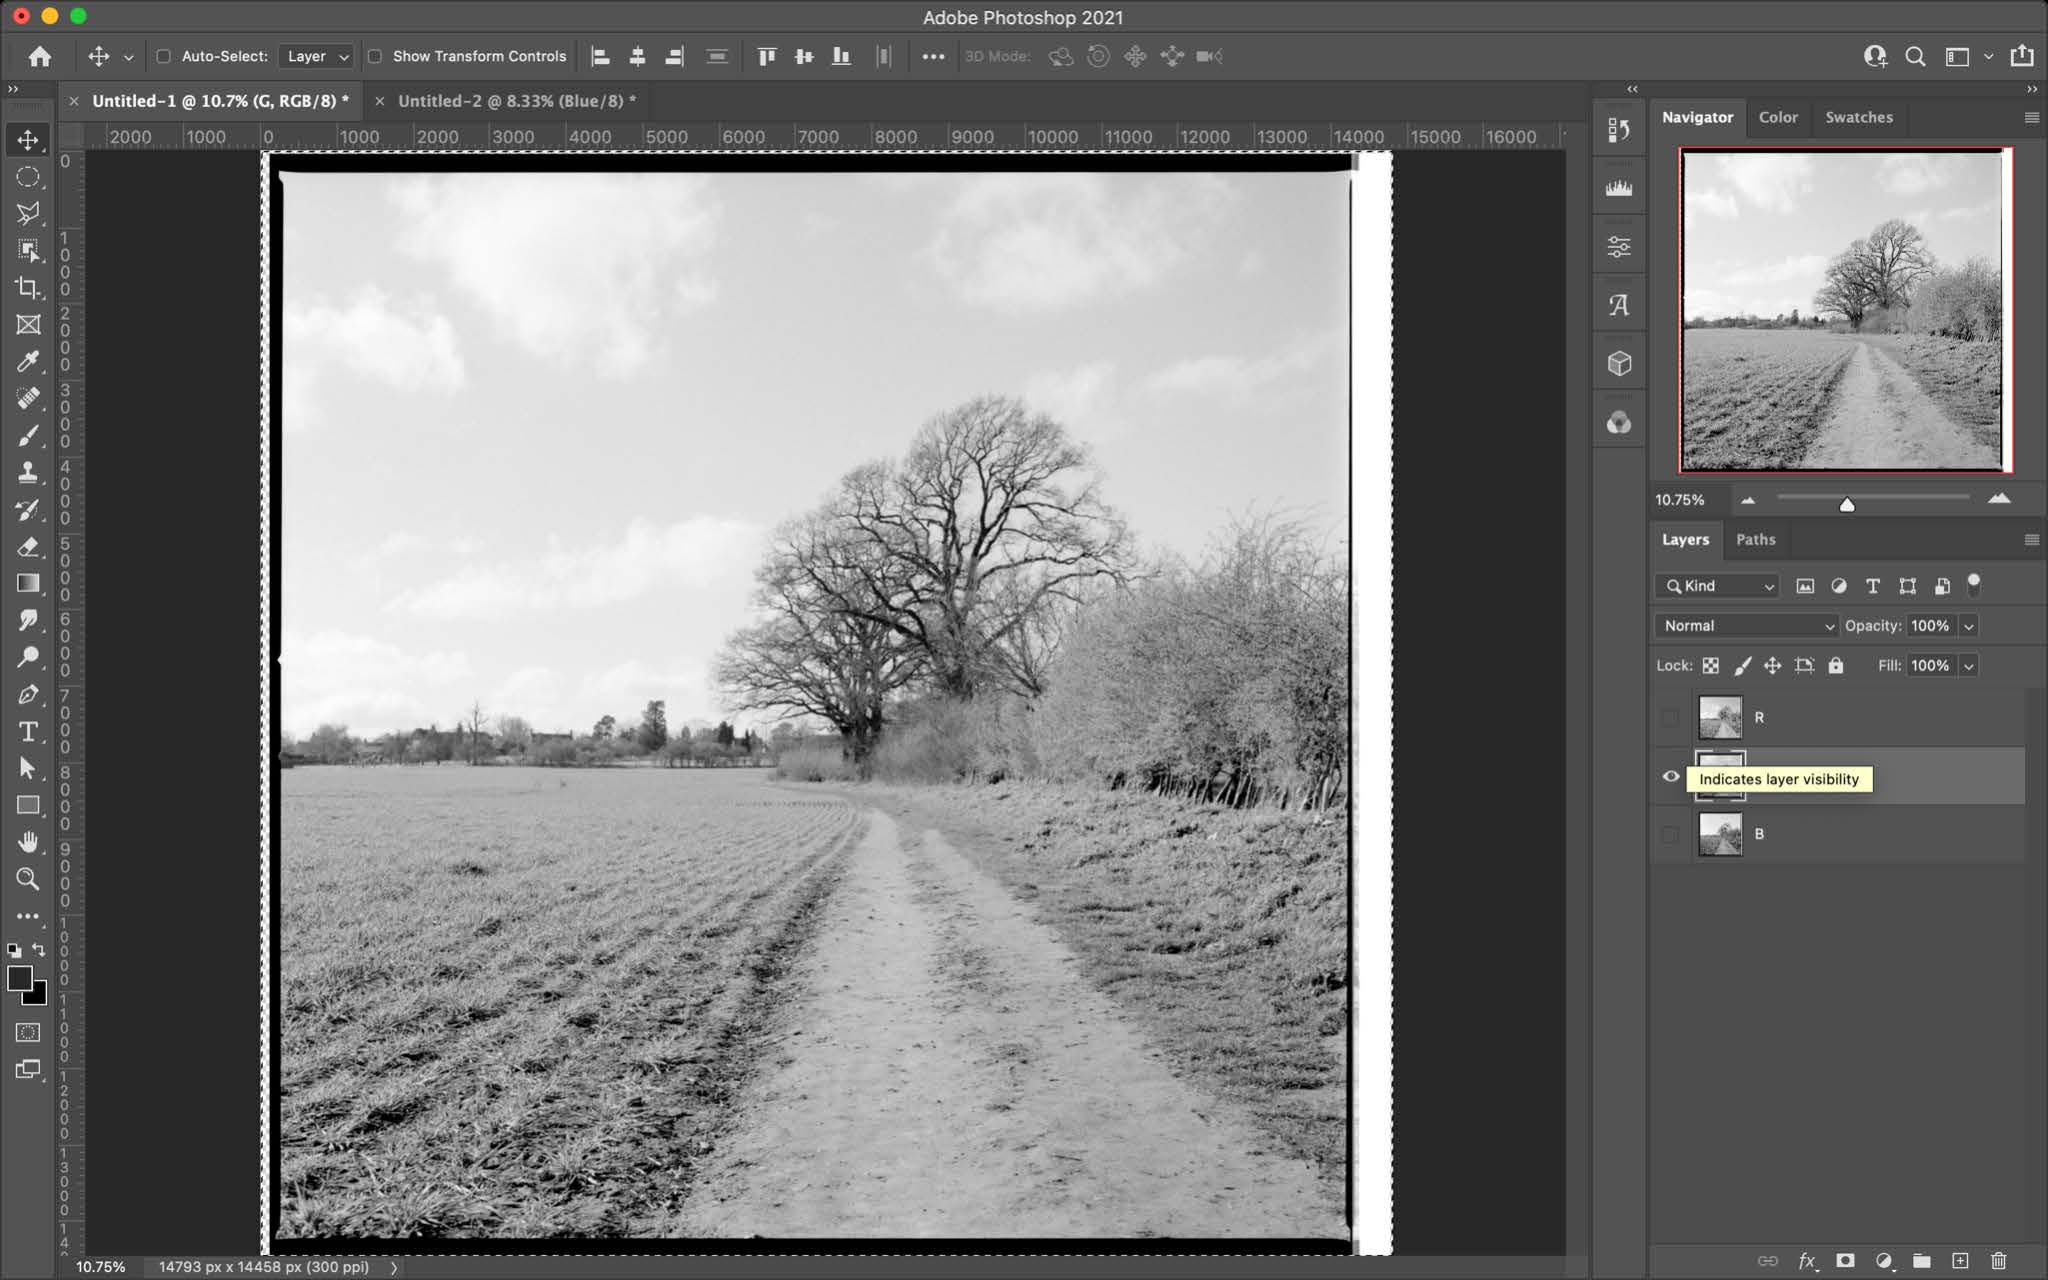
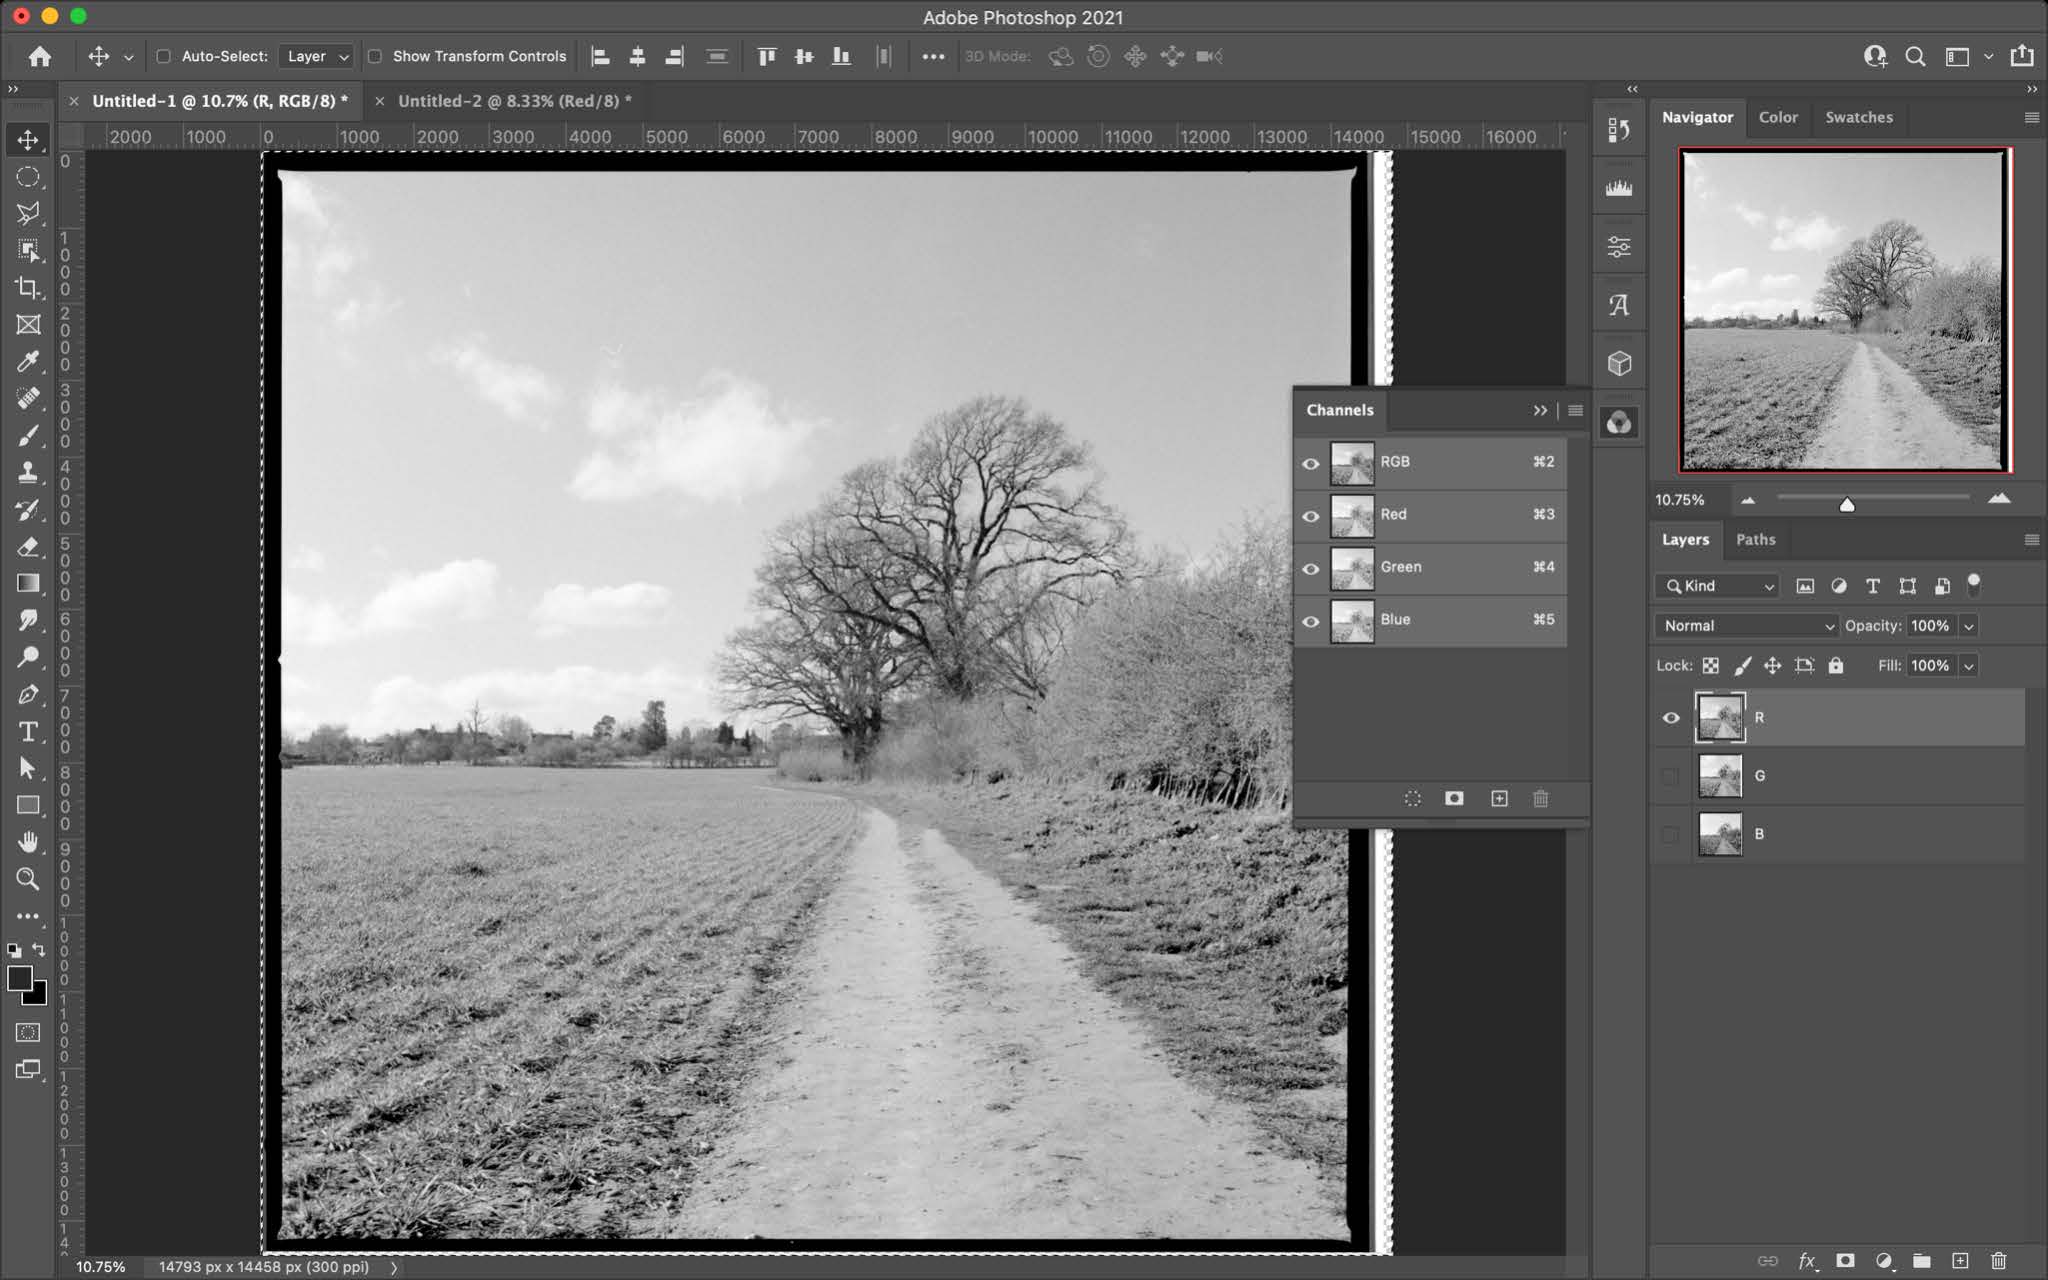
You can develop your negatives as normal, in my case I used ID-11. Once developed and scanned you can bring them into photoshop and combine all to the images. Once all three images are open in photoshop navigate to File>Scripts> Load Files into Stack… From here click add open files and check the box “Attempt to Automatically Align Source Images. Failure to do so will result in a more extreme Harris shutter effect on the final image. Depending on the size of your files this may take a minute or two. Once they are fully loaded you can rename each layer red green and blue. I order my layers red on top green in the middle and blue on the bottom.
From here there are two methods of combining the images.
Method 1
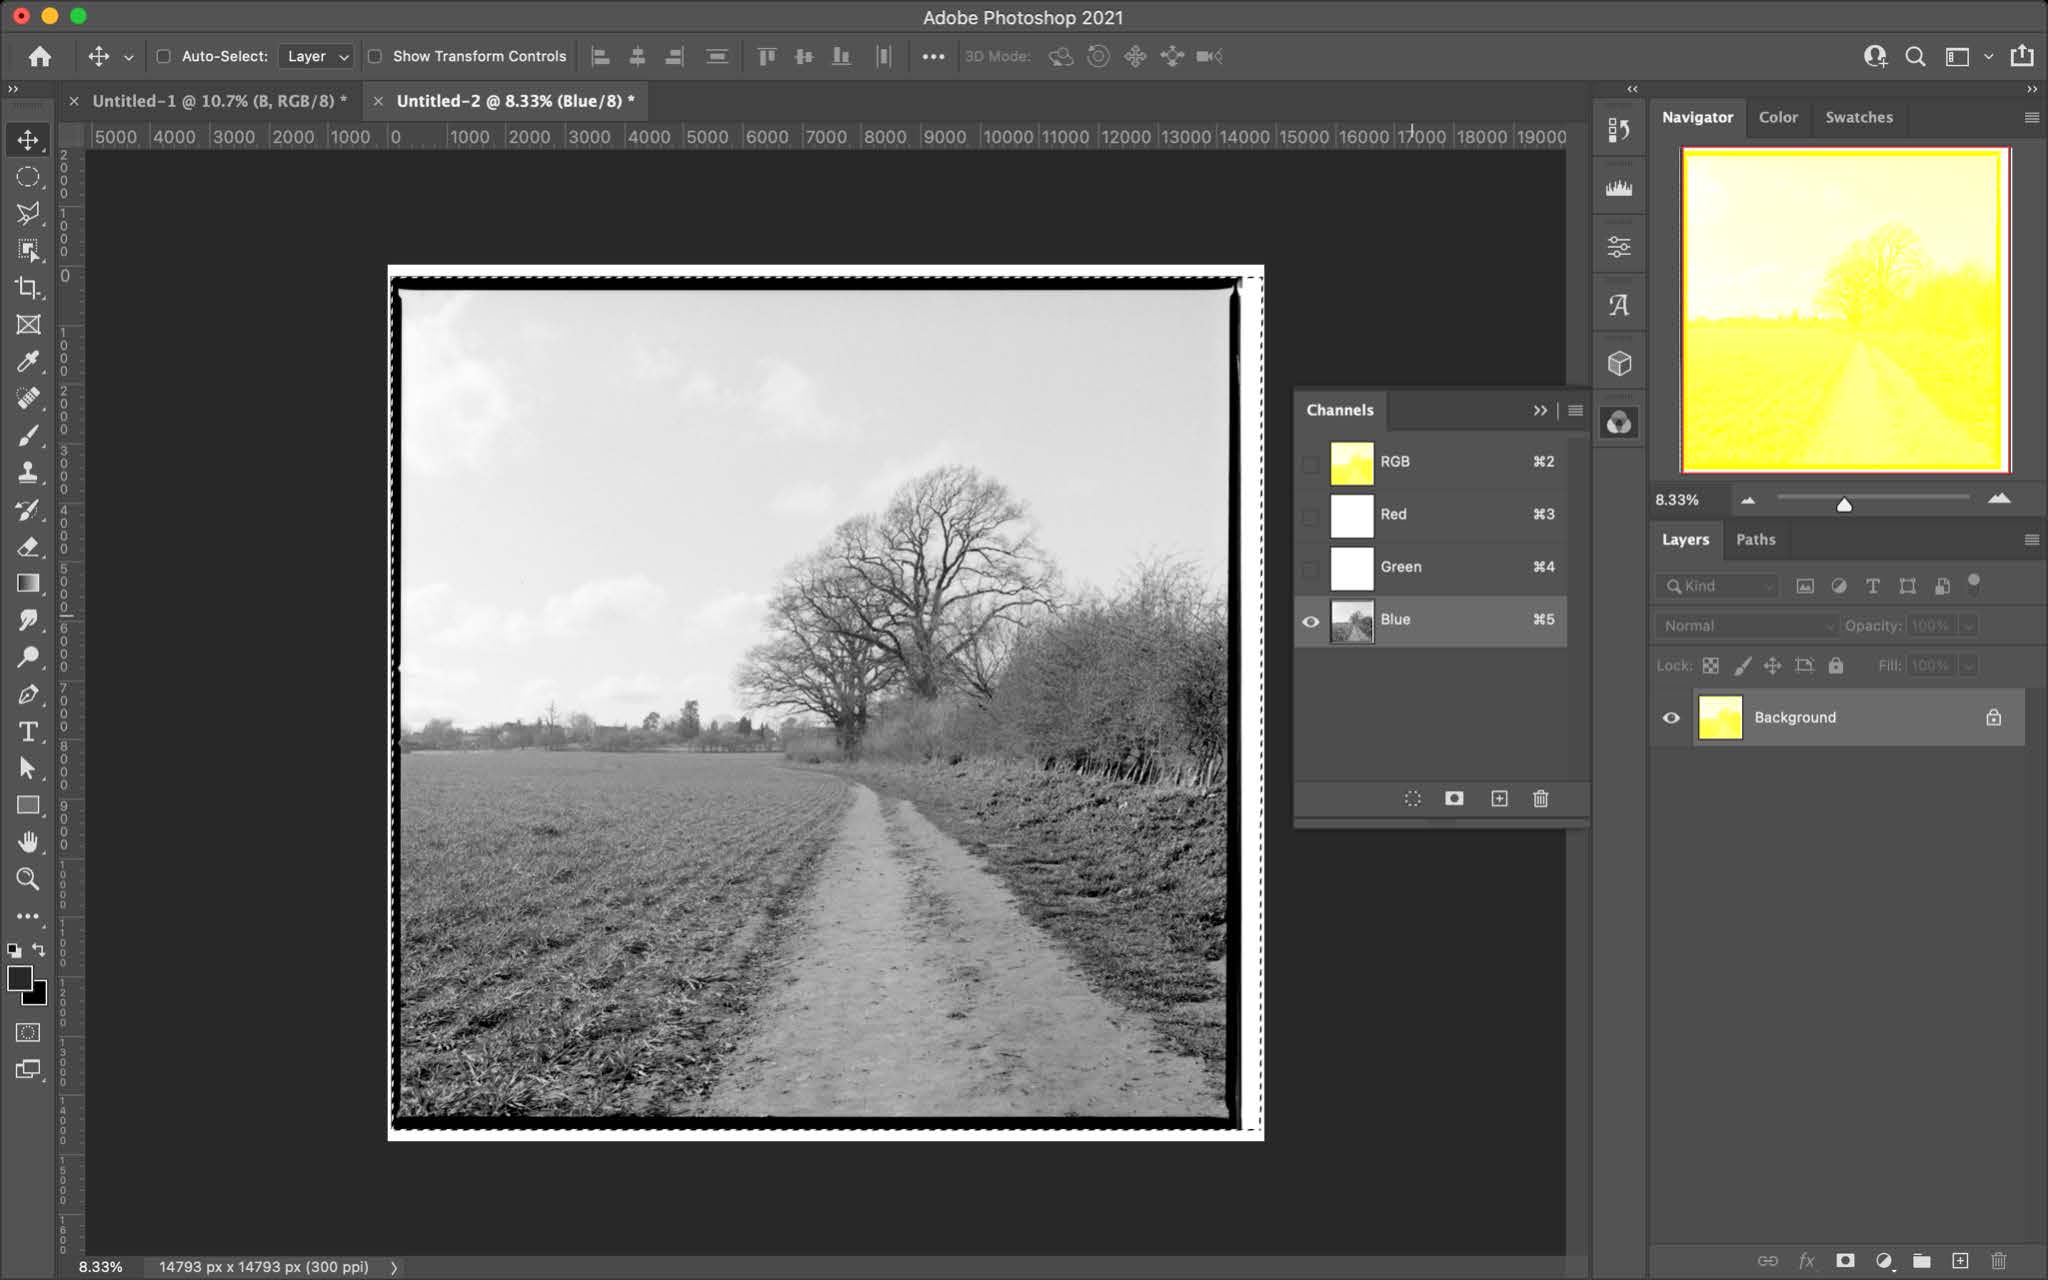
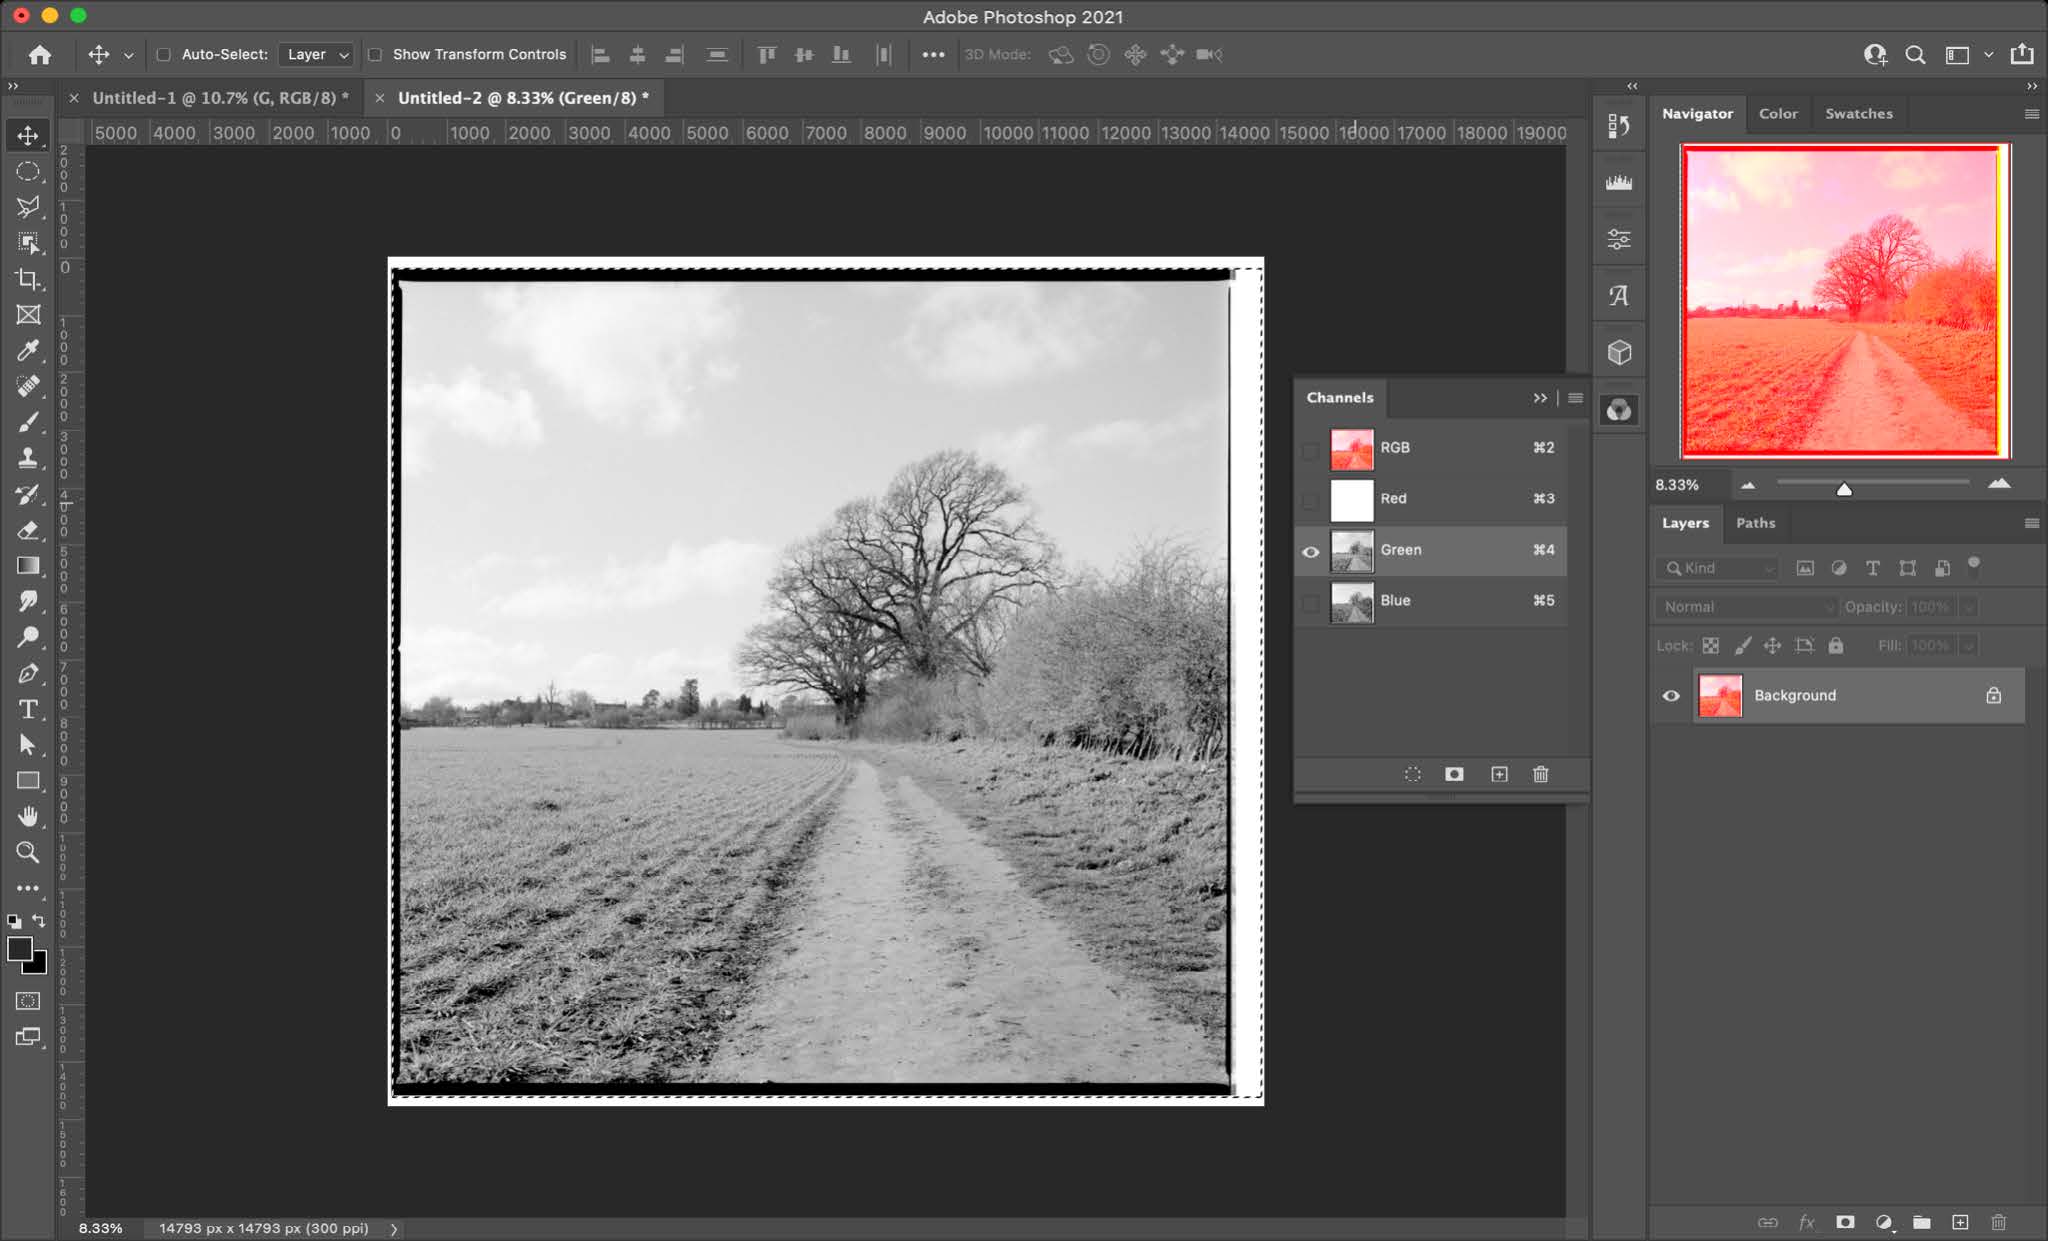
Create a new canvas. Be sure to make the size of the new canvas the same size as the stacked images and open the channel panel.
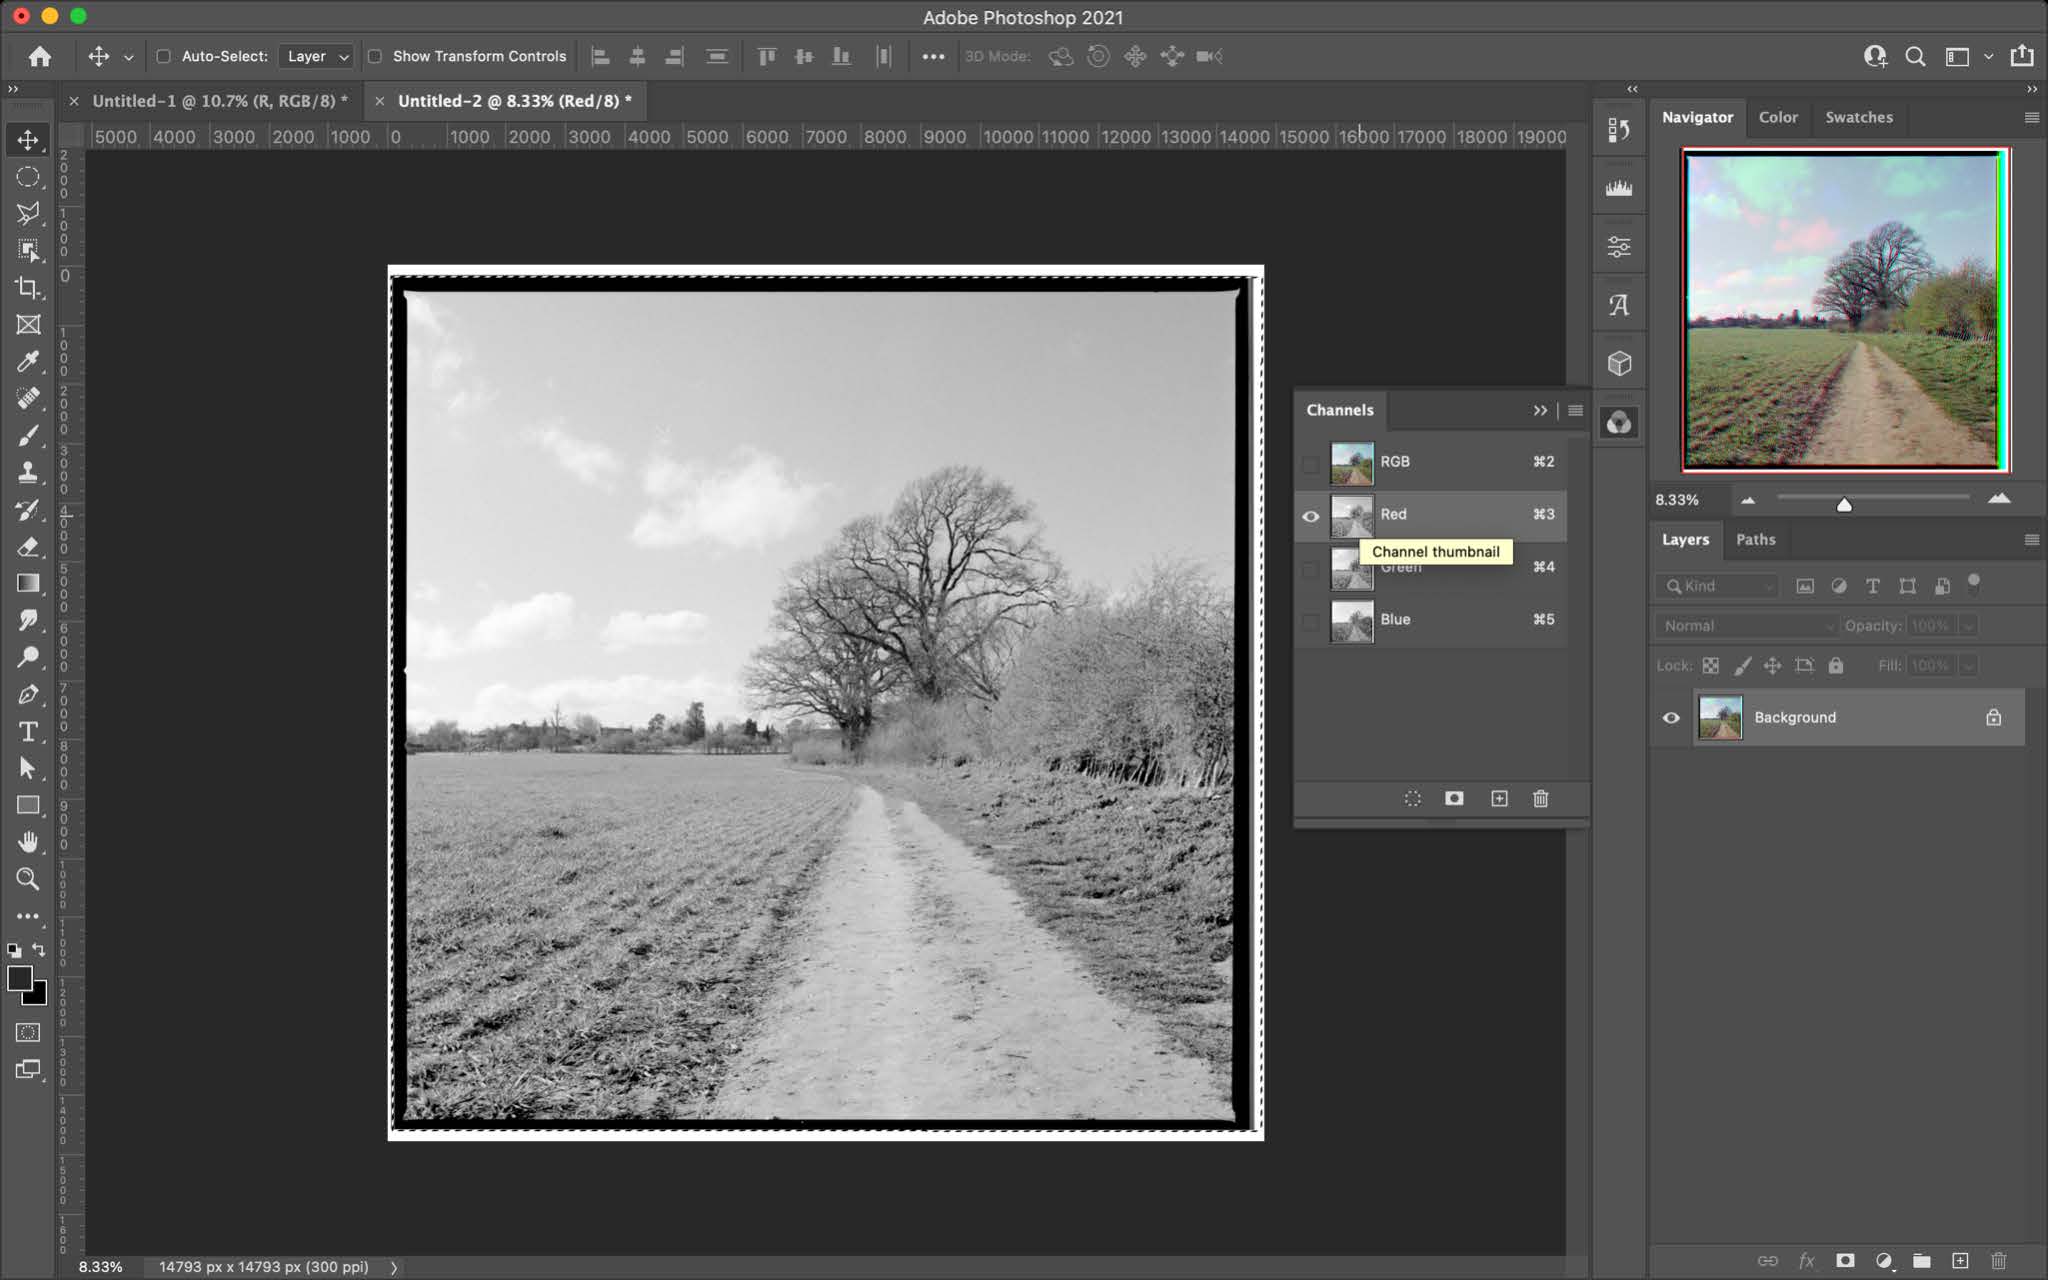
Go back to the stacked images and show only your blue layer, select all and copy. Now go back into your new file and go to the channel panel and select only the blue channel and hit paste.
Repeat this for the green and red channels and you should have a colour image.
Method 2
You will then need to convert each layer into a smart object. This step isn’t necessary but helps with any adjustments you need to make later on.
Selecting one layer at a time, then using the shortcut cmd+u/crl+u. This should bring up the Hue/Saturation box. You need to click the colorize box. Slide the top slider to the corresponding colour of the named layer, eg: the image shot with the red filter needs to be red.
I have found through experimentation that the saturation slider position has to be in a positive number whereas the lightness slider has to be in a negative position.
The following is a good starting base that I have found for my images.
-
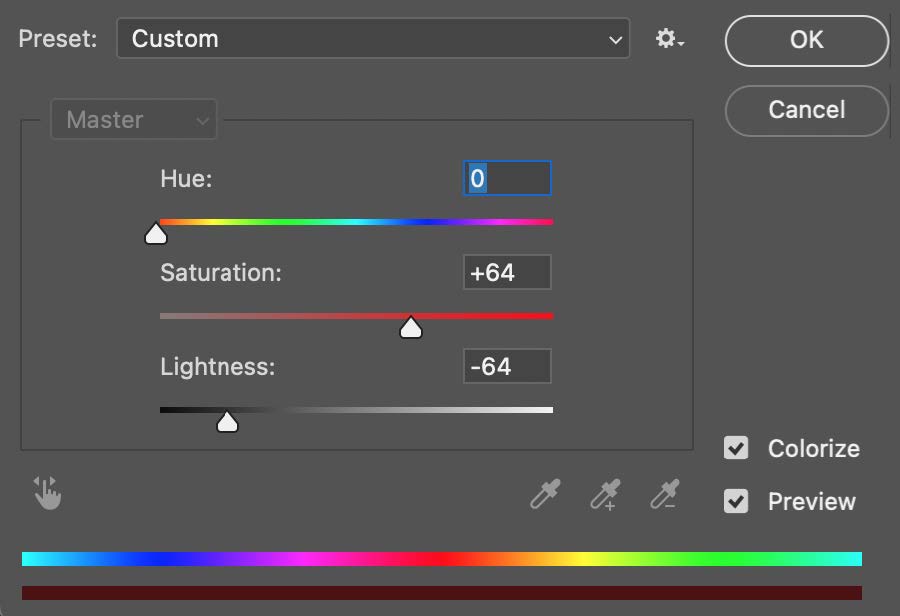
- Red
-
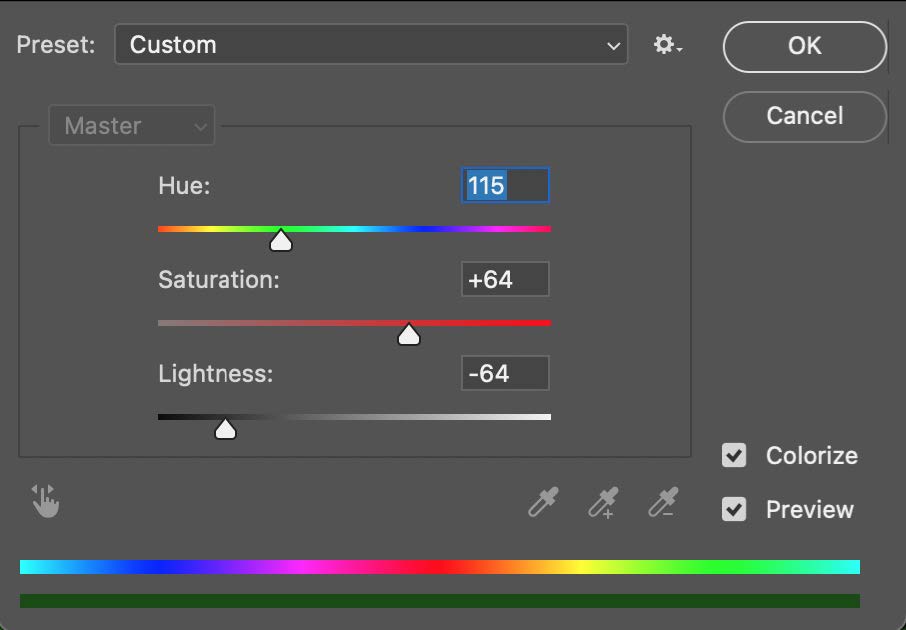
- Green
-
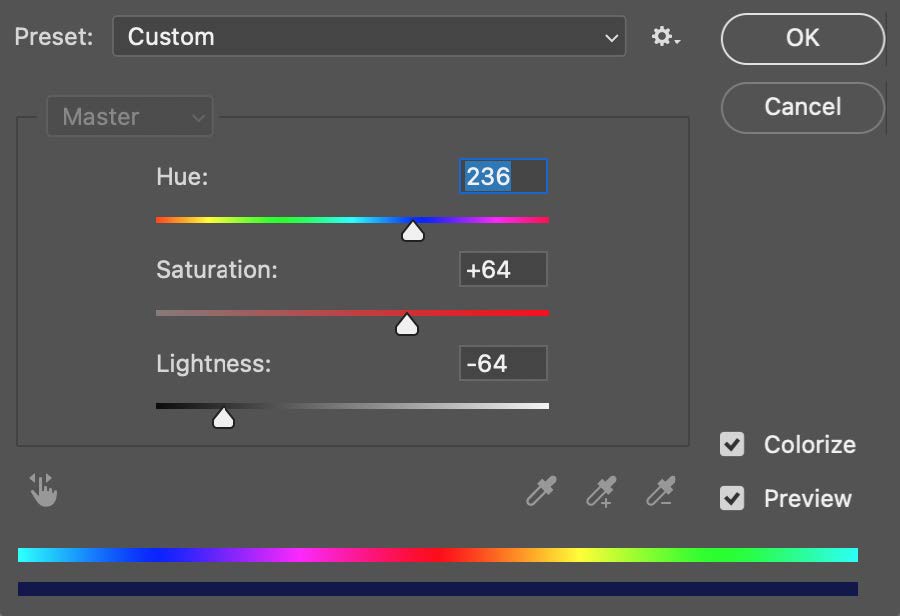
- Blue
Once all the layers are colour coordinated the magic can begin!
Select all the layers and change the blending mode to Lighten. Et Voila! You should see a colour image.
Final Touches
The reason for converting each layer into a smart object in method 2 is so if needed, the hue saturation and brightness of each later can be adjusted. I typically like to add a gentle S curve, brightness adjustment layer and do some general adjustments to taste.
That's how to shoot colour photos with black and white film.
Oddities
Don’t be disheartened if your images are not the correct colour. On overcast days I have found that images come through really purple so I reduce the saturation of the blue and red layers and shift the blue slightly more towards cyan.
-
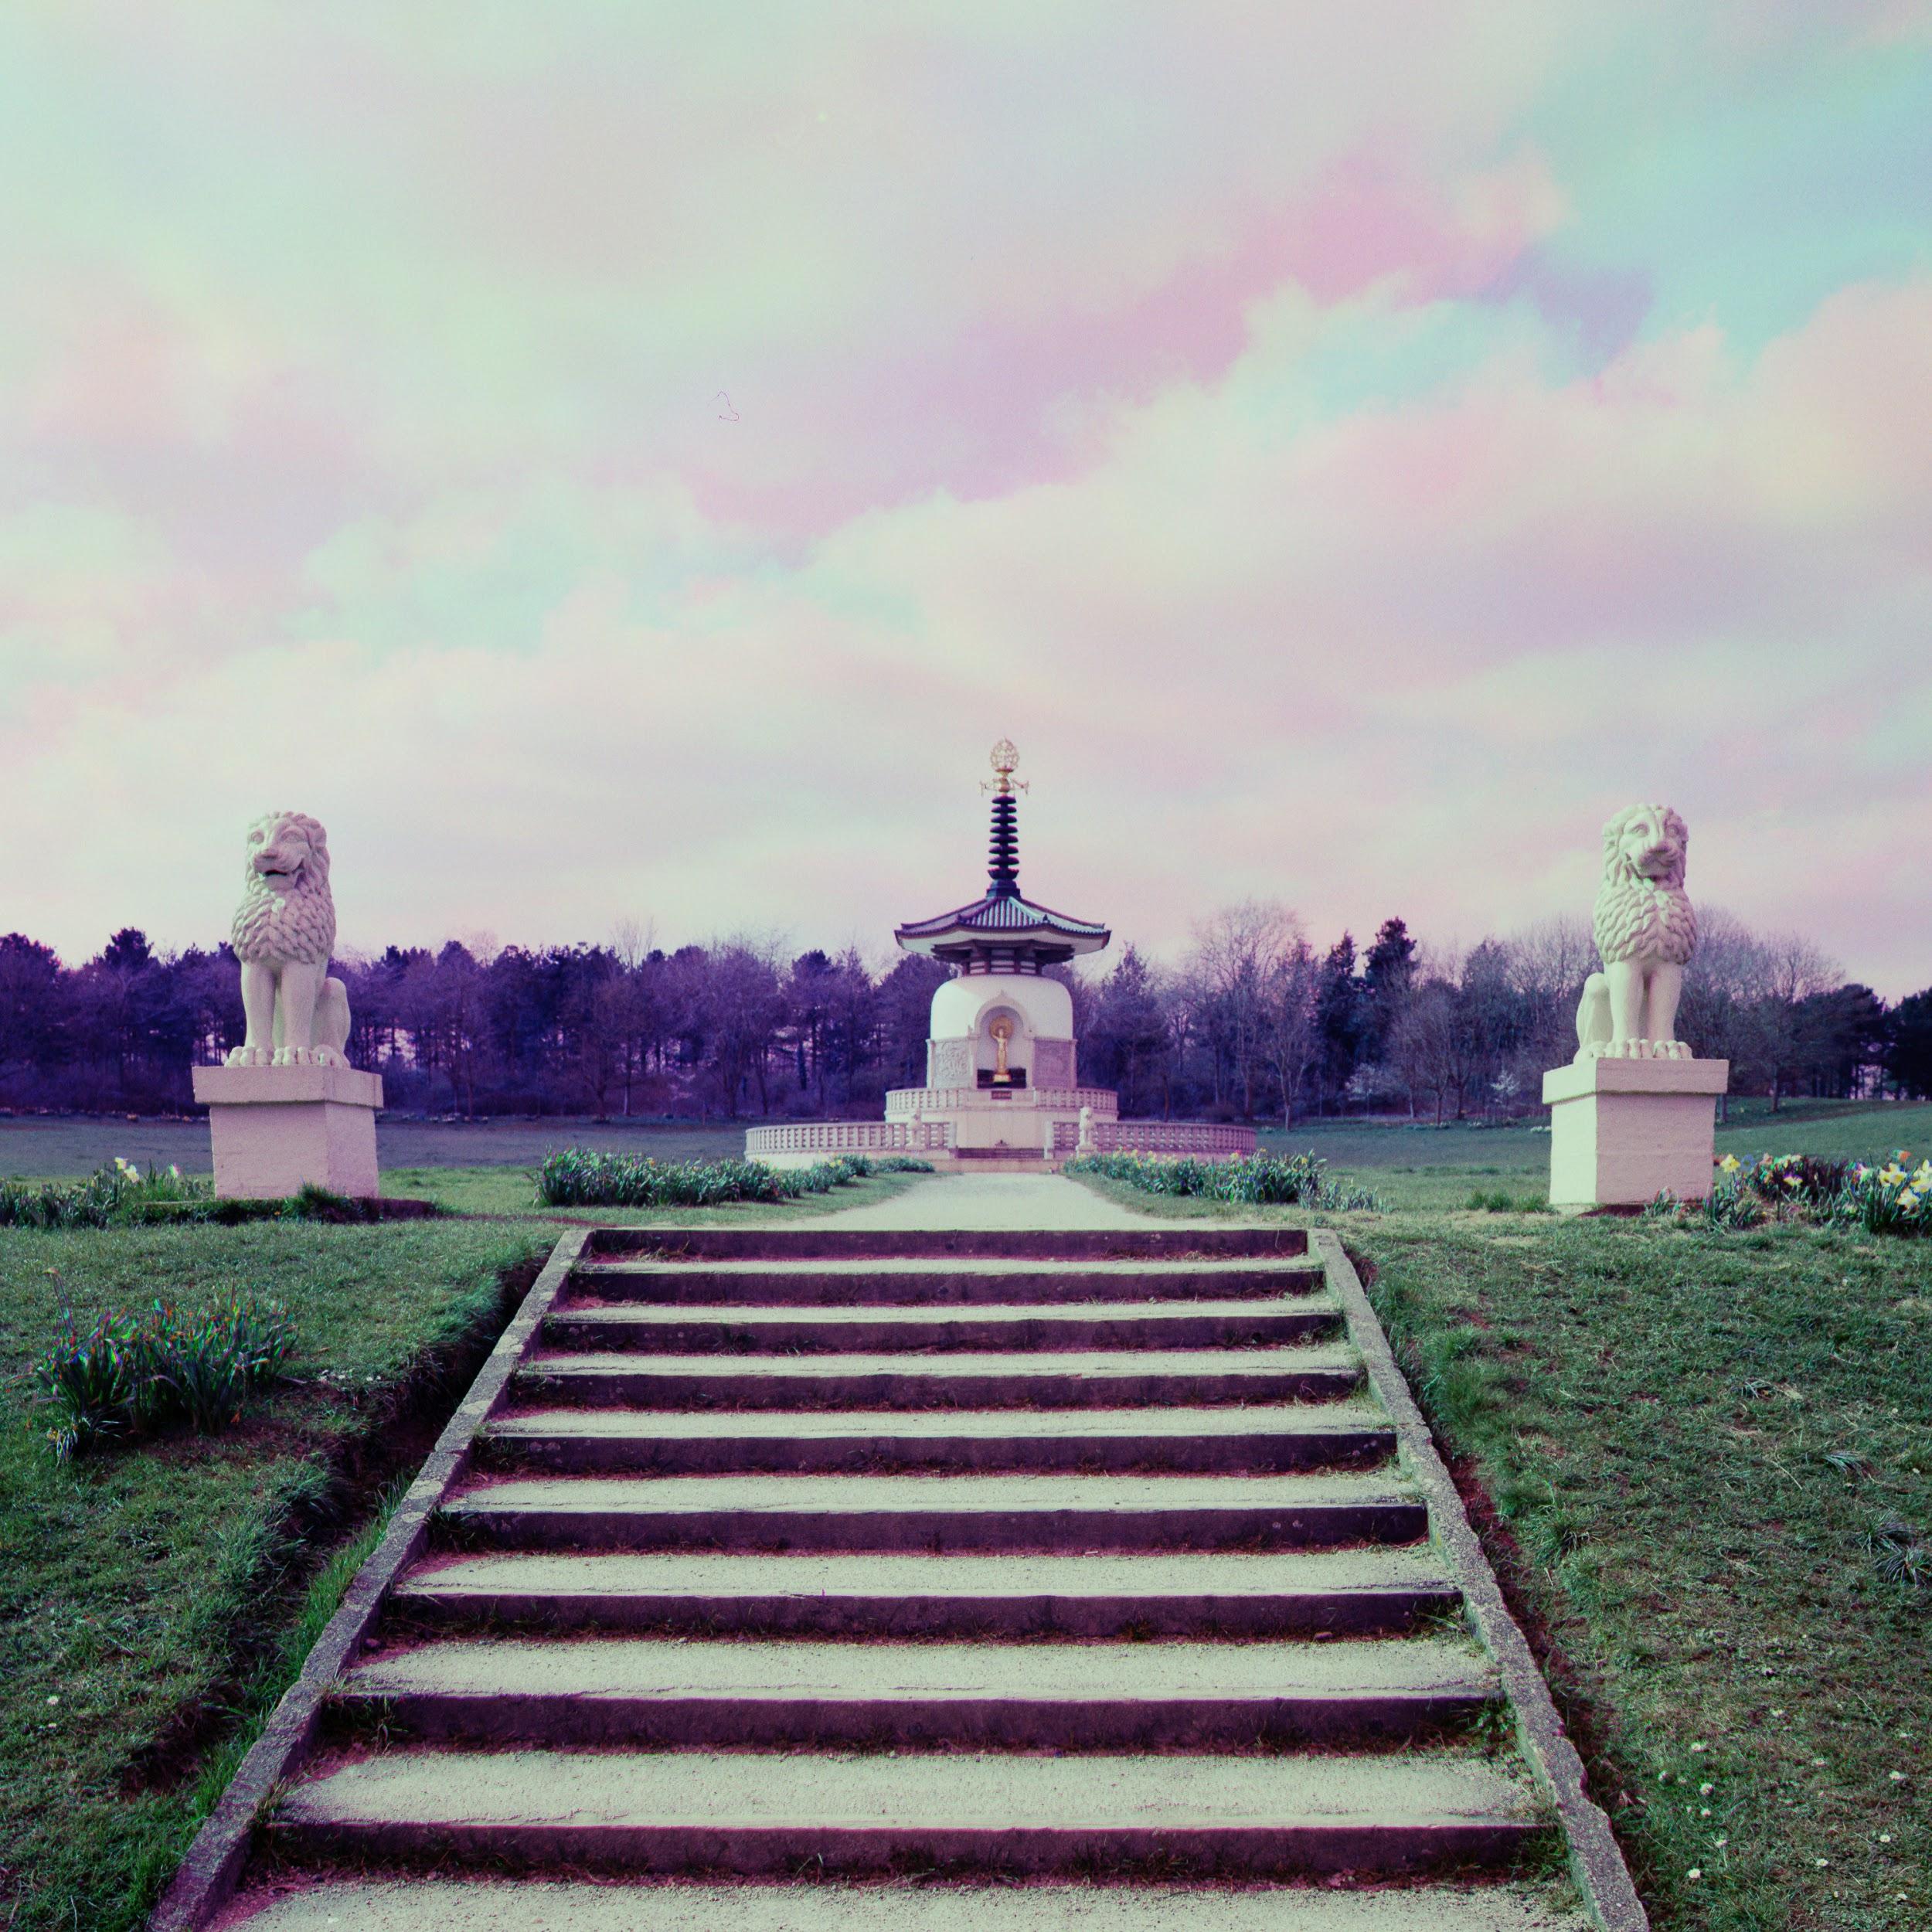
- On the left the bare trees in the background are more purple.
-
- On the right I reduced the saturation and shifted red and blue hues
Taken with HP5 and Zeiss Distagon 50mm FLE
Primarily a black and white shooter
I am primarily a black and white shooter and I dislike colour correction so I am sure someone with more experience could get a better result than I did. In a way I prefer the more abstractpurple shot but at the end of the day it is all down to personal taste.
You will also get strange harris shutter-esque banding arising in certain areas. This may be down to the cloud coverage or light changing whilst swapping filters.
SFX 80mm Planar
In conclusion
This is a very long and laborious way of taking a colour image but at the same time it's exciting and experimental.That being said it is not a very economical process, you get less images on a roll of film, in my case four 6x6 colour images from a roll of 120 or 12 colour images on a 36
exposure film.
I shot with both HP5 and SFX and found I had the best results with the HP5. This might be down to the fact that SFX has an extended sensitivity to red wavelength of light but I found that the majority of my images became harder to control.
SFX 80mm Planar
At the start of this article I mentioned that this process is over 150 years old. I stumbled across it a few years ago but I only experimented with it when I purchased a new camera system and wanted to standardise the size of my filters. Jasper Fforde wrote an article on his website which I read and referenced before trying the process of myself.
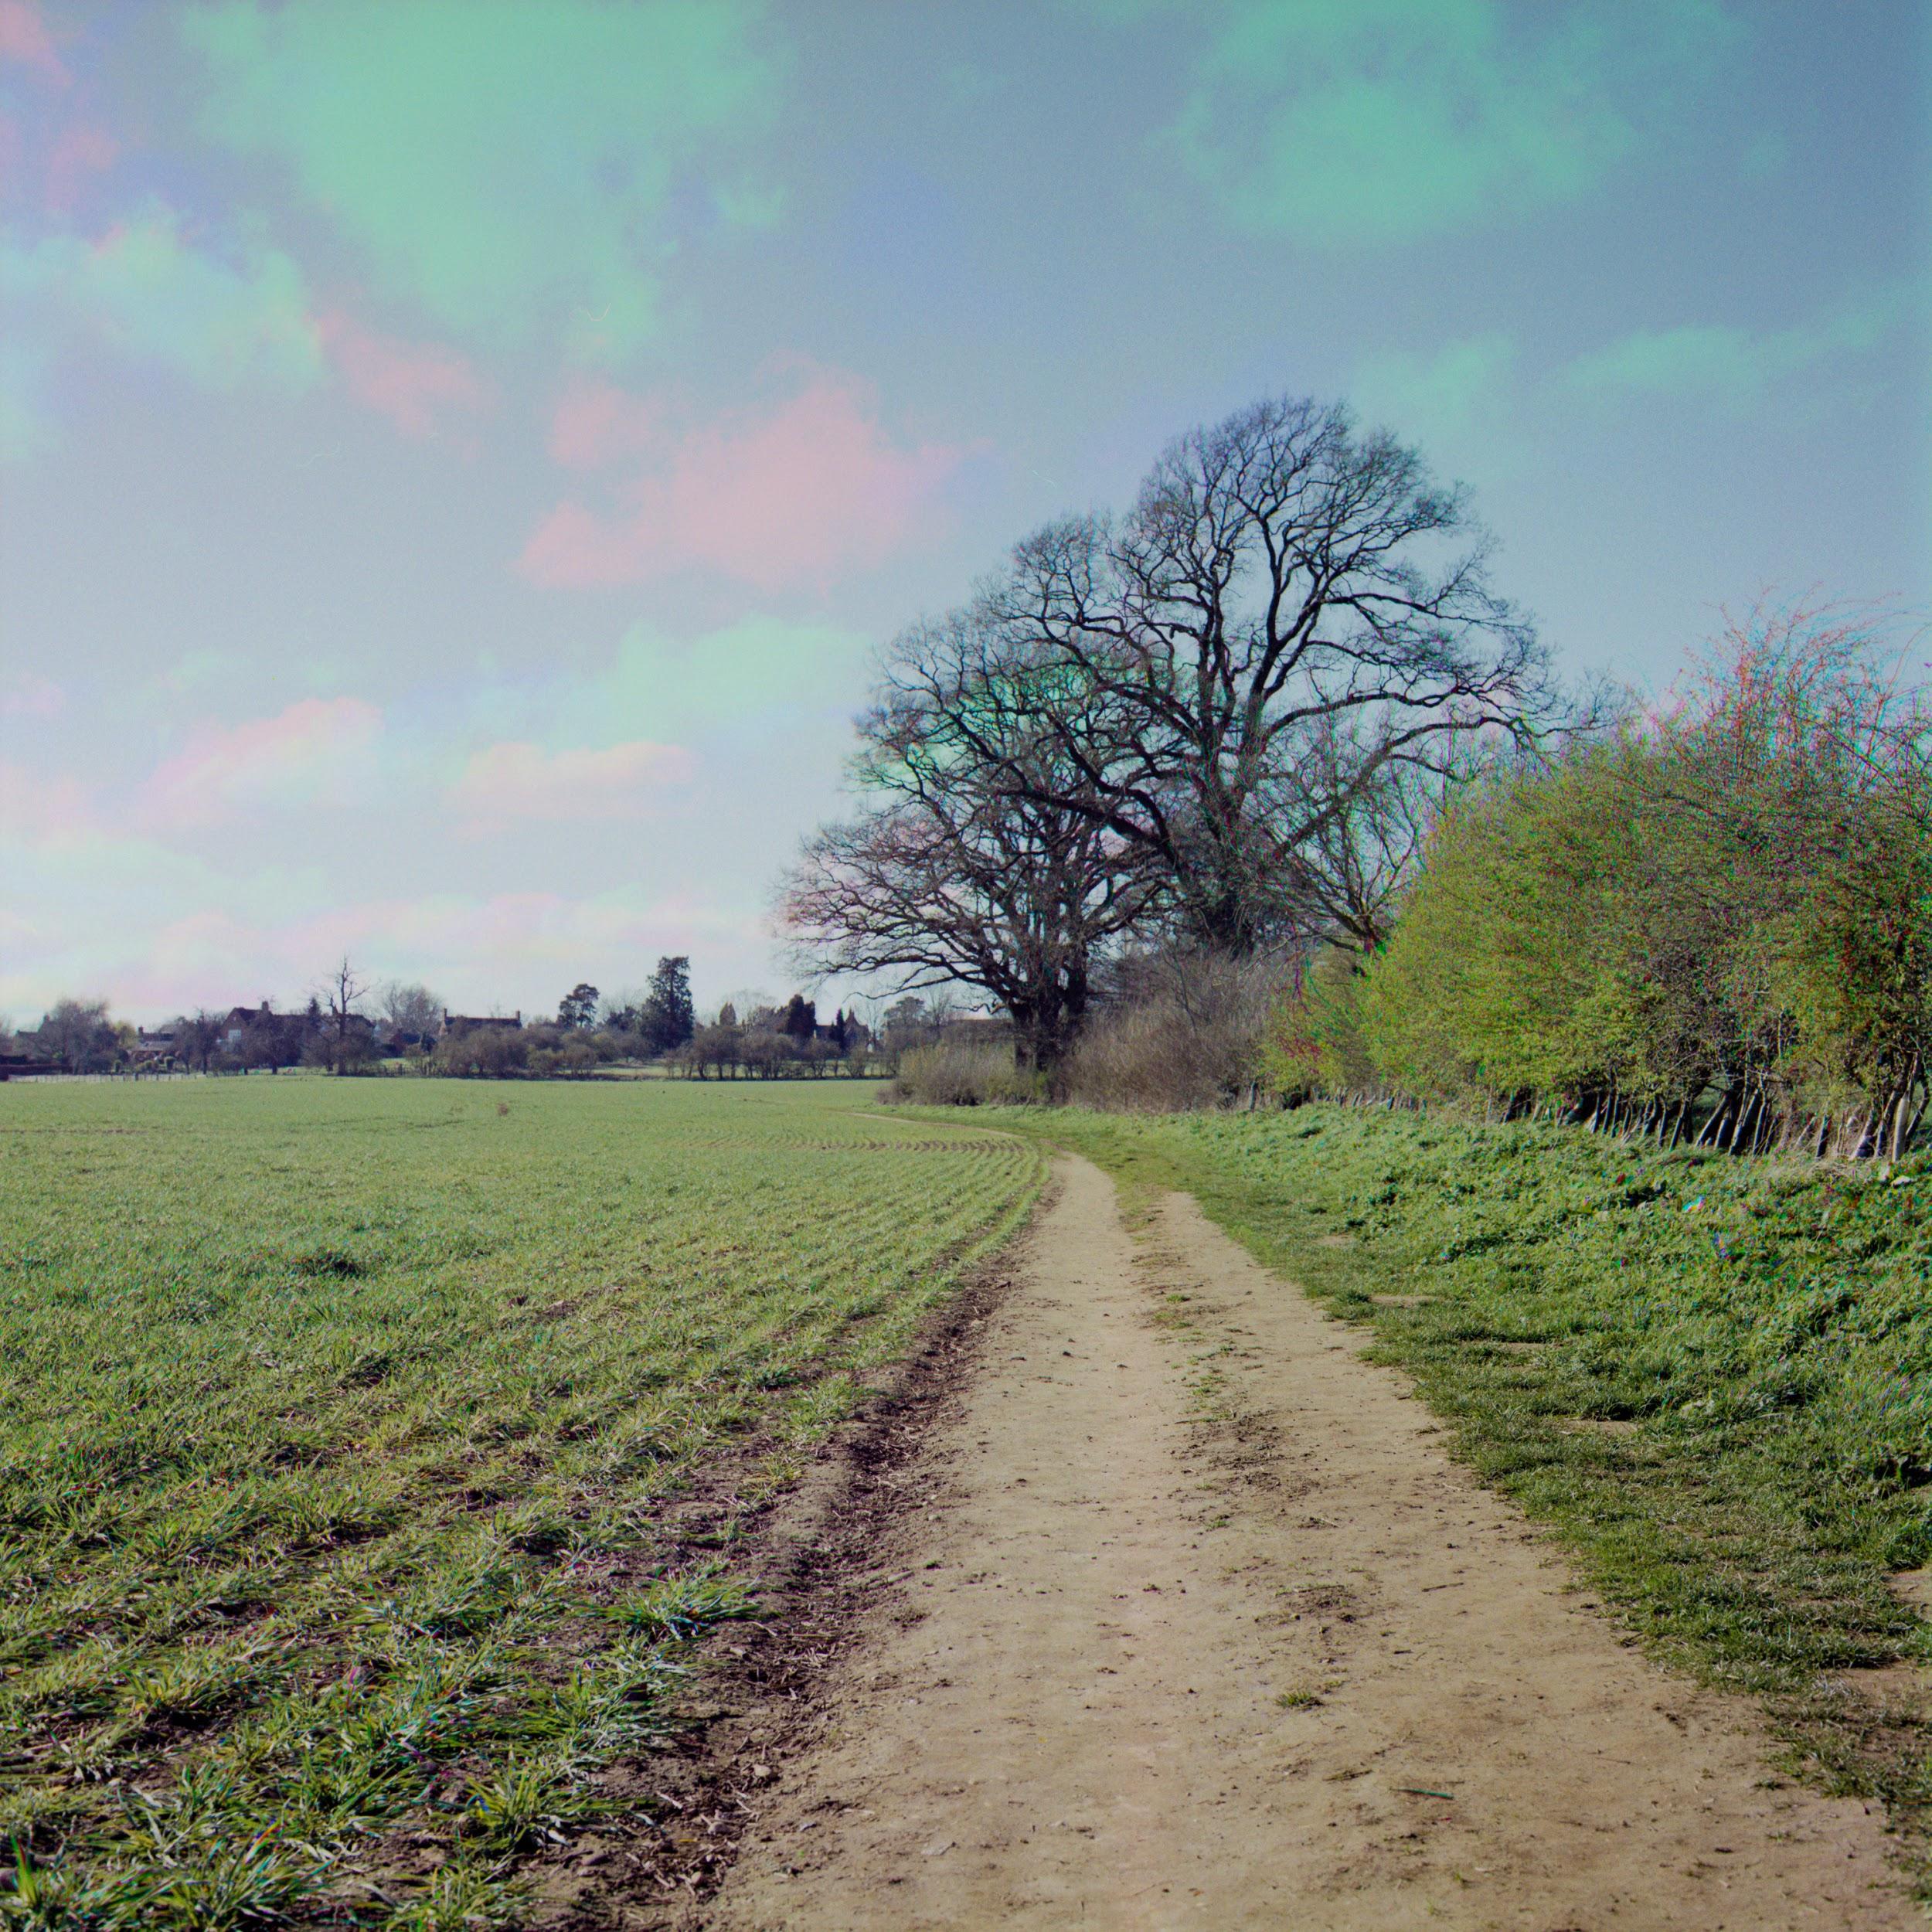
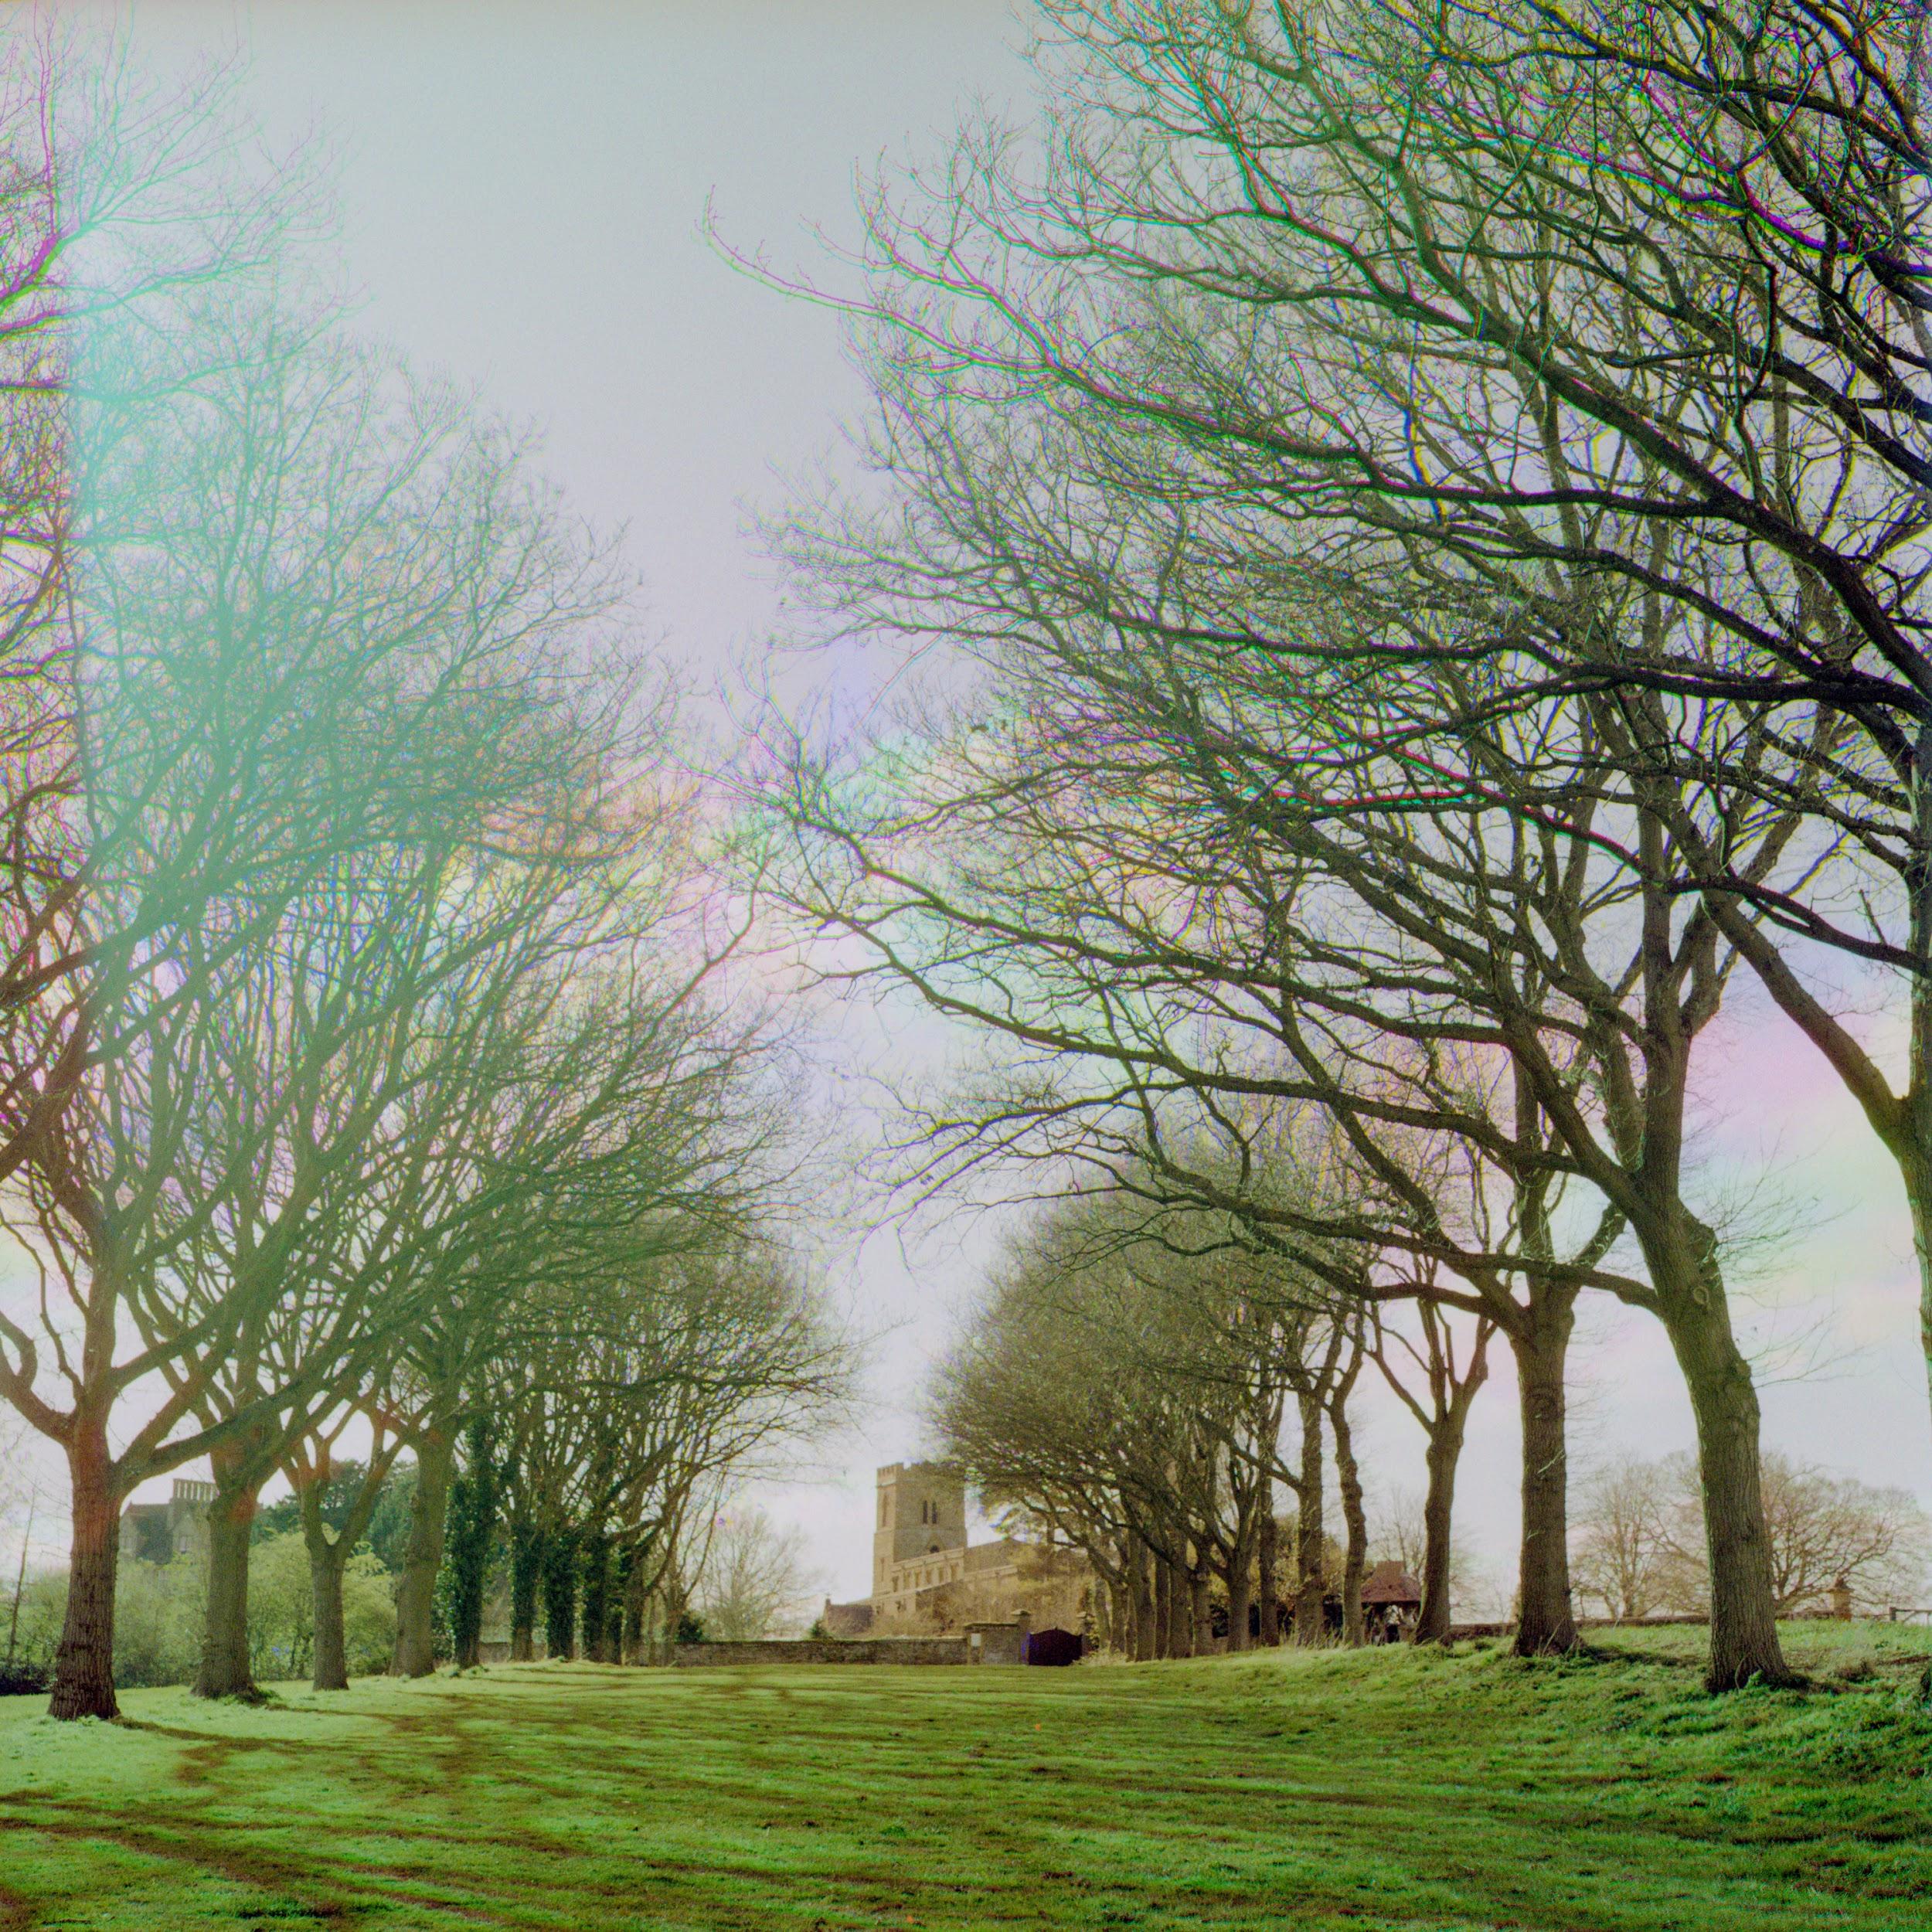
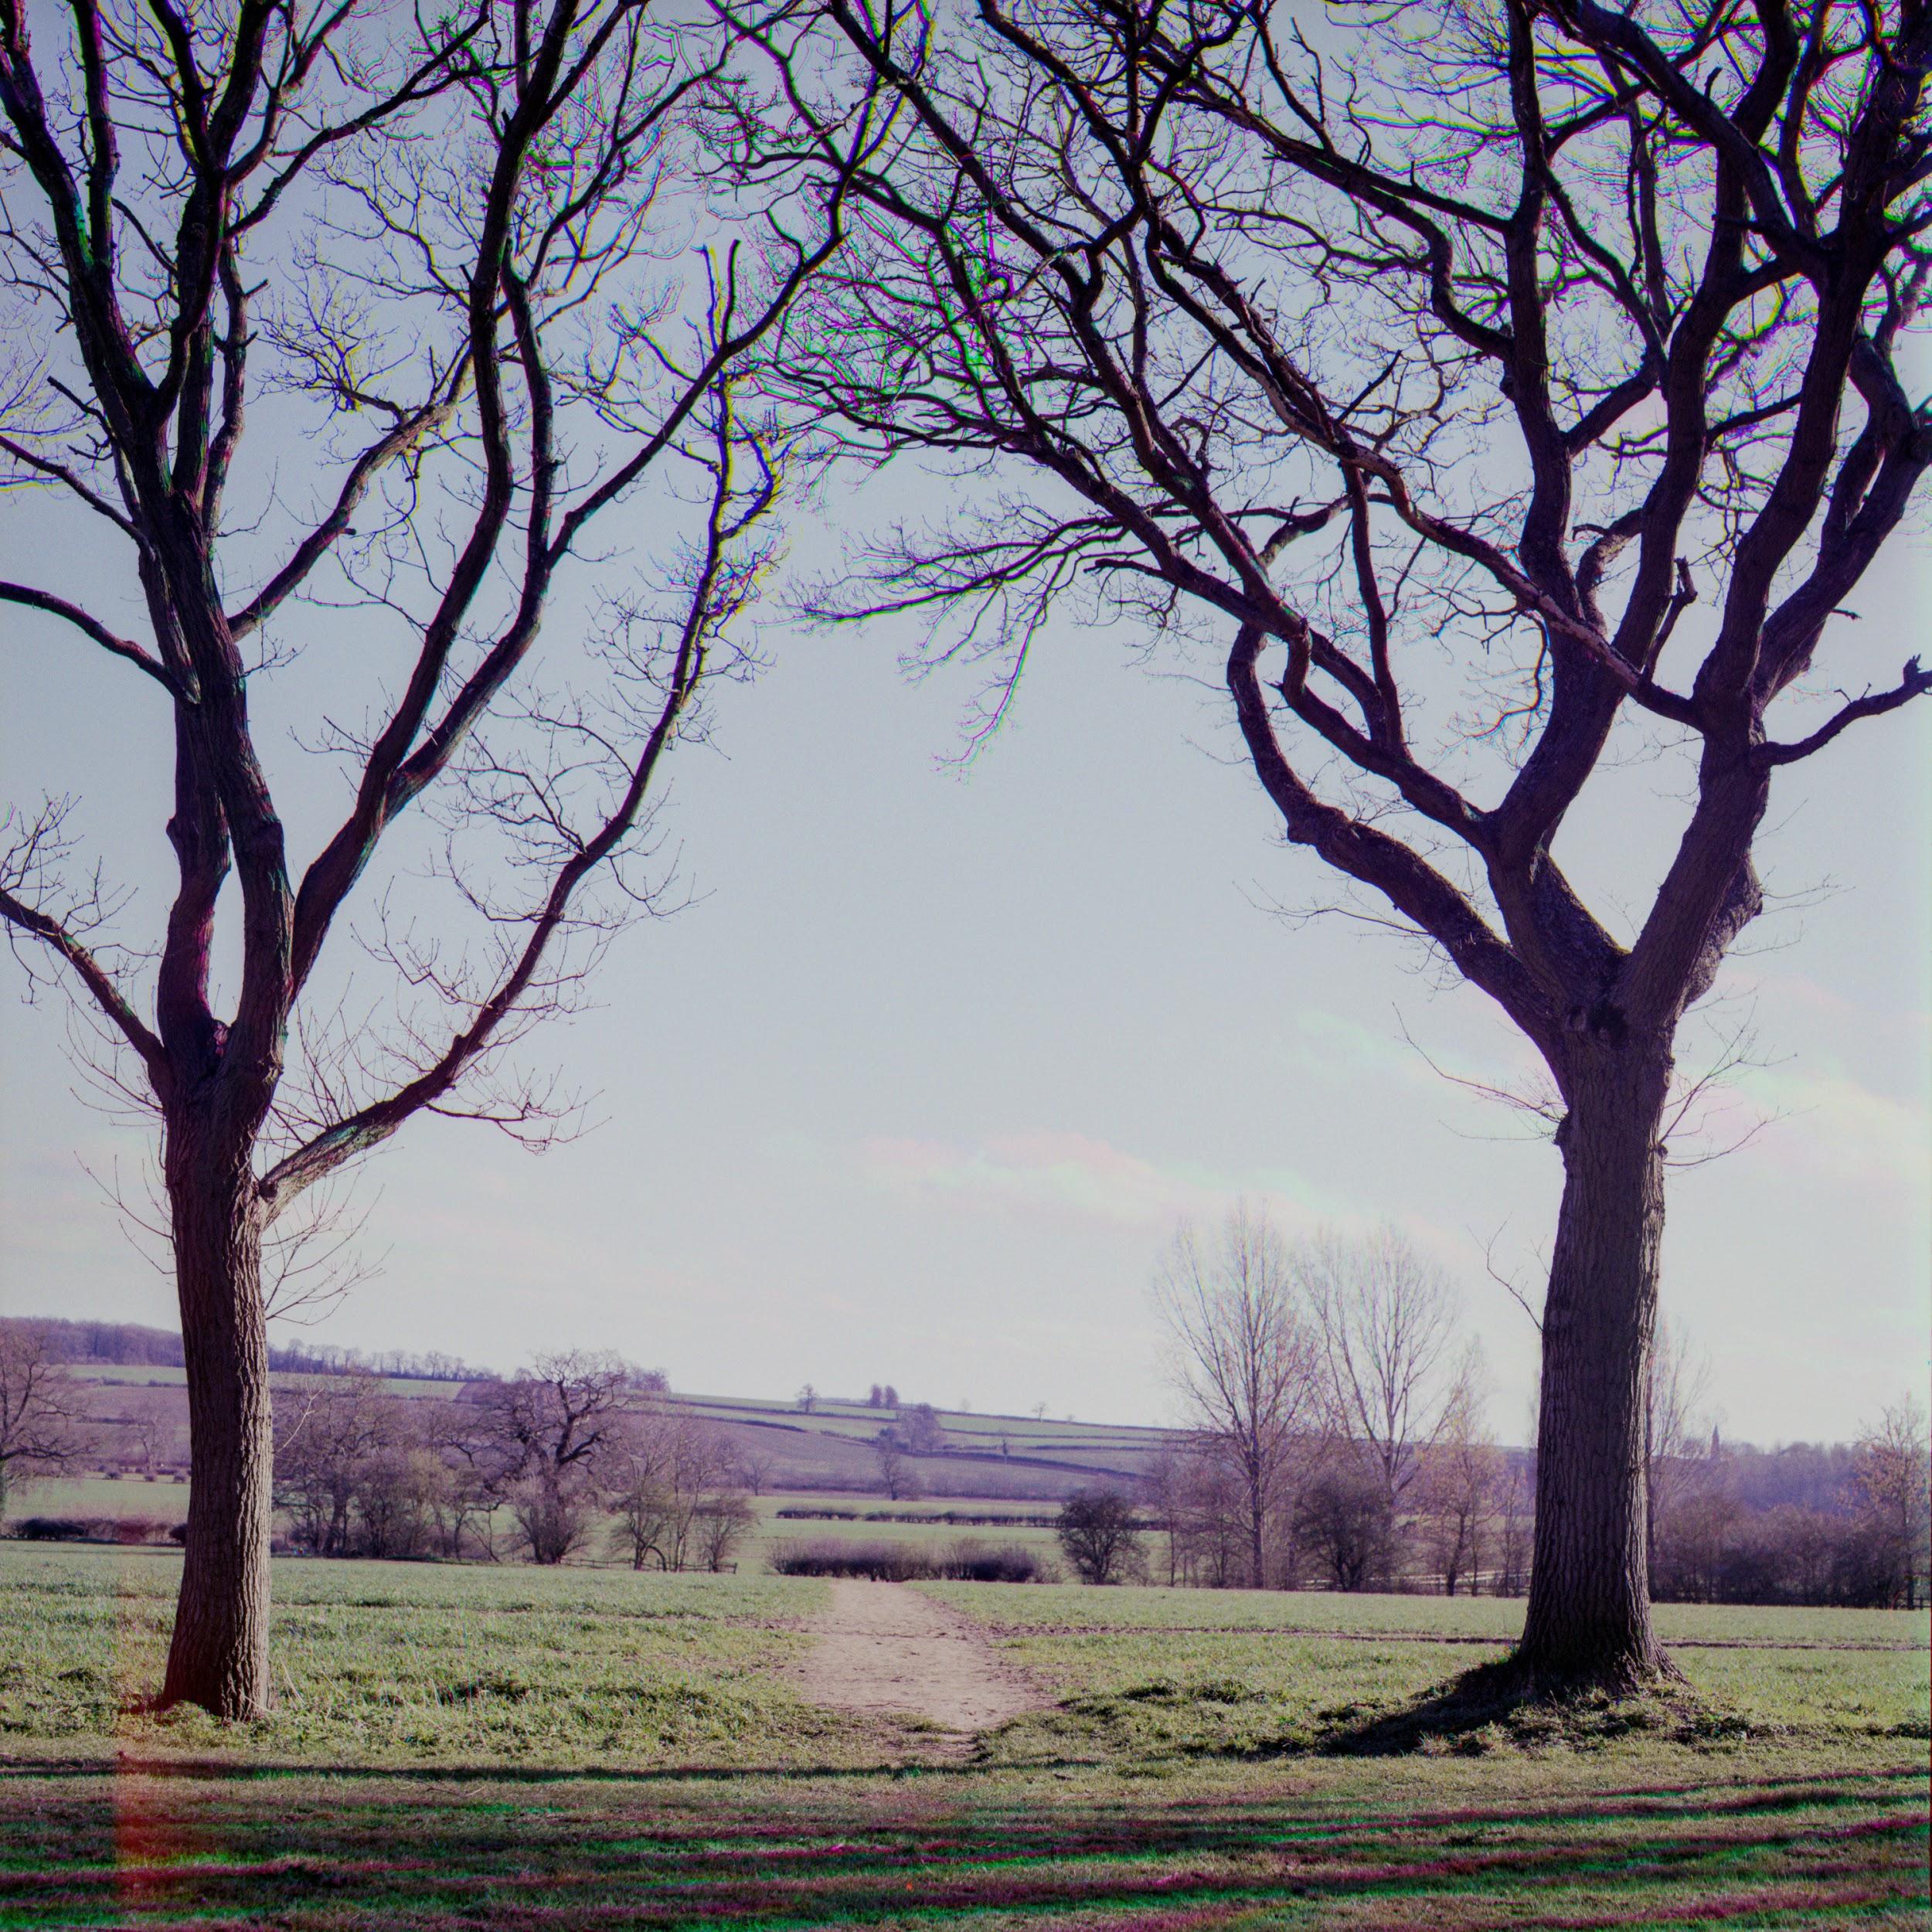
All images above taken with HP5 and 80mm Planar
-
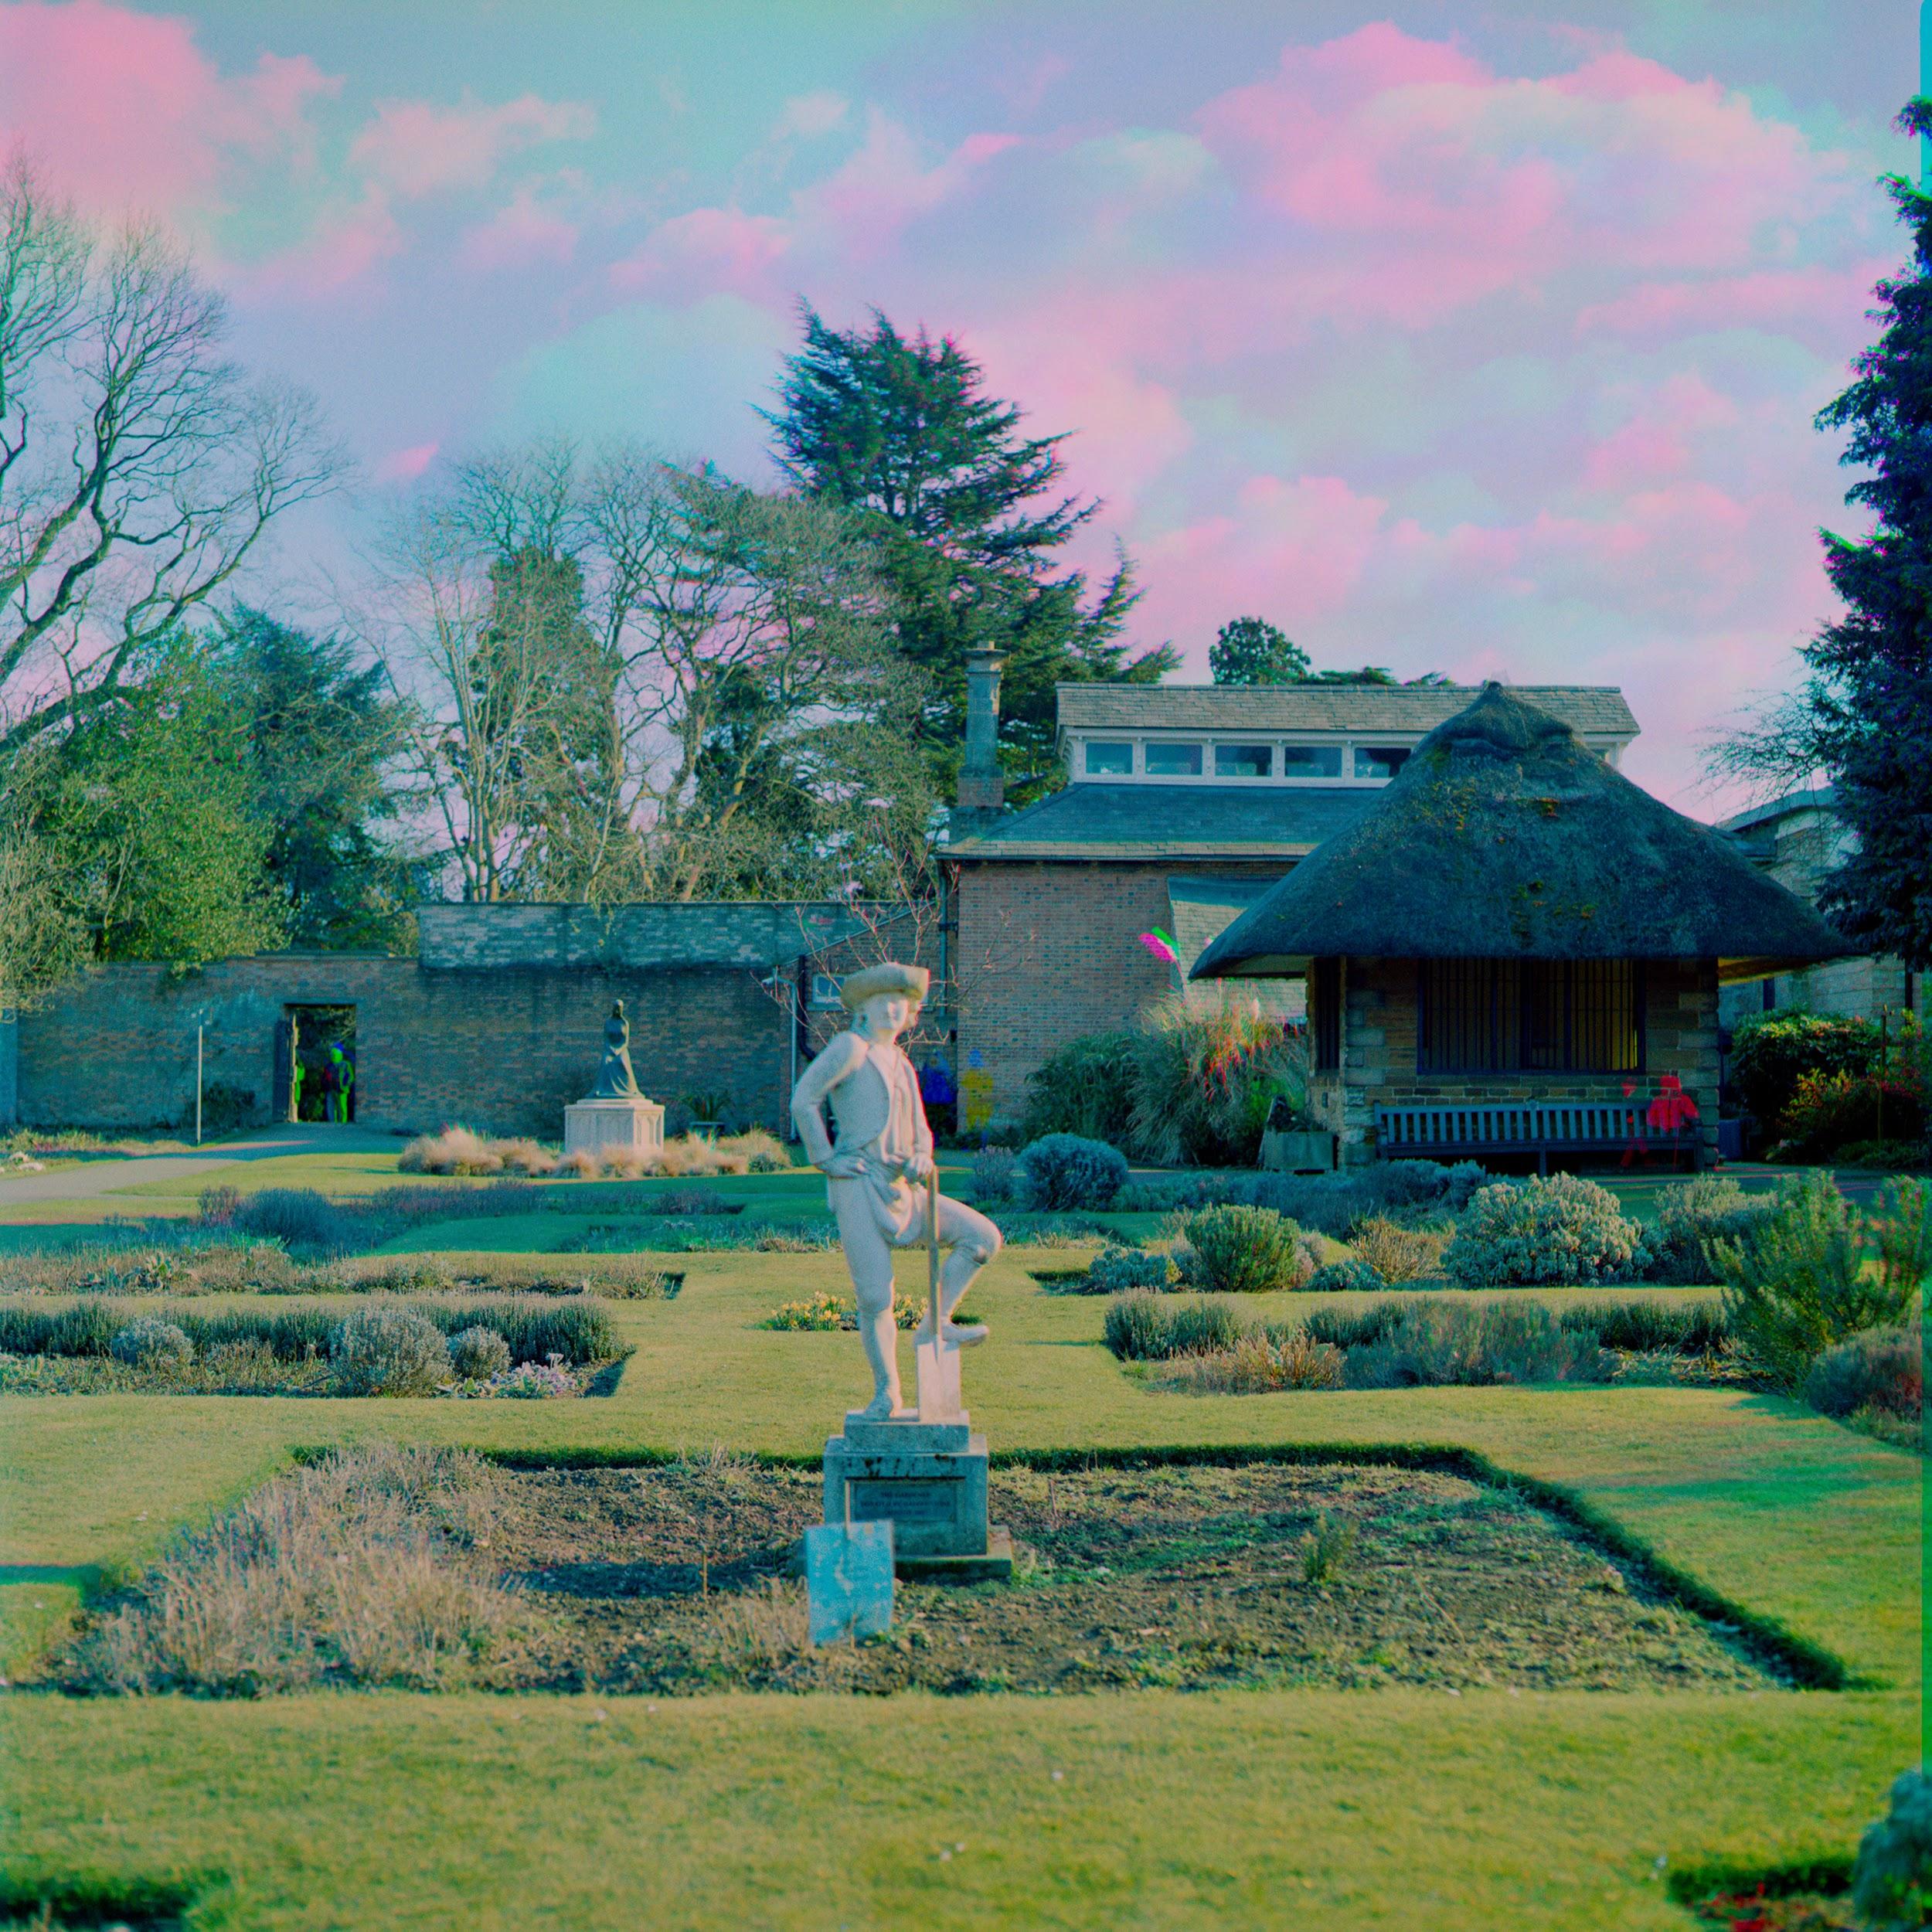
- HP5 with 80mm Planar
-
- HP5 with 50mm Distagon FLE
I personally wouldn’t shoot colour images like this regularly especially nowadays when we have some fantastic colour film stocks! It has been a great experience to look back and draw inspiration from the methodologies of yesteryear. I am currently working on another effect using similar methods to create a very different effect. Perhaps you can guess what it is if I tell you it uses SFX!

Images © Jack Crofts
About The Author
Jack Crofts
I first started shooting film in 2010 whilst learning photography at secondary school. As a class, we were told to shoot five frames each using a Pentax K1000 and a roll of Ilfordu2019s HP5. I couldnu2019t help myself and shot the whole roll and when I saw the negatives I knew I had found something I was passionate about. Although through college I had a part-time job I couldnu2019t afford a digital camera so I stuck to shooting film. It wasnu2019t until 2015 I bought my first digital camera but it only attracted dust as I found the analogue process much more rewarding. It has only been in the past year that I have started experimenting with alternative methods and experimenting with different processes. Eleven years later, still shooting HP5, I still have the same excitement as I did shooting that first roll.
nWebsite: www.jackcrofts.co.uk
nYouTube: www.youtube.com/c/JackCroftsdigitalportfolio
nTwitter: @thejackcrofts
nInstagram:@jackcrofty/@jackcroftsdigitalportfoliou00a0
n