


Shooting large format film Posted On 23rd April 2018 To Learning Zone & Expert Series

An Interest in Large Format
Large format is an immensely rewarding and enjoyable way to make a photograph. It can also feel overwhelming when you’re just starting out, but it doesn’t have to be complicated. This article is for anyone with an interest in large format.
I got into 4x5 because I wanted to challenge myself, and to try something new. Over the last two years it has become my favourite way to take a photograph. There’s something special about slowing down and being so deliberate with each image. It seems like there’s a lot you need to know; when you’re first beginning it can feel a little intimidating. Once you're familiar with the process, it will feel like second nature in no time, and before long you won’t even have to think about it.
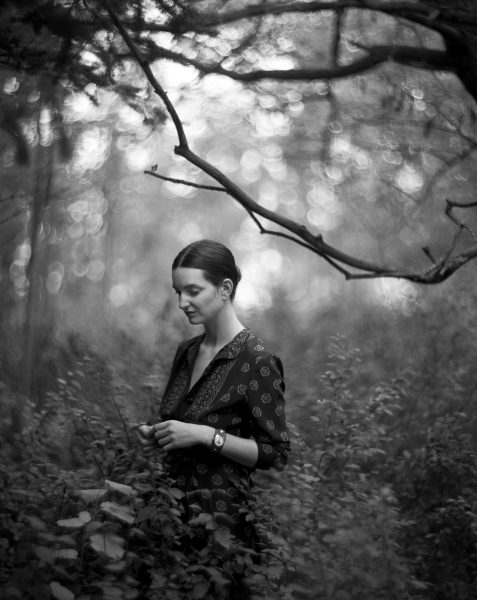
Beautiful tones
Right from the get go it’s obvious to most people that it’s a lot slower to shoot large format. You’re not running around taking shots, it’s a deliberate and methodical process. That’s a big thing for me, I want to do all my work on the image before it’s taken. Often when shooting my 4x5 camera I like to take a step back and evaluate what’s on the big, beautiful view-screen. You come to feel comfortable working this way and you can look at the world in front of you as if it were a printed photograph. Does this light look good? What about the angle? Should I move the person, or the camera? How should I change this, what works and what doesn’t?
The second reason I love shooting large format is the quality of the image. Since the piece of film is so big in comparison to 35mm or 120, the grain is much less noticeable. The transition of tones is beautiful; you’ll find that there is a richness to the quality when shooting such large film. In the end, choosing large format is about trade-offs. I love 35mm and 120 film, and will always continue to use them. With 4x5, what you lose in weight, and portability, you gain in quality of the negative/scan/print.
My Set Up
- My set-up is pretty straight forward:
- I use a Speed Graphic press camera, it has the ability to use lenses without shutters inside them. But can also use lenses with shutters, it is versatile this way.
- It has an internal shutter that goes up to 1/1000. Which is useful for me as I shoot portraits and want flexibility shooting in bright light.
- My main lens is a 178mm f/2.5 Aero Ektar, it’s my favourite lens for any camera I’ve owned, and I love working with it. It’s what I shoot 95% of my work with.
- I also have a 90mm lens for when I need something wide.
Research
The majority of my work is portraits, so this helped me narrow down a selection of bodies and lenses.
I knew that a 150mm 4x5 lens is usually considered “normal”, but that was about all I knew at the time. I did a lot of reading online. Browsing images and looking at posts on forums of photographers using different set-ups. I didn’t need lots of movements with my camera, which are very useful for architecture and landscape photography. What I did need was something that would allow me to shoot in bright sunshine if necessary, with more control over shutter speed. I also needed a camera body that would allow me to use modified lenses from other systems.
Often you’ll find it’s the lenses that have the shutter inside them, not the camera body. I picked the Speed Graphic because it has a shutter in the body. Not only can it use non shuttered lenses, it can also use the shuttered ones when setup properly. A big plus for me.
What will you want out of your system? There are so many options out there it’s a little intimidating to do some research on your own. Unfortunately there isn’t one single resource out there for large format cameras and lenses. Do as much online research as you can about what can meet your requirements. I found images I liked, and worked backwards from there - trying to find out as much as I could about the gear used.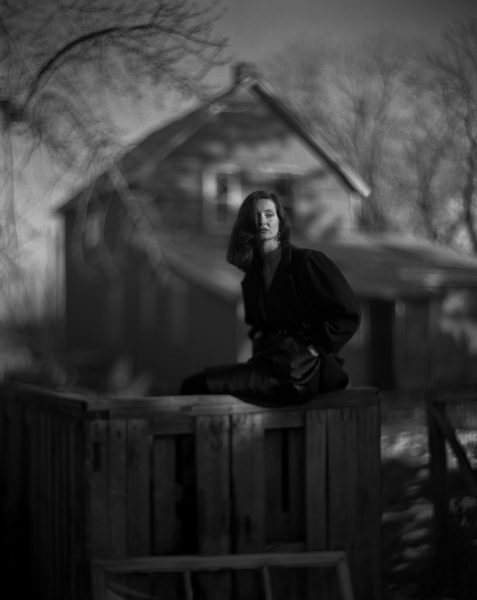
A typical shoot
One of the biggest questions I get is: how is it working with large format? I'll run down a typical shoot for you. Most of this could can be applied to any kind of photography, not only portraits.
Film decision is always first for me. Where I’ll be shooting, what results I want from the film and what the light will be like are all considerations. If I know I’ll be working outdoors then I bring more slower speed film, like FP4+. If I’m shooting a lot indoors and know the light may be low, I will bring more HP5+ since it is a higher ISO film and pushes well. Film speed is my main concern. The last thing I want to do when shooting is have the wrong kind of film for the type of light I'm in. Often this means being over-prepared. There are things to think about like color, or black and white, but that's best left up to you on a shoot by shoot basis.
Loading film
Once I have my film picked, it’s time to load the film into holders.
At first, like with most things in this process, this may feel alien to you. Loading film is done in the dark, It’s all done by feel. (I use a table top film tent that I can put my arms into and work with film away from light).
You open the film holder first by drawing out the darkslide a little, to release a flap at the bottom of the holder; this exposes the film retaining tracks. Each film holder takes two sheets of film. The film has little notches on one corner, all large format film does, and each film has it’s own unique notch code. This means it’s quick and easy to tell which way the film goes into the film holders. I find the notch of the film with my fingers. Gently running along the edge/corner of the film sheet until I feel the notches. I position the notches so they’re on the bottom left corner. I find this the easiest way to always know the emulsion is facing the right way in the holder. Then insert the film that way into the holder. There’s a little gap ahead of the film-retaining tracks to slide the film in. Once you get it once you’ll know how simple it is.
Having a routine is important! It will help you make less mistakes, and help you to trouble shoot later if any problems arise. Get into the mindset of having a routine with everything you do with large format.
Be prepared
Once the film is all ready to go I use some masking tape to label each holder with what kind of film I have inside. This way there will never be any confusion as to what kind of film you have inside. Believe me, you don’t want to have two pieces of film left while shooting and have no idea if it’s ISO-125 film or ISO-400. I always bring a pen with me while I’m shooting so I can write on the label if the film needs pushing/pulling. This will remove any confusion during the shoot, or after with development.
Use a tripod
Something you’ll want to consider: get a good enough tripod. I say good enough because for the last two years Ive been using an old clunky cheap model from the 90’s that I found in my grandparents garage. It wasn’t super stable, but it worked. Something lesser would have made life too difficult with supporting the camera. Stability is always important. Once the camera is mounted on the tripod I attach the cable release, something worth investing in. It will eliminate a lot of movement when taking a photo since you’re not pressing the shutter on the camera or the lens. Get one, use it. It’s a cheap solution for camera shake.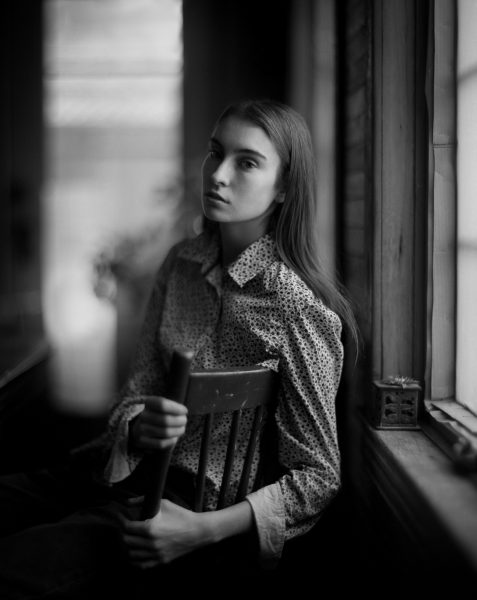
Take your time
Working with the 4x5 is something special, but it’s also slow. For me this is a good thing. Be prepared to slow way down, more than you thought you would while making images. Give yourself the time and space to work with what you have in front of you.
I spend the majority of my shoots looking through the camera, not actually taking the photo. Move, look, adjust, look, move again - look - adjust again... look. And so on. Take your time and enjoy it. Once everything is lined up and I feel happy about things, I always use a loupe for fine focusing on the screen. I use a 5x loupe to see close up on the back viewing screen, this lets me get super precise focus on the eyes. You could apply that to anything you’re trying to focus on, not only people. Things may look in focus okay enough, but with a loupe you can nail it down. This is another must have for me. Luckily they’re cheap too.
In conversation
During this process of setting up, moving, adjusting and focusing, I’m always in conversation with the person I’m photographing. I don’t bore them with technical details or photo specifics, but I like to talk about what we’re doing. Sometimes I let them look through the back of the camera to see what it’s like, and what I’m seeing. Almost every time they are interested in how cool it looks through the viewing screen. The world is upside down and backwards, but it also shows the depth (or lack of depth in some cases) in the image before you. Once you've seen this, you'll likely become hooked. Much of the love for shooting large format comes from having the camera on a tripod and standing back to have a mindful look.
Metering
Metering is something I get asked about often, and it's something that I asked about when I started out. There is no trick to it; I use a light meter to read the light in the scene, taking many readings and then deciding what to do. I use an old incident/bulb handheld meter, a spot meter would be fine, but not necessary.
First I take a reading of the bright side of the persons face I'm shooting, and then the darker areas. From there it's a simple matter of deciding what is "best" for the image I'm making. Gentle, even light will be easier to work in and I expose those for mid-tones or about a half-stop over. For contrasty scenes I'm more careful and like to expose closer to proper mid-tones, as I like this look.
It's subjective, but the best advice I can give is to spend the time taking multiple readings of the scene. This way you'll gain a better understanding of the light you're working with, and how to get the exposure you want. Sometimes it's easy. Sometimes it's more complex when trying to think of exposure as a set of changing variables across an entire image. I try to be aware of the different light in the entire scene, if I expose one way - how will it affect the film.
Be methodical
Different cameras work in various ways. Mine works by loading the film, then setting the shutter speed, then lifting the dark slide on the film holder and finally releasing the shutter.
I typically shoot wide open on the lenses, but keep in mind you’ll probably want to focus wide open and then stop down if you need to. It’s a bit of a tricky dance the first few times you do this. When I first started I did this wrong a few times and would have to start over again, or I’d bump the camera and have to re-focus.
Take your time, be methodical, have a routine, relax and shoot. I talk while loading the film, and by now have usually explained that I need them to hold still while I’m focusing and loading film. Once the film is loaded I say something like “ok hold still, I’m getting ready, ok, ok... ready…ok... and don’t blink...”. I find this works better than counting down. I ask them to not think about it much, it comes naturally and there’s no guessing involved. Load the dark slide back in the holder, always flipping it around so the tab at the top is a different colour. (All holders have two dark slides with tabs to grab them by, one side will usually be white, or have a logo, the other will be black, or have no logo). This way you’ll know which piece of film you exposed, and which you didn’t.
Take a chance
And that's it! It's a process I have fallen in love with, so much so that it has become my favourite way to shoot. It doesn't have to be expensive and it doesn't have to be overwhelming. I urge you to take a chance and step into the world of large format photography. It's so completely rewarding, fun and feels special in today's world of instant everything. You won't regret it. It’s so simple. The cost of entry isn't as high as you'd think! And if you're developing and scanning for yourself then the cost comes down even more.
I didn't want to sound overly romantic about large format shooting, but for me it has become something I adore. There's a lot to be said for the intangibles, and shooting 4x5 hits all the right buttons for me. I can't explain it in a way that does it justice, but you'll see what I mean.
Where next?
Where to go from here? Well there's developing, scanning, printing, whatever you desire. Those are all great topics but far too much information to cover in this one article. YouTube is a fantastic resource for this; you can find all kinds of valuable information there. There is no shortage of choice when it comes to gear, but hopefully this article will give you a place to start. Take the time to find the right equipment, you'll be glad you did.
What else can I say? It's my hope that you'll read this and come away with a better understanding of shooting large format. I wanted to demystify the process, to show that it's fun, and incredibly rewarding.
Find what you love to shoot, what you're passionate about, and give large format a try. There's always something new to learn, there's always more ways to grow. Isn't that such a beautiful thing about creativity?
Enjoy!
About The Author
Sandy Phimester
Sandy Phimester is a film photographer from western Canada. He began taking photographs inu00a0his mid/late 20s when his father bought him a camera for a cross Canada tour with a band heu00a0was singing in. Since then he has dedicated much of his time to photography. Personal growth,u00a0learning new skills and new ideas are top on his list of priorities.
nYou can see his work, contact him and more – at his website: www.sandyphimester.com
nYou can find him on Instagram @sandyphimesteru00a0
n