


How I got this picture - Mike Basher Posted On 9th July 2018 To How I got this picture

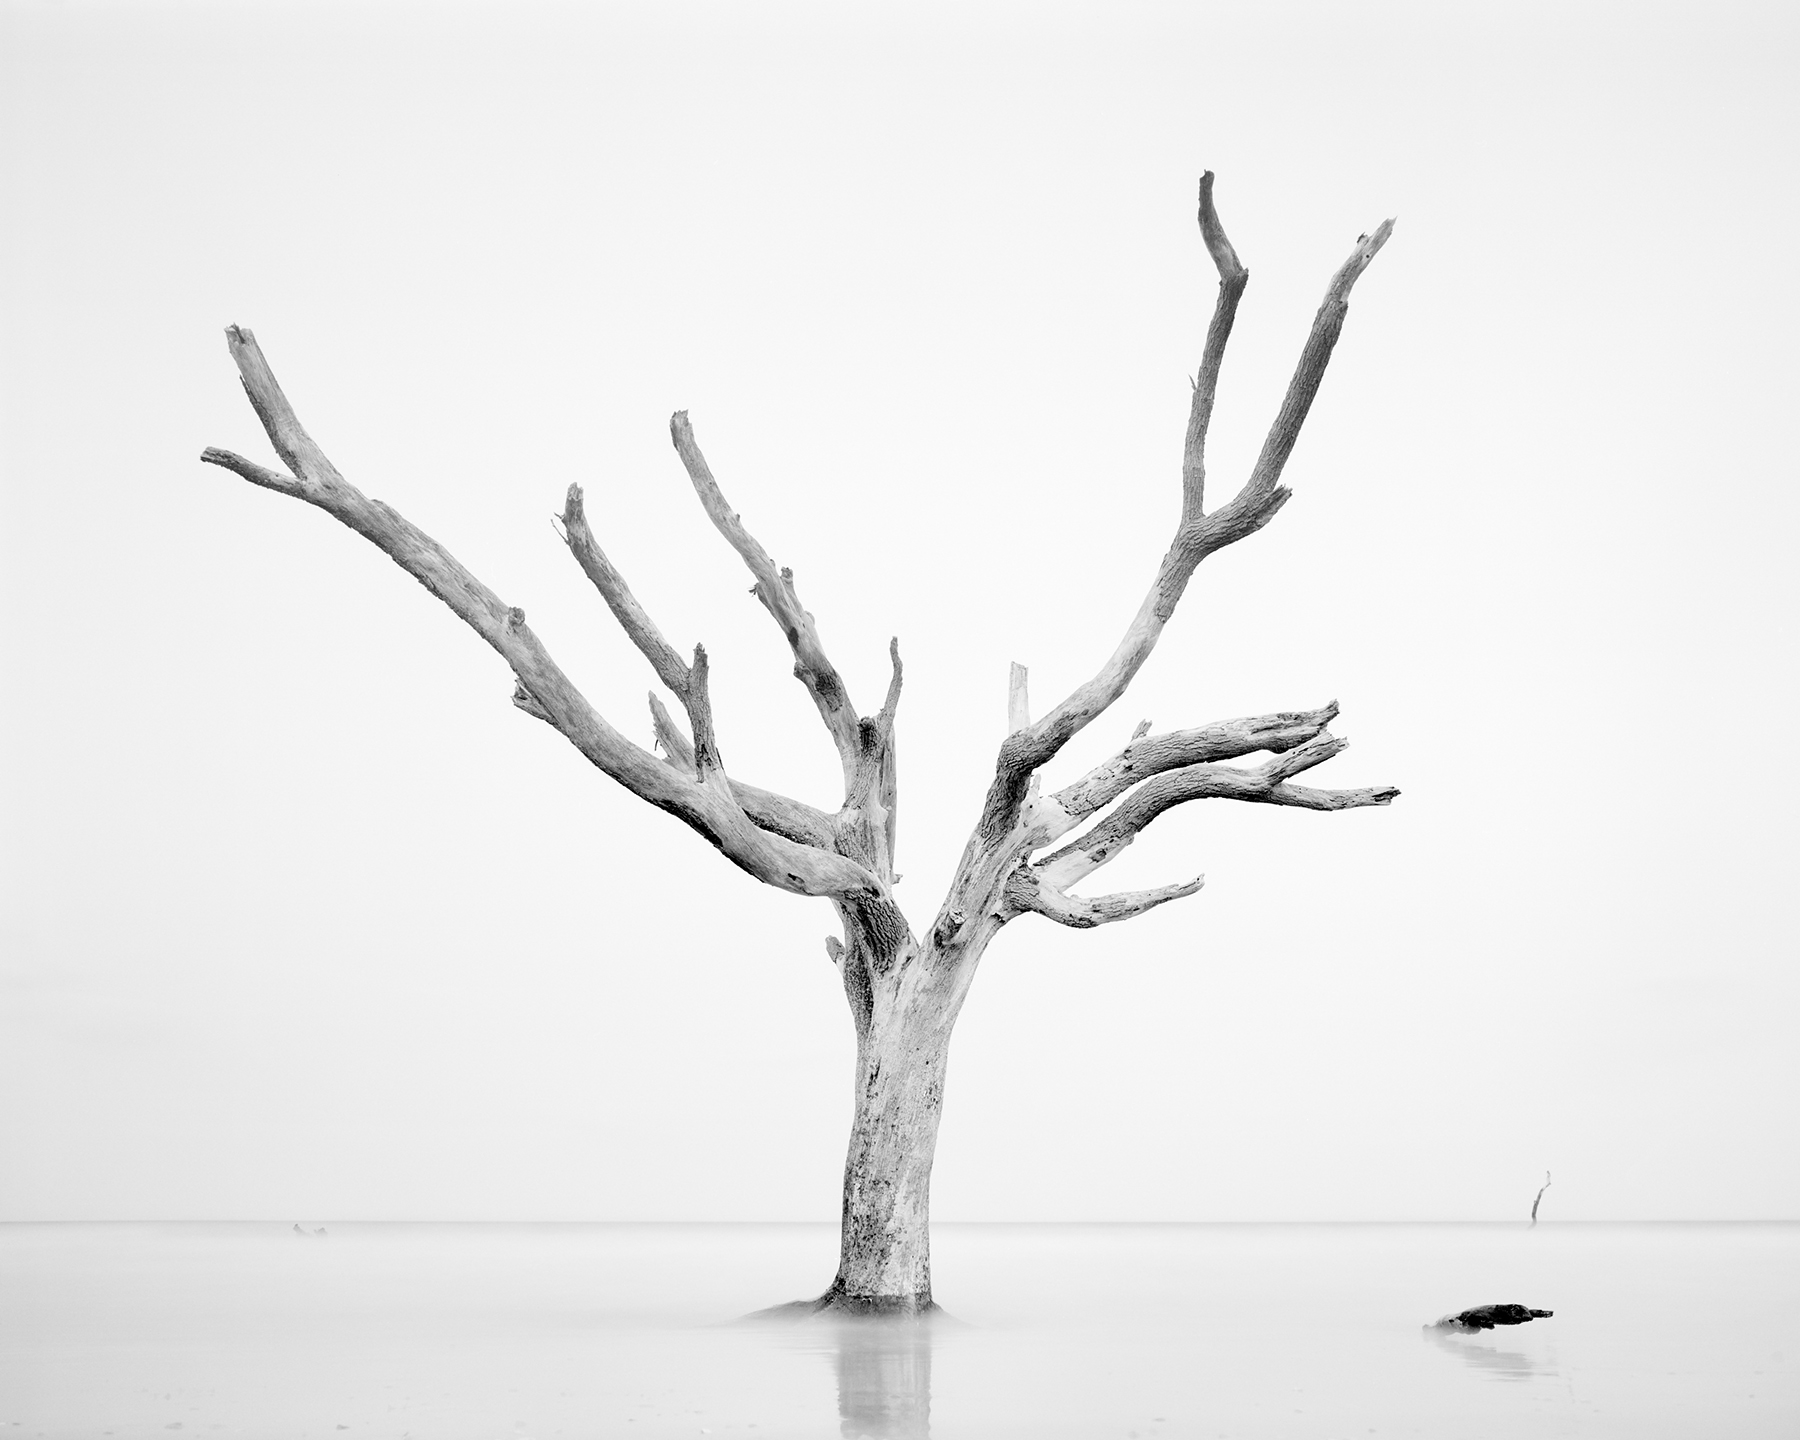
HUNTING ISLAND XVI, 2018
Technical info
Film Used Ilford Delta 100
Format 4x5
Camera Chamonix 045N-2
Lens Fujinon SW-90
Exposure time Approx.2 minutes
Other equipment Sand & shells, to taste.
Location: Hunting Island, South Carolina, US.
Tell us the story behind this image. What inspired you to shoot it?
This March, I was in Charleston, South Carolina, and had a day to burn. I started looking around for somewhere cool to check out, and found this barrier island about two hours away, called Hunting Island. The story of this island is really interesting, come to find out. Over the past century, its shoreline has retreated over a mile inland. In the late 1960’s, engineers started efforts to combat this erosion problem, through the implementation of groins and jetties, which has done little to slow the loss of landmass. Depending on who you ask, some will say that the efforts have actually harmed more than helped.
Anyway, after my day there in March, I had to go back and really do it up right. So, at the end of May, I spent three days there, tent camping at the beach, photographing scenes from sun up until sun down…really trying to tell this story of these environmental processes that are happening with each tidal cycle.
To reach the hardest-hit area of the beach, you have to walk about a mile through the woods, and you emerge to this scene that looks like a bomb went off. What is now the beach was the middle of a maritime forest not even a decade ago. The ocean has stripped sand from beneath oaks and palm trees, leaving them vulnerable and choking on salt water. Eventually, each succumbs to the waves.
Did you come across any challenges?
This area is extremely challenging to photograph, as there are dead trees on top of dead trees on top of just heaps of stuff. It’s really a lot to take in, and can be extremely challenging to seek out a sound composition. This particular tree was about a mile down the beach, on the fringes of the destruction, kind of hanging out on its own.
Out of concern for keeping the horizon line low in the frame balance out the background, and keep most of the visual attention on the tree, I wanted to get the camera as low as I could go. I also wanted to be as close to the water as safely possible, so that the waves washing back and forth would cover up any areas of dry sand for the final photograph. I set up my tripod, legs splayed out, as low as I could get it, and it wasn’t low enough, so I had to resort to Plan B: abandon the tripod altogether in favor of the ground.
It’s hard to tell from the behind the scenes images, but I found my distance from the tree (taking into consideration the incoming tide), and shimmied the camera back and forth into the sand, grinding it down into place. I also supported the front of the base of the camera with a few seashells to help keep everything in place. Composing on a large format camera on the ground, basically standing on your head in the dark can be interesting.
What process did you use?
This exposure was supposed to be two minutes, taking reciprocity failure and the quickly fading light into account, and the high key look I wanted in the final photograph. It was also unfiltered, as the light had gotten quite dim at this point. I say that it was “supposed” to be two minutes, but just before time was up, the approaching waves had gotten really close to the camera a few times, and one finally took aim at the camera, so I had to reach down and grab it right before it became swamped. Actual exposure was about 100 seconds (a third of a stop under the intended exposure).
How did you process it?
A few years ago, after encountering inconsistencies in tray processing, I bit the bullet, and picked up a Jobo CPA processor and a Jobo Expert drum, and would never go back. I’ve used many different developers over the years, from Pyros to all of the staples, but about a year ago, started using Ilford DD-X for most of my work. I don’t really process many sheets of film in a year…between 100 and 200, so concentrates are handy in that I can mix working developer as I need. The DD-X is quite versatile for extending processing a bit for really bright highlights when I want them, and the developer gives Delta 100 a smooth highlight range that doesn’t block up.
What about printing?
I use a hybrid process in that I develop my film per how it was exposed, then scan it on an Imacon scanner. I used to hand-print my pieces, but if you’re familiar with working with sheet film, then you’re familiar with the dust that comes with it. Dust on your film during exposure leaves a black mark on your final print, which is not fun to get rid of. More often than not, this black fuzz finds its way to the whitest part of your scene.
So…I scan in my negatives, spot them, dodge, burn, do some contrast grading, then have them printed on Ilford Galerie Fibre silver gelatin paper via a LightJet enlarger. My works are all limited edition, in sizes from 16x20 up to 40x50, and the digital side of the process keeps everything consistent. Although it would be a fun adventure, and I’ll do it someday, hand-printing a 40x50 would a fun challenge. I recently started working with, and highly recommend Weldon Color Lab in Los Angeles, for anyone interested in this process…
About The Author
Mike Basher
Mike Basher is a fine art and commercial photographer based in North Carolina’s Outer Banks.
nWith a commercial career that spans two decades. His work has taken him around the world, creating campaigns for brands like Under Armour, The North Face, and Reebok.
nAfter a five year hiatus from shooting film, in 2009, he turned back to working with large format systems to create his personal fine art work.
nToday, Mike enjoys using his fine art photography as an excuse to explore the world around him, the challenges of continuously honing his skills as a photographer, and pushing the limits of photography that are only possible with the use of black and white film.
nMike’s work can be viewed at: www.bashergallery.com
nFavorite Ilford products: Delta 100, HP5+,u00a0 ILFOTEC DD-X, and Multigrade FB papers.
nnInstagram: @mikebasher
nYou can view this series of work, Hunting Island Studies here: www.bashergallery.com/hunting-island
n