


Chemical Landscapes Posted On 9th November 2021 To Magazine & Alternate

Rule breaker
The chemigram process allows any photographer to be experimental, free and a little bit of a rule breaker. As a photographer who is passionate about the traditional printing process, I was always taught that my prints should be clean and crisp. So, coming across a process that allows you to be messy, hands on and experimental makes me feel like a child again.
My wonderful friend introduced me to this technique and I have been completely blown away by the atmosphere you can create. Also, this technique is so relaxing, it allows you to have time to reflect on your day and to let your imagination to go wild.
A simple process
The process is simple, all you need is black and white photographic paper and a tray of developer, water and fix. You don’t need a darkroom to create chemigrams and you only need very limited photographic equipment. Set up your chemistry like normal, as if you were heading into the darkroom. Instead of using a stopbath I use water as I like the idea that the print is still slowly developing.
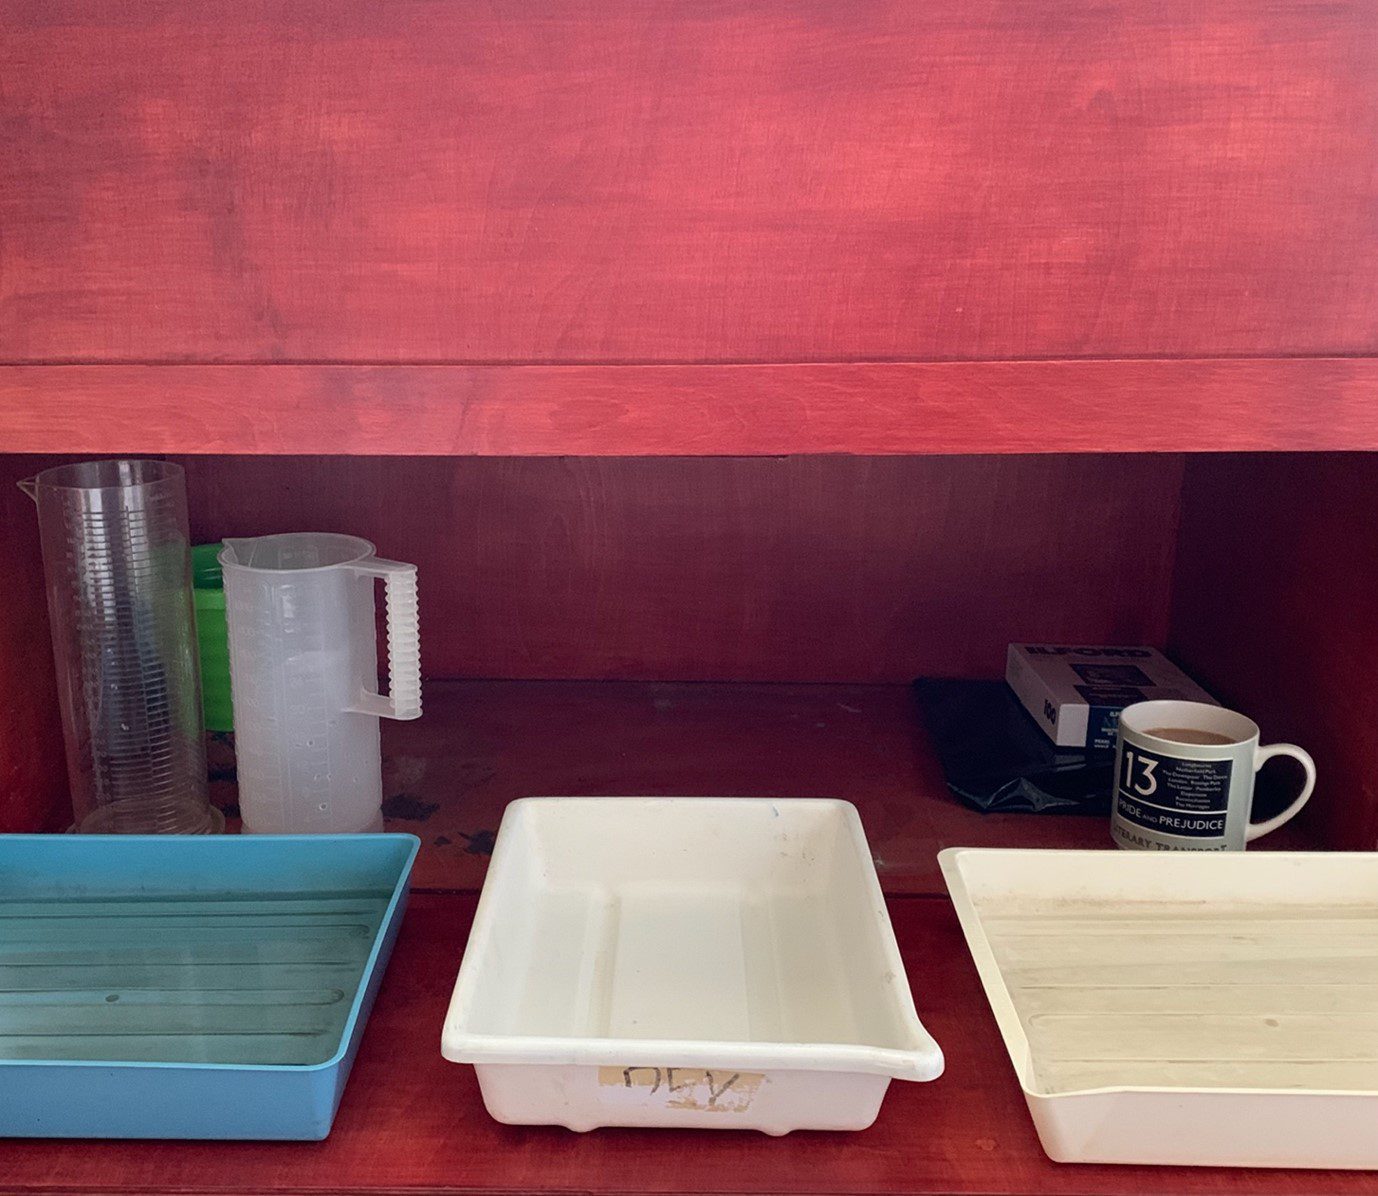
Start by creating your foreground. Slowly dip the bottom of the paper into the developer and watch the paper turn black or to the tonal range you would like. Once you are happy with the development, dip that section into the water to quickly wash it and then the same black foreground section into the fix to hold it. Once the development has stopped in the foreground you can make the next layer. Either by putting the paper partially into the fix first and then the same layer into the developer. (This could bring out some amazing purple, orange or yellow colours depending on what type of paper you are using). Or, you can create the next layer by placing the paper into the developer again. Follow the same process for development, stop it when you are happy with the tonal range and then wash and fix.

Building Layers
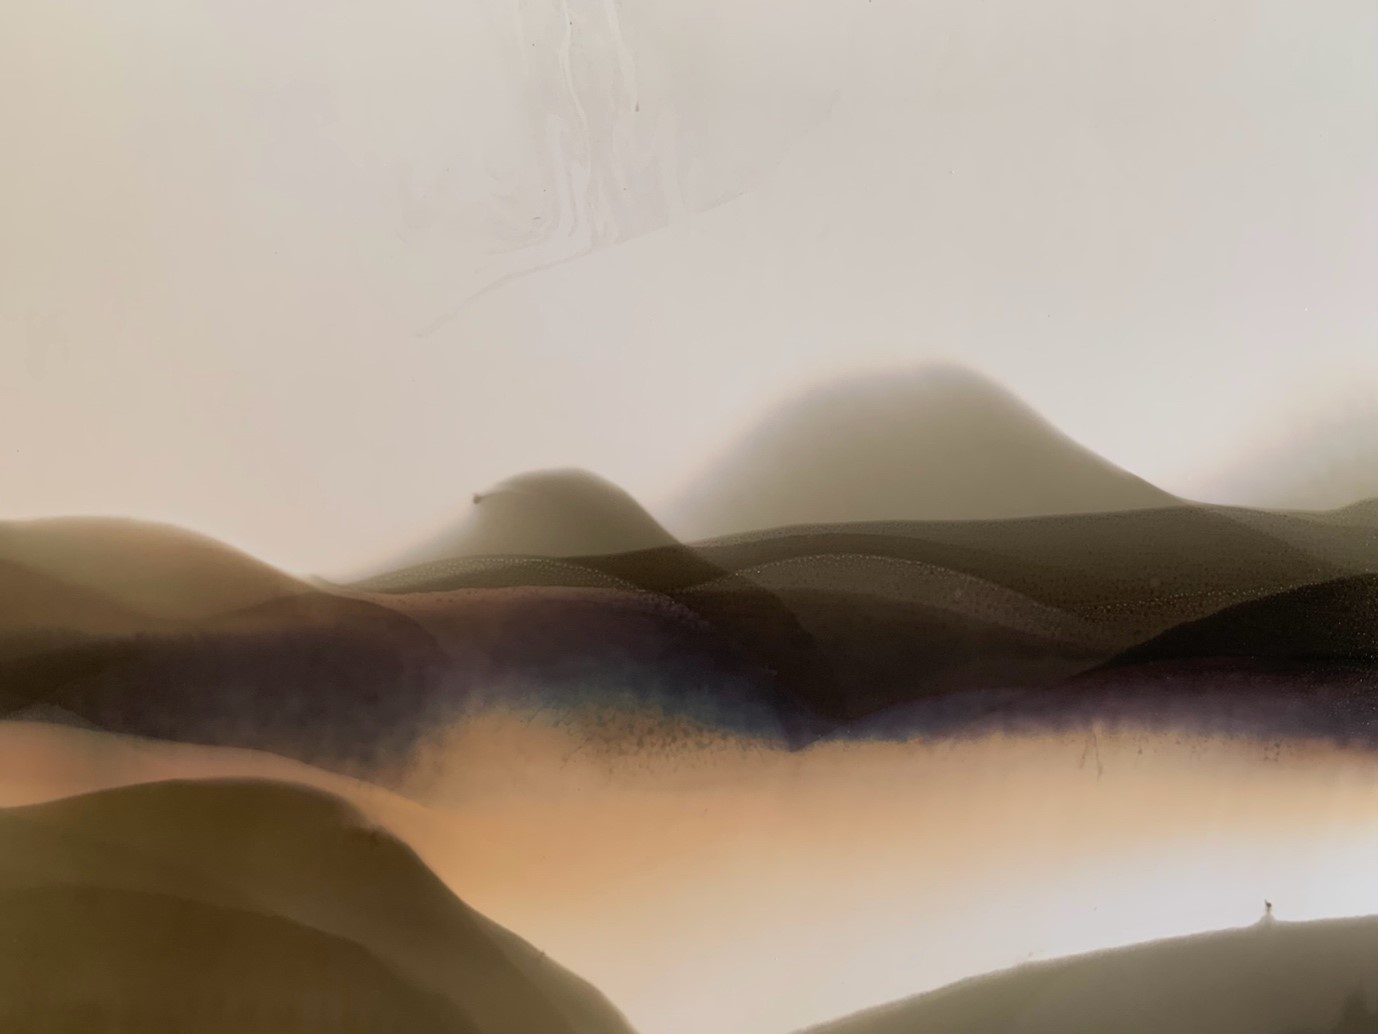
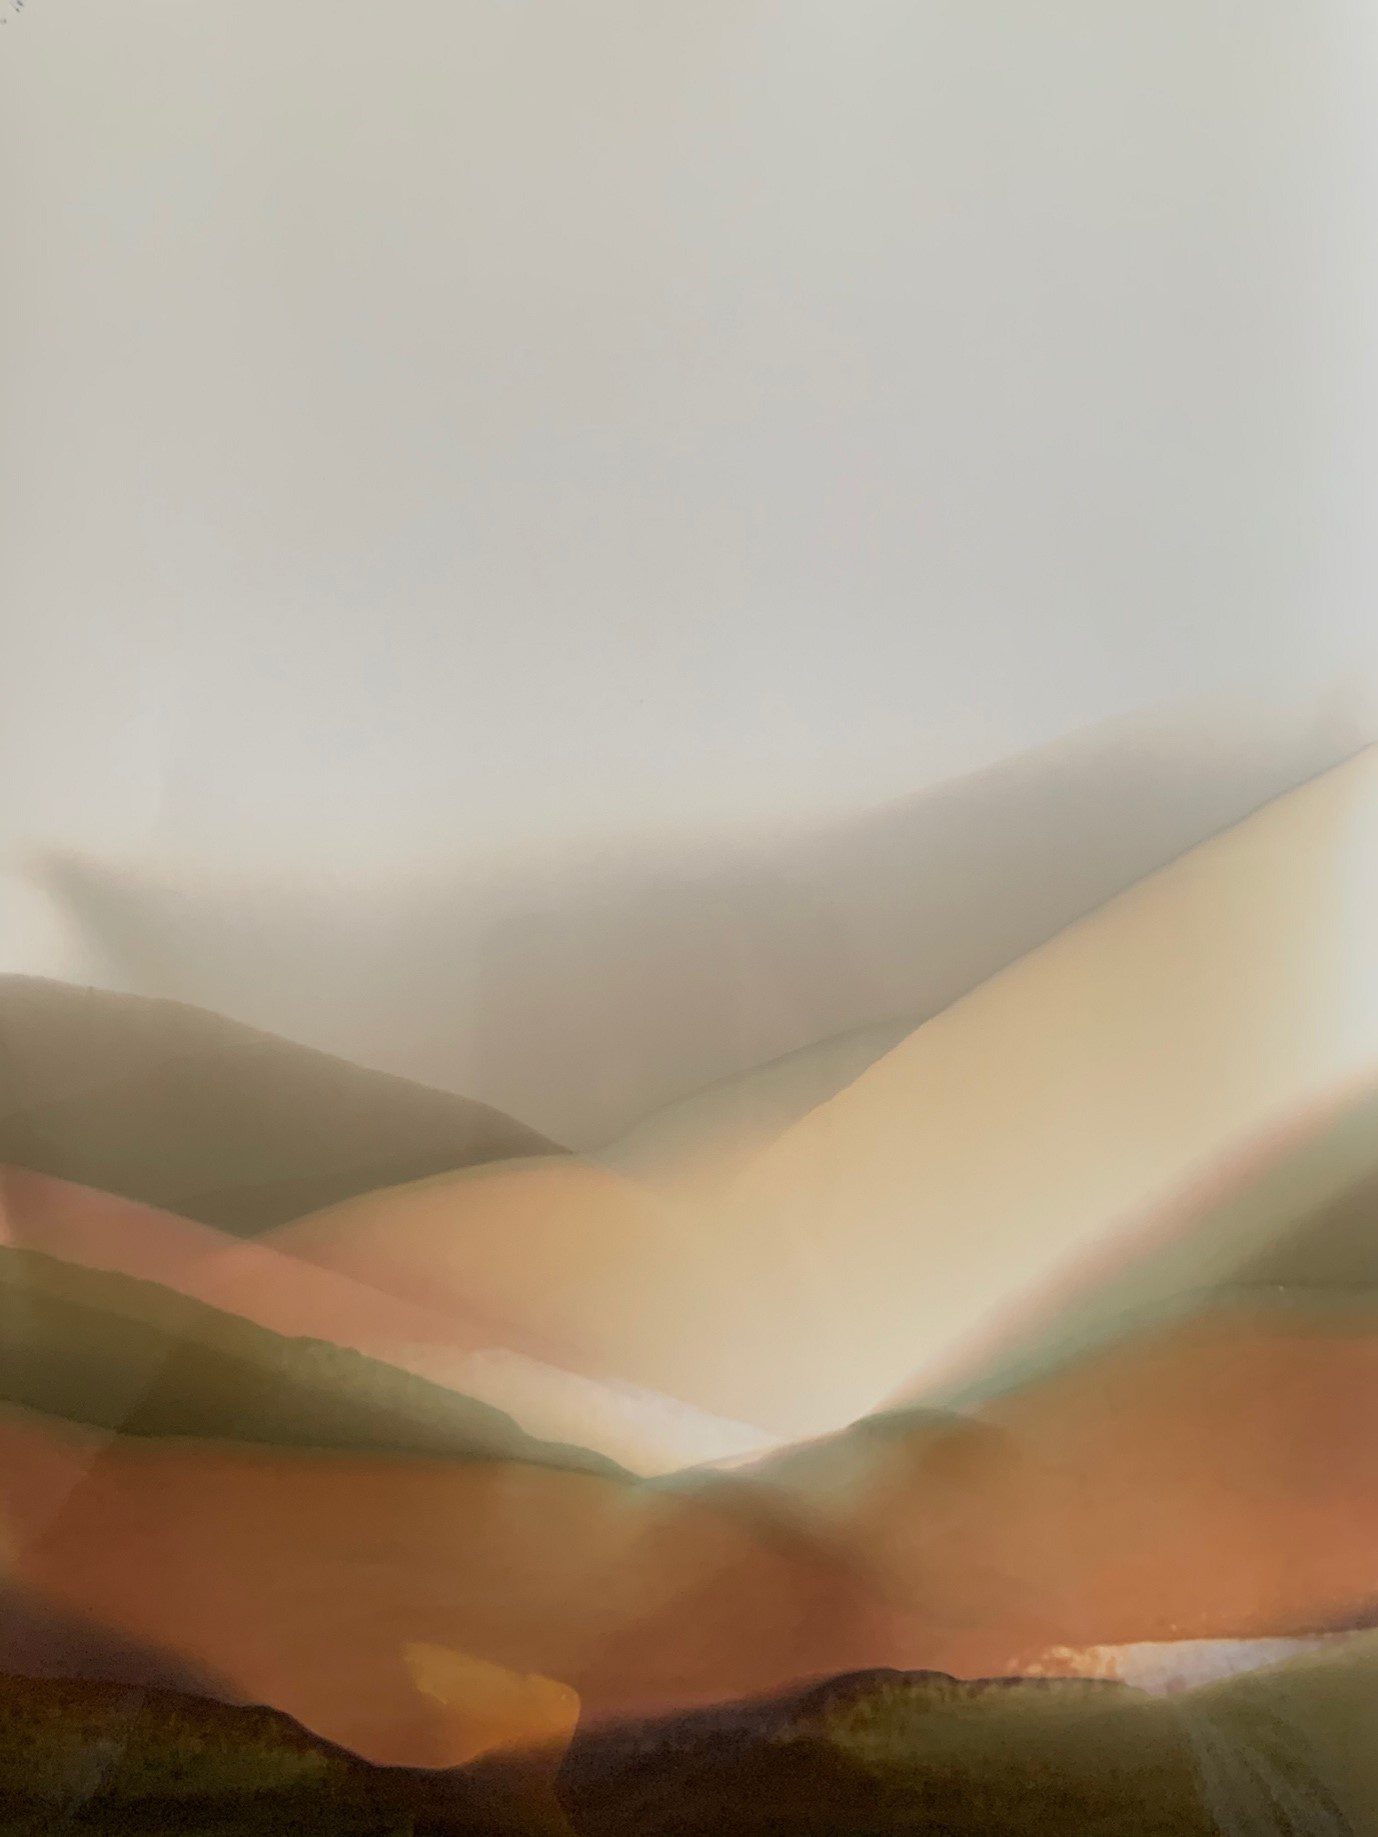
This technique is all about building layers up to create your landscapes. You can also draw in trees and other features using the developer but, you need to be conscious of where the fix has been. It is very difficult to add development after you have fixed your paper. Different papers and developers will give alternative affects to the overall image. For this technique I would suggest starting on resin coated paper first. Practice the layering and emulsion agitation and then when you are ready, try printing on fiber based paper. Fiber based paper will allow you to have a longer development time because it’s a slower paper to use.
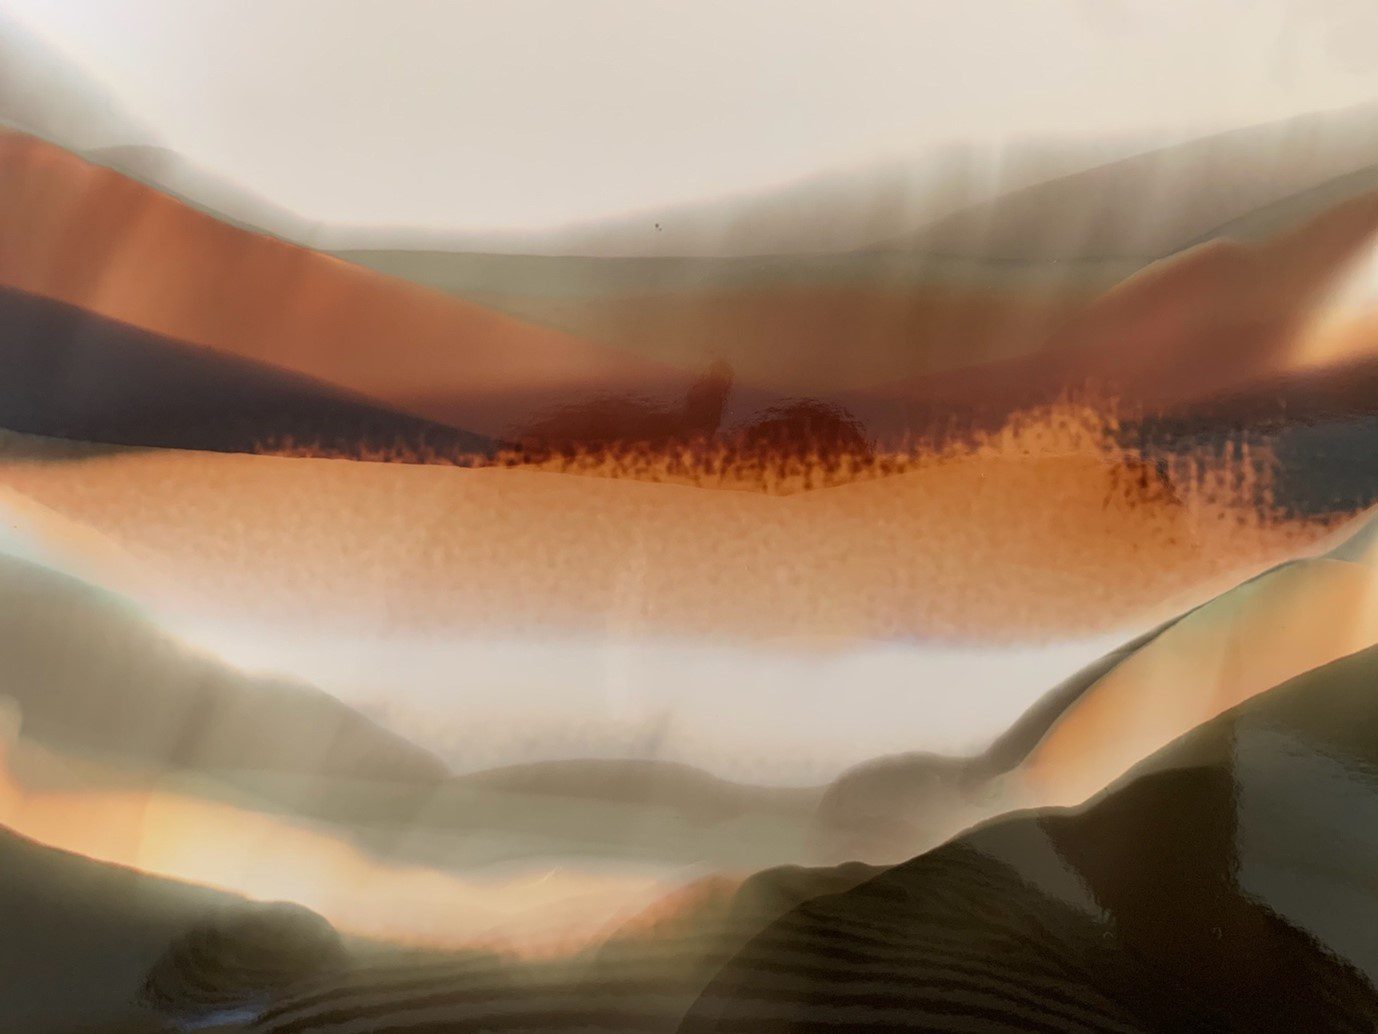
This is such a fun printing technique and as I mentioned earlier it’s very calming and relaxing as well. You can take your time with this technique but always be aware that the paper is slowly fogging whilst you are developing & fixing the print. All of the images in this post were made with Ilford Photo papers, developers and fixer.
https://twitter.com/LBoffin/status/1336741161076207619
Images © Laura Boffin
About The Author
Laura Boffin
Hello, my name is Laura and I am a Photographer from Oxfordshire, UK. I graduated from De Montfort University studying Video, Photography and Film Studies, I then went on to do an Artist in Residency at Oxfordshire School of Creative Arts, where I focused on different Alternative Photography Processes.
nI also specialise in Silver Gelatine Printing, Camera-less Photography and have experience working with Wet Plate Collodion. I describe myself as a u201cheritage and rural life photographeru201d as I tend to be drawn to the British landscape, traditions and history.
nnwww.folksy.com/shops/BoffinPhotography
n