


Uprating HP5 with semi stand development Posted On 19th May 2020 To Learning Zone, Beginner Series & Film

Early Experiements
Many, many years ago I experimented with uprating HP5, I was a student and it fitted the look I was after at the time. In those days, information was difficult to find and I relied on advice from friends. As a student, the mysteries of film and processing were fascinating and strange. I tried all sorts of things, but didn’t know what was really going on. I knew that uprating meant setting a higher speed (ASA in those days) on your light meter and then giving it a longer development time. In my ignorance, I thought that if you doubled your film speed, you should double your dev time. Ha! - I ended up with negs that were too dense to print!
Semi stand developing
Later, when I understood it more and did some research, I was able to get rather impressive results using a little known method devised by William Mortensen. These days, the method would be known as semi stand development, but at the time it hadn’t been given a name. The whole process took over an hour and gave very impressive results, but I eventually drifted away from it to pursue other types of photography and processing.
Last year, a photographer friend was shooting social documentary work and he was struggling for light with his indoor shots. I contacted him and told him about this impressive Mortensen uprating technique. As I hadn’t done it for over thirty years I thought I had better run a few films through and test it again.
First results
My first results were as impressive as I had remembered, so I thought it would be interesting to compare it to other uprating methods. I could run a series of films through different developers to see which uprating method gave the best results. At the very least it would be interesting to see how each one handled shadow detail and contrast.
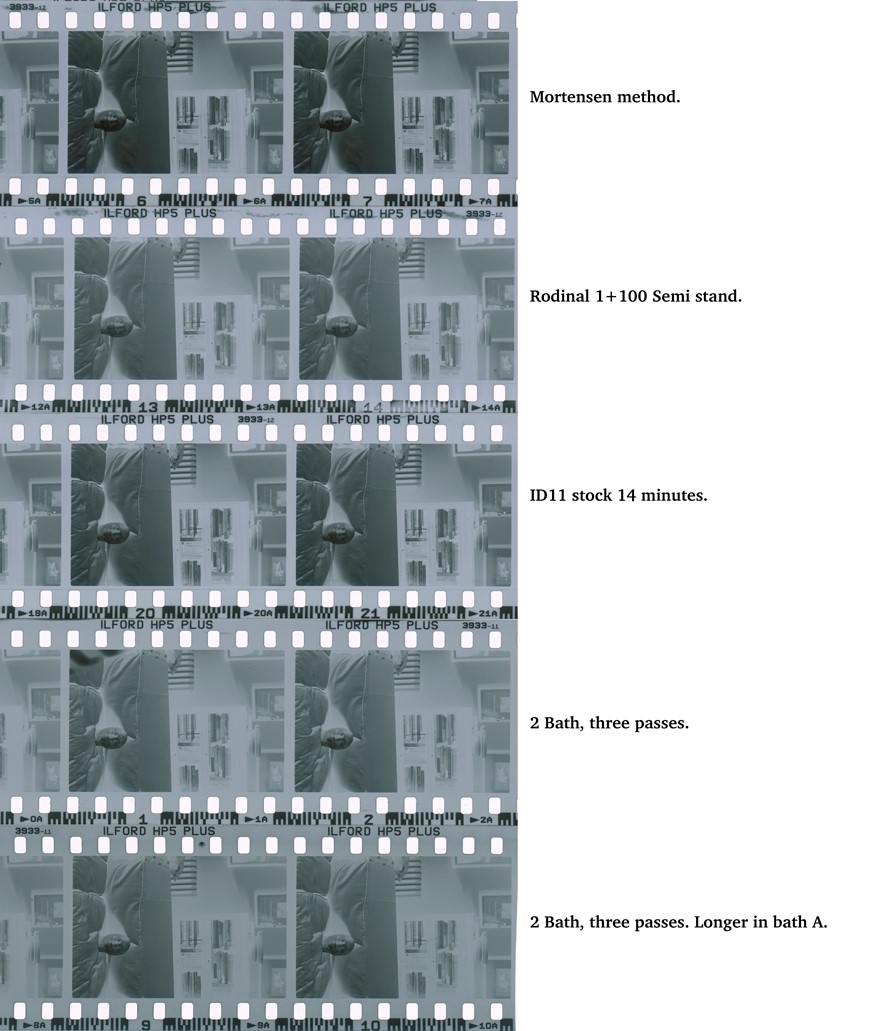
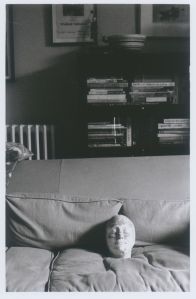
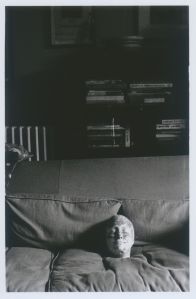
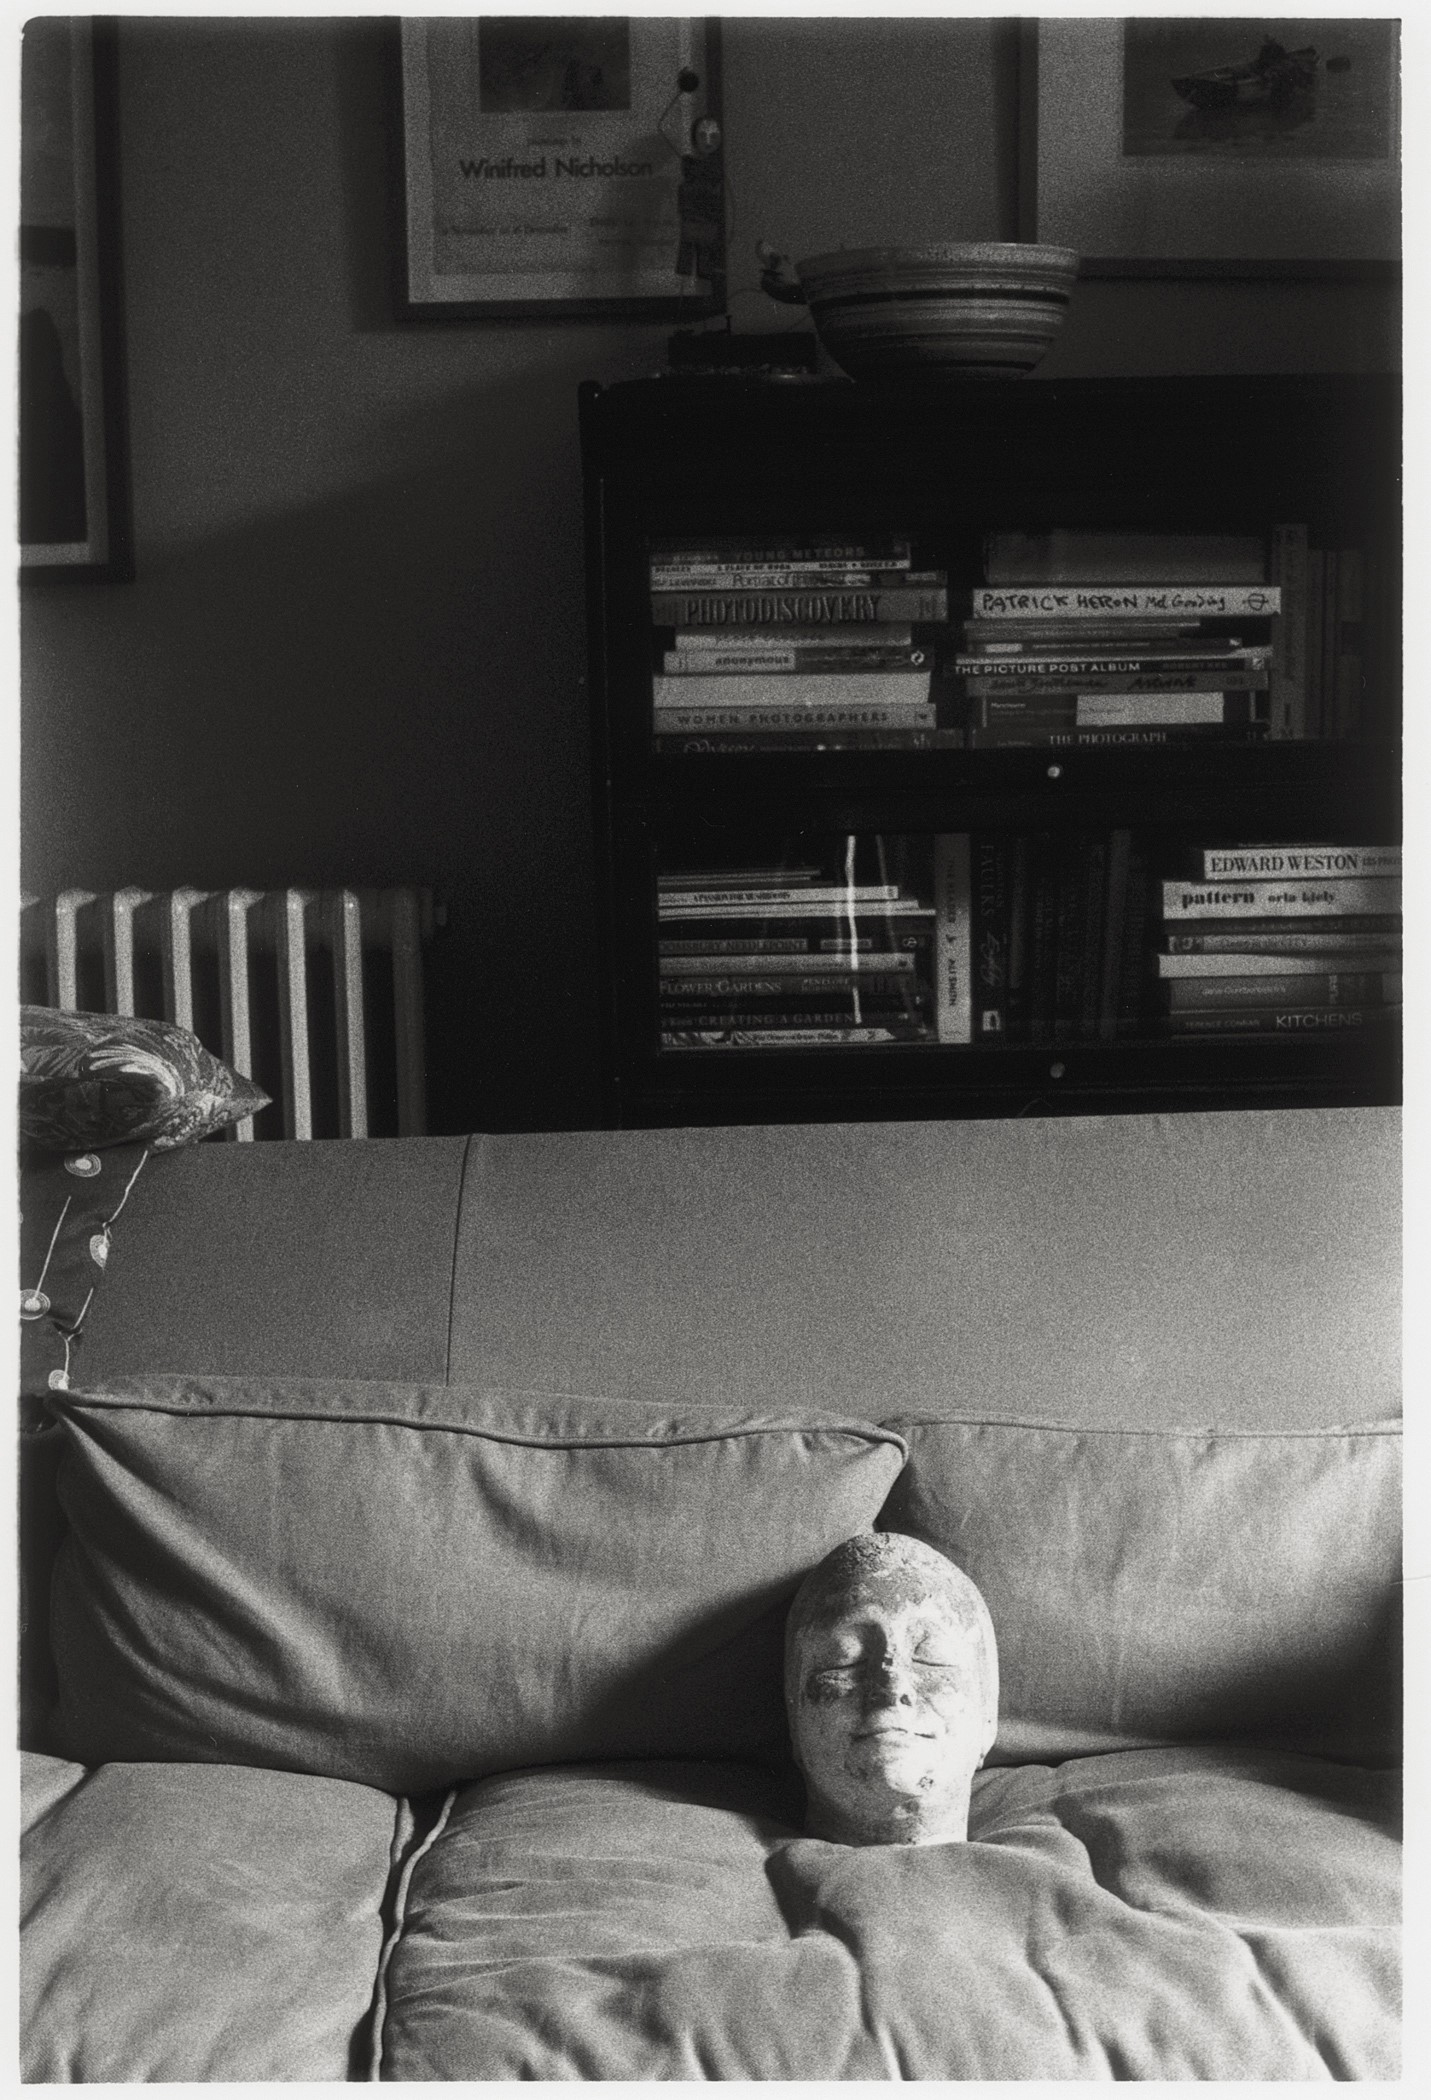
I didn’t have access to a model who would sit in a poorly lit room (the reason for looking up the method in the first place was social documentary pictures of people in their homes) for the duration of my tests, so I placed a white, plaster of Paris bust on my settee, some distance from the window. The difference in brightness between the lit head and the dark bookcase behind was really going to show what these developers would perform like.
Taking an exposure reading.
One thing that compounds the problem of shooting in low light is the method of metering the scene. In a concert venue for instance, it is not practical to go up on stage and take an incident light reading to determine how much light is falling on the performers, so most people rely on through the camera metering from an audience position. This can cause readings to be really wide of the mark, because the back of the stage might be very dark, but spotlights might be shining into your lens. Problems with accurate metering can also happen in a room lit only by one small window. The exposure for a person sat 2ft from the window will be quite different for one with the subject sitting at the far end of the room, 8 to 10 feet away.
For my test I placed a bust on my settee in the middle of the room. I took an incident reading from the position of the head, then exposed a number of films with every frame at the same exposure. I took 1600 ASA/ISO as my test speed, and figured that if I got heavier negs with any particular process I could run another test with the film speed set higher.
Then I processed the films in five different ways;
- Mortensen semi stand 1 hour ten minutes
- Rodinal 1+100 stand 1 hour
- ID11 stock solution 14 minutes
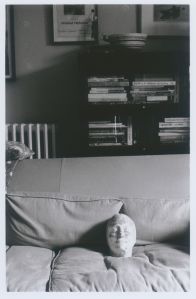
-and an interesting version of two bath processing -see below.
And the winner is.....
The fullest negative (therefore the highest speed) is found with the Mortensen process, details of which I shall give later. The second best, and no slouch was ID11 stock solution at 14 minutes. The third was Rodinal 1+100 1 hour.
I found this quite amusing, because the Rodinal method is the one that always gets bandied about on social media, I suspect, by people who are really only repeating what they have read in an effort to sound intelligent. It produces negatives that are good enough for scanning, but they are a bit lifeless in the shadow areas. One other thing about these negatives surprised me, the Rodinal was not the sharpest as you would expect, the Mortensen method produced the sharpest detail, followed closely by ID11 stock, the Rodinal was last. The difference isn’t huge, but it is worth noting.
One thing I didn’t do with this test, was to include something in the frame which was more than four stops brighter than mid tone. If I had placed a mirror on the settee so that we could see a bit of sky it would have shown which process would cause blocked up highlights, and which was best for controlling them. Looking at the density of the brightest part of my set up, the right side of the head, I can see that the Mortenson technique is giving more density here, and If I had a brighter area in the scene it could have been too dense. The ID11 stock development seems to be very good at rendering these bright areas, so perhaps that would be the choice for a concert venue with bright lights.
2 bath development
Whilst I was doing these tests, I noticed on social media that a friend in Germany was experimenting with uprating in a different way, one which I had not considered. When I saw his impressive results I got in touch. Rudiger Hartung was experimenting with two bath development, but he was running the film through the two baths two or three times, I was amazed, I didn’t think this was possible. As soon as you introduce any of bath B into Bath A, you have ruined your two bath developer, so how was he doing it? I contacted him and asked about his method.
Rudiger replied that he used stop bath and a wash in between, which allowed him to go back into bath A without contamination. I was very interested to see if this method would work with any of the film that I had exposed, so I asked him if he would put some of my test exposures through his chemicals. I sent him a film that I had exposed for the test and let him cut it into sections for different processing tests, and the results were great. There was a definite speed increase, it wasn't as much as I was getting with the two methods in ID11, but his own successes were with another Ilford film. Amazingly, he was getting the best results from Kentmere 100 film, taking it up to 1200 ASA/ISO! He was getting a 3.5 stop increase in speed, and the quality was really good.
Rudiger cut my test film up into four sections and processed them all differently. He also tried HC110 and Pyro. The HC110 and the Pyro negs were not good enough to include here, but I am thankful that he took the time to try them.
-
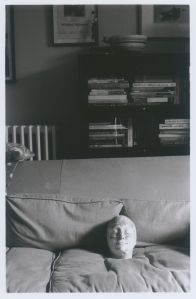
- mortensen method
-
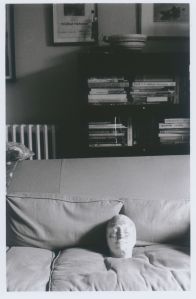
- rodinal-stand
-
- id11-stock
-
- 2-bath
-
- pyro
The Mortensen method.
Dilute ID11 stock at 1+3.
Get the temperature to 20ºC.
Pour into the tank, start clock and agitate for 30 seconds.
Agitate three gentle inversions each 30 seconds for the first ten minutes.
Leave standing, untouched for 50 minutes.
Agitate every minute for the next ten minutes.
Stop and fix.
Wash.
One other thing that I think is rarely, if ever considered, is that uprated films that are left unprocessed will lose some of the latent image in the thinner areas. This will degrade the shadow areas that uprating is designed to bring up. If you are considering uprating films, prompt processing is recommended.
Final conclusion.
For general day to day uprating, when you don’t have the luxury of time, the standard recommended time in ILFORD ID11 (14 minutes) produces superb results.
If you want a bit more on your negatives and are prepared to spend quite a bit longer processing them, then the Mortensen method is the one for you. The two bath method is very interesting, but you need to mix everything up from scratch, and it takes a long time to do the process correctly.
If you are busy, or lazy, the Rodinal 1 + 100 stand method is for you.
All of the processes produced negatives that were full enough for scanning, but a couple of those did not have enough density for darkroom printing (HC110, Pyro). I did manage to make pretty good prints from all of the other negs, using split grade filtration. I did test prints on 7x5 RC paper, Then a full 10x8 print of the Mortensen neg on top quality ILFORD MG Warmtone FB paper.
Split Grade Print 8x10 Morteson method
About The Author
Andrew Sanderson
A professional photographer for over 30 years, Andrew Sanderson has established an international reputation as a photographer, master printer and teacher of the medium of film photography. He works with many different techniques and formats, but always with images which are strong on observation and composition. His three books: ‘Night Photography’, ‘Hand Colouring and Alternative Darkroom Processes’, and ‘Home Photography’ all received excellent reviews all over the world and have sold out. He has a self published book currently for sale on the Blurb site, on the subject of Paper Negatives.
nAndrew has published countless articles in all the top UK photography magazines: Ag+ Photographic, Amateur Photographer, Black and White Photography, Camera and Creative Photography and Photo Art International. His work has inspired many photographers over the years.
nWebsite; u00a0www.andrewsanderson.com
nBlog; u00a0www.thewebdarkroom.com
Pinterest; u00a0http://www.pinterest.com/andrew2499/
nFacebook; u00a0www.facebook.com/pages/Andrew-Sanderson-Photography/243287612520814
nInstagram; u00a0http://instagram.com/andrewsandersonphotography
nTwitter; u00a0https://twitter.com/PHOTOSANDERSON
nhttp://twoartistsathome.bigcartel.com/
nn